Posted on

Acorn Squash Pulao

Acorn Squash Pulao

Acorn Squash Pulao is inspired from the fall season during which we see farmer’s market and Whole Foods greet you with  different type of squashes  right at the entrance of the shops. The orange, yellow and green colored squashes in all different shapes and sizes, all loaded with the great amount of beta carotene and Vitamin A did present a challenge in cleaning and cutting! But the challenge was worth it, as the house smelled of fall fragrance, as the acorn squash with ginger, mint leaves and cinnamon.  I modified  the recipe of Kombucha Pilaf from Bon Appetit  and modified to the ingredients readily available with me. Sometimes great things are discovered when one is willing to experiment and use a little creativity, listening to your own heart’s inner voice.

On reading more about the various types of squashes, I found that the Kombucha Squash is the sweetest squash you can find and it is similar to Butter Cup Squash. These squashes can be easily used as replacement for sweet potatoes, so that is great thing for anyone wishing to avoid root vegetable, and yet not loose much of the taste of sweet potatoes.

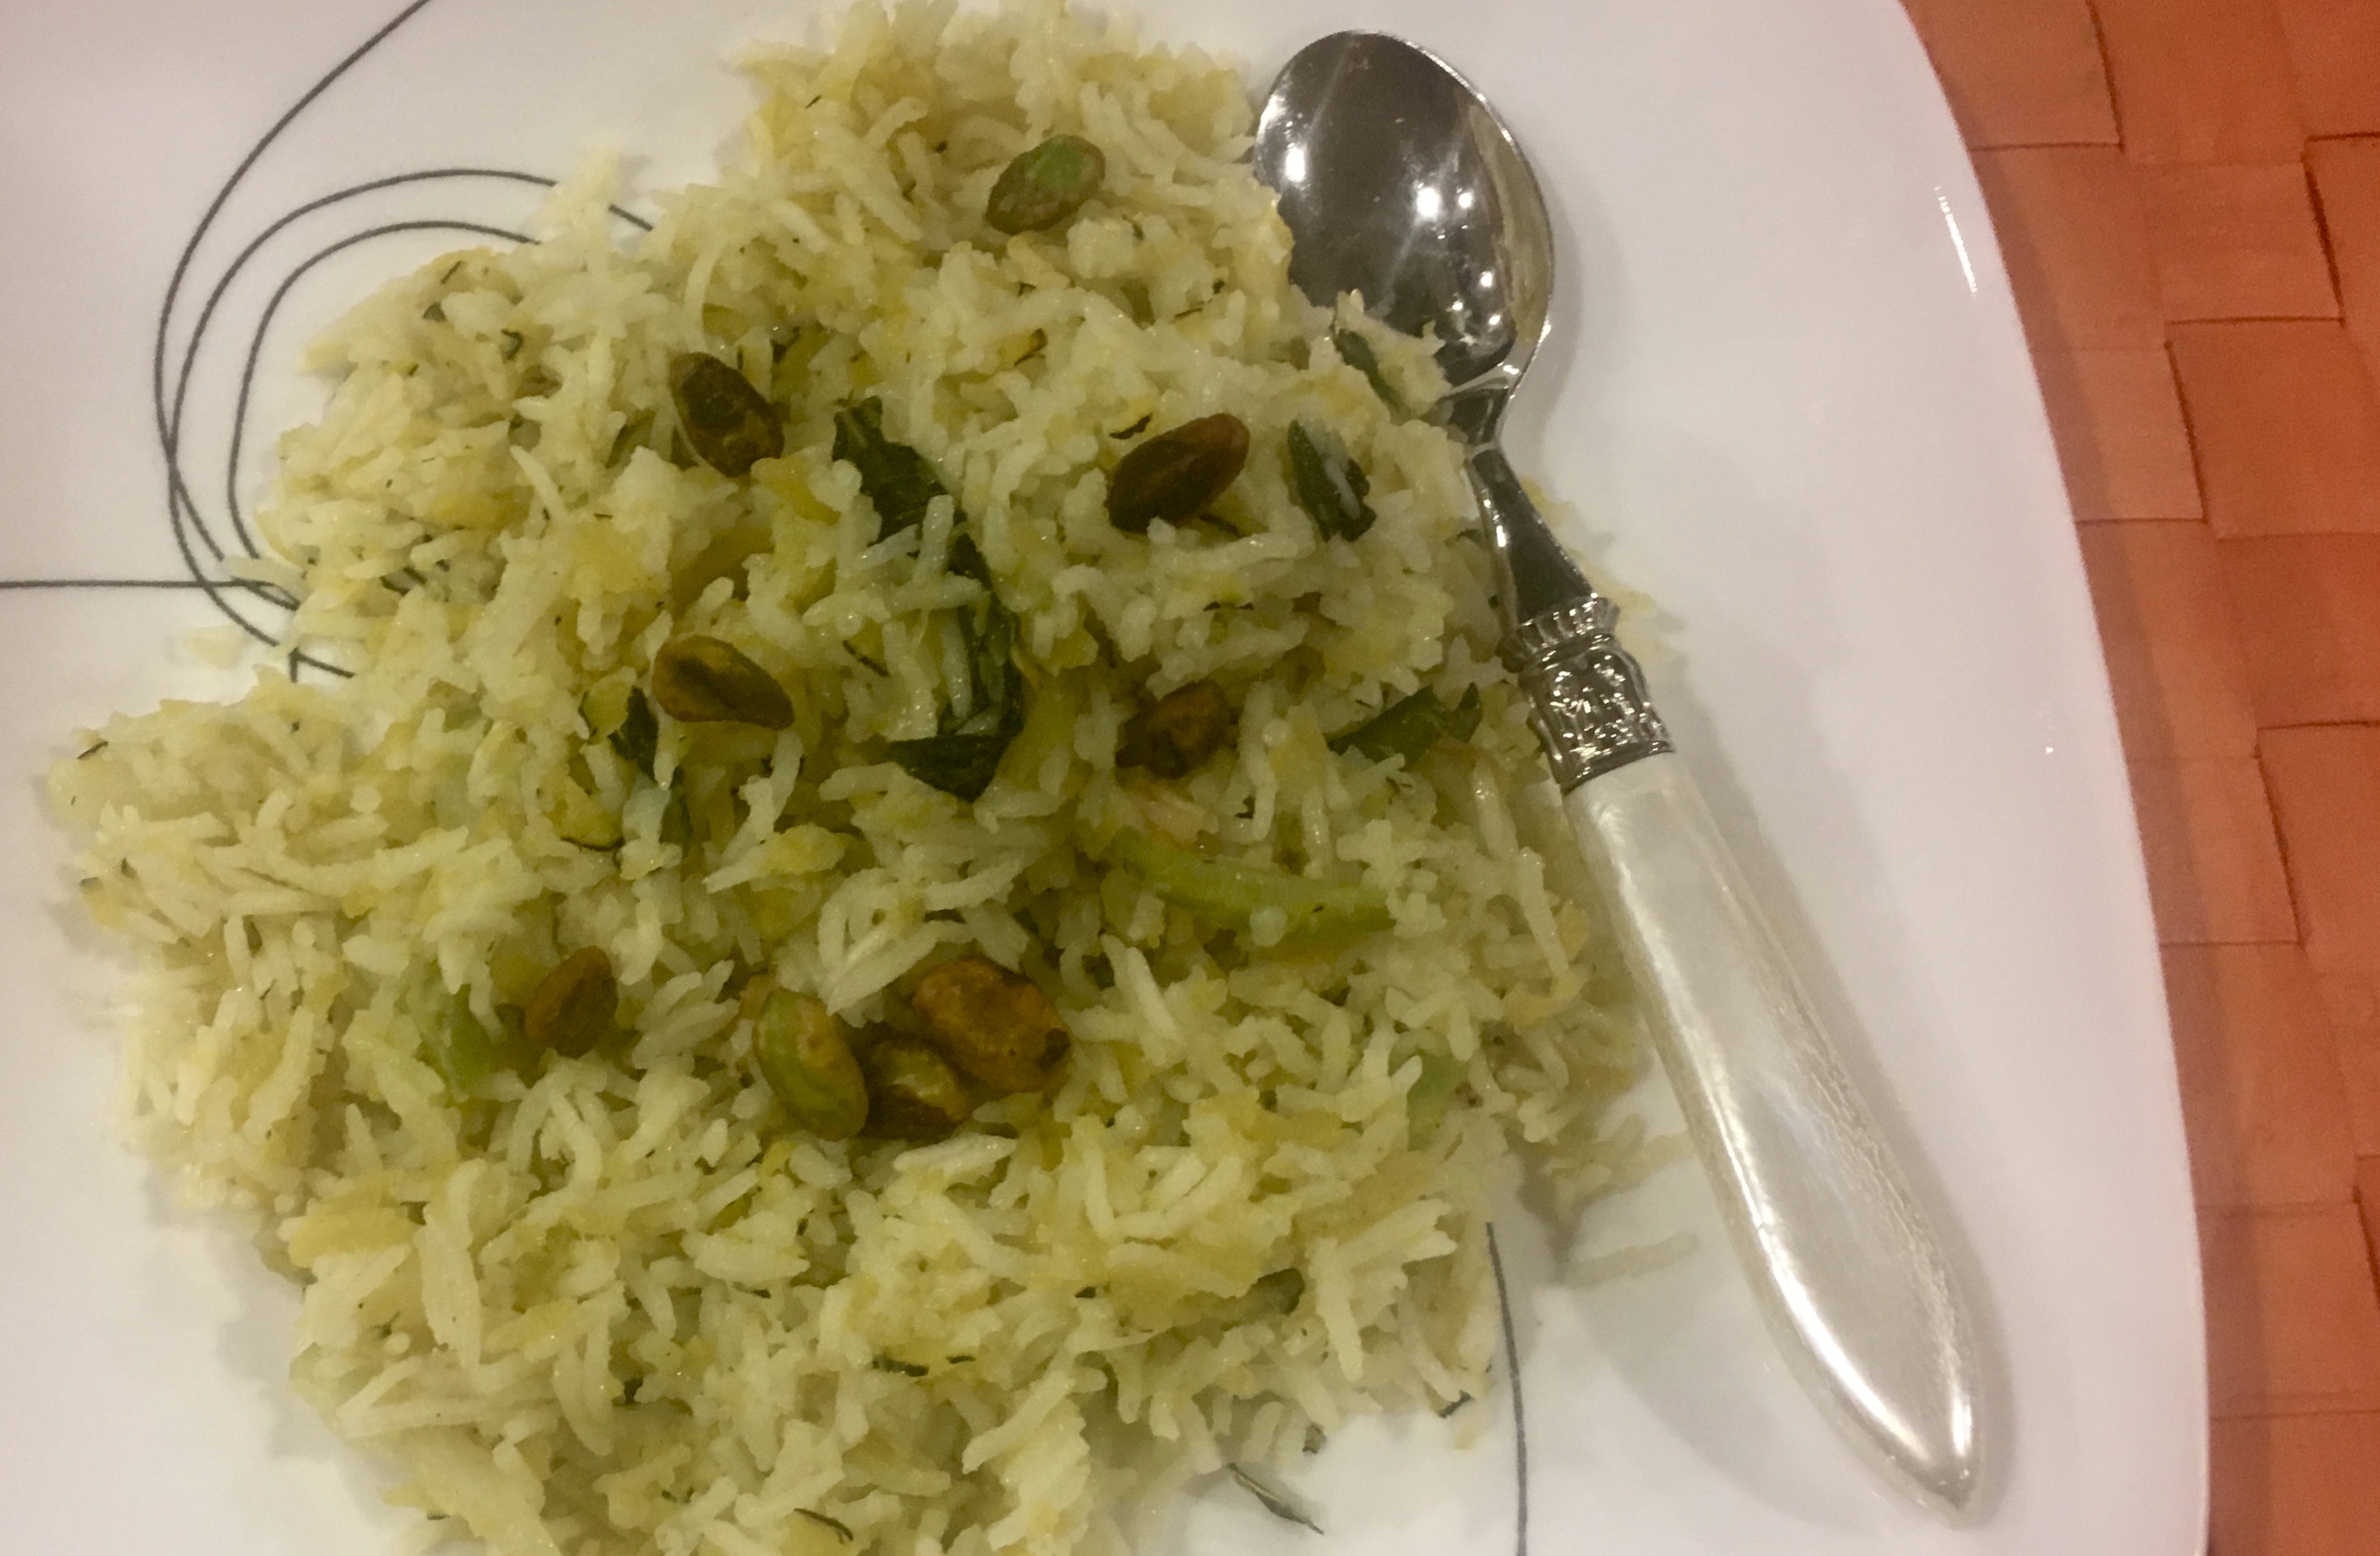
In giving the Acorn Squash Pulao a little Indian touch, decided it to flavor with cinnamon, green chillies, and mint leaves and topped it with roasted and salted pistachios! Its a quick one pot meal that can be done in about 30 minutes and its a great mix of western and indian cuisine. When your kid asks if she can take it to school next day, means you have hit a home run!

Using very little oil, and filled with nutrients its a great addition to the daily cookbook during the fall- winter weather! Enjoy this journey  with Gourd Almighty Family and Acorn Squash!!

Recipes makes Acorn Squash Pulao for 2-3 people

Time to Cook – 25 min

Prep Time : 5-7 min

Ingredients

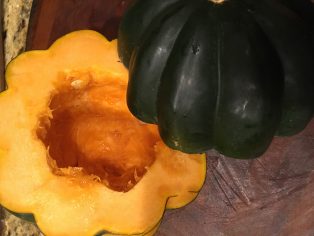
  • 2 cups peeled and shredded Acorn Squash
    img_2440
  • 1 cup Basmati rice
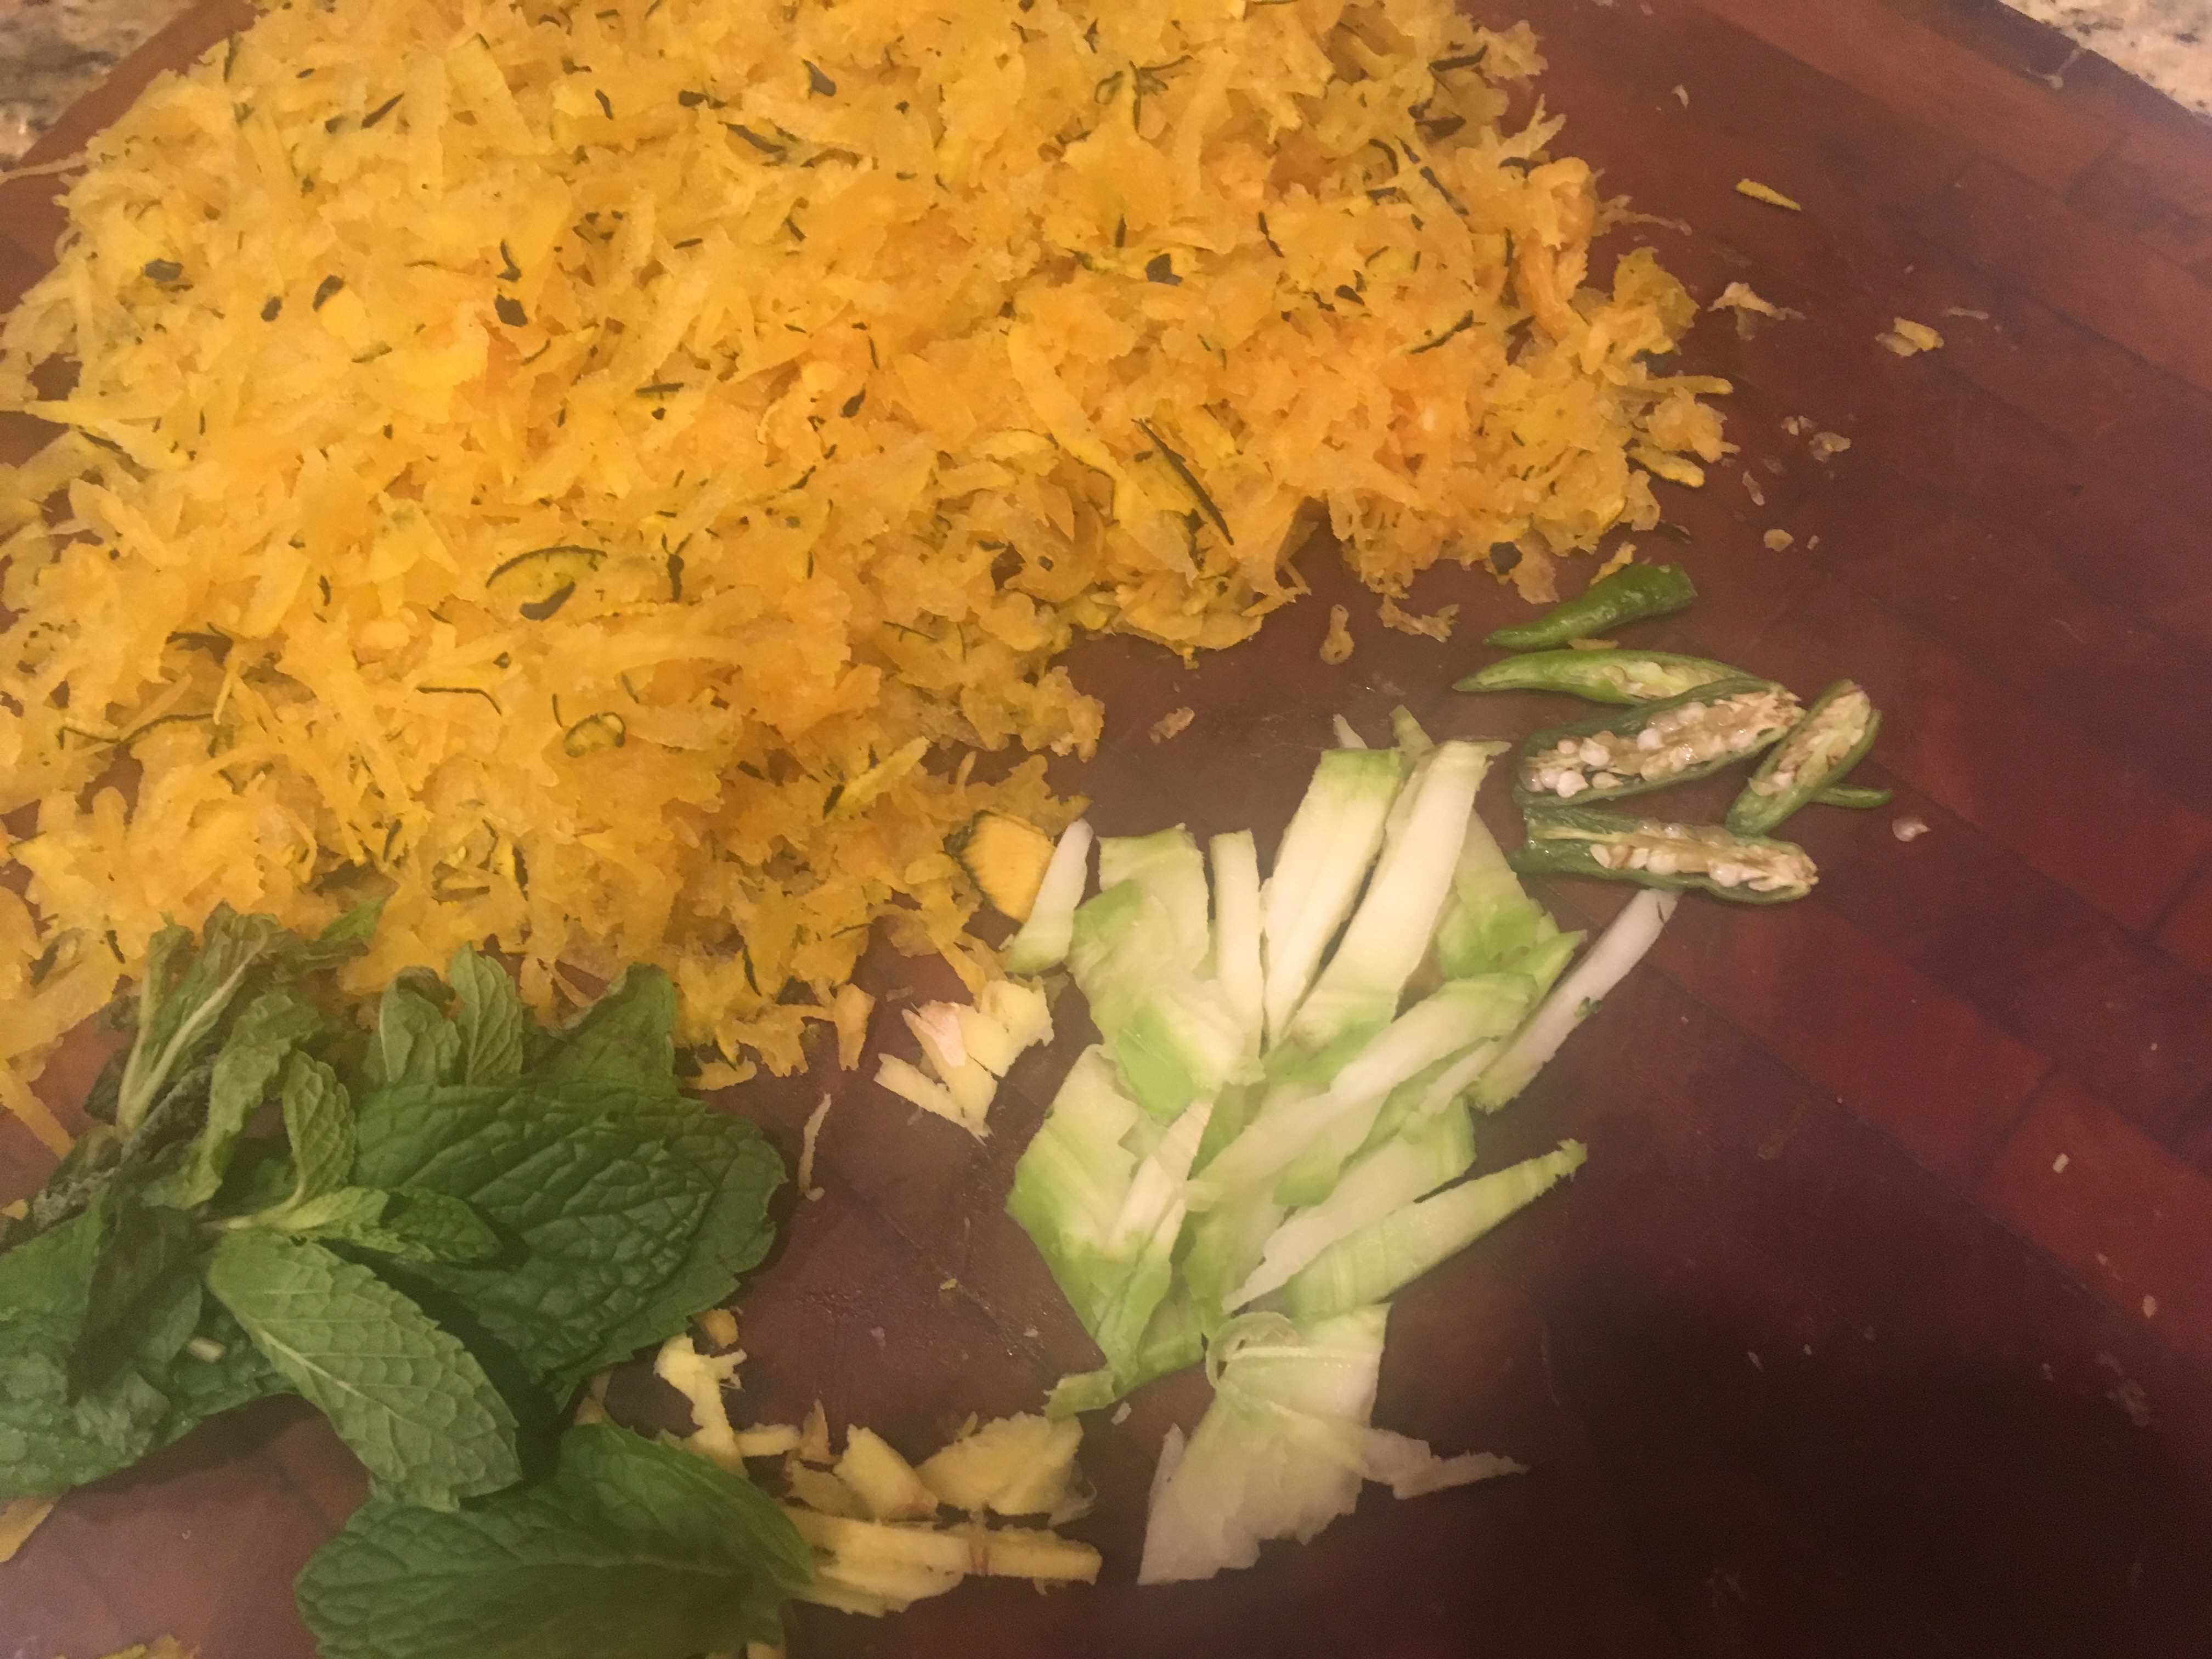
  • 2 thai hot green chillies, sliced
  • 1 cinnamon stick
  • 1/3 cup sliced broccoli stem pieces (optional)
  • 1/2 tbsp sliced ginger ( heaped spoon)
  • 1 tbsp chopped mint leaves

img_2442

  • 2 tbsp oil
  • salt to taste
  • 2 cups of water to cook rice.
  • 12-15  roasted and salted pistachio for garnish

Method

  • Wash the rice thrice in lots of water and soak in four cups of water for 20 minutes.
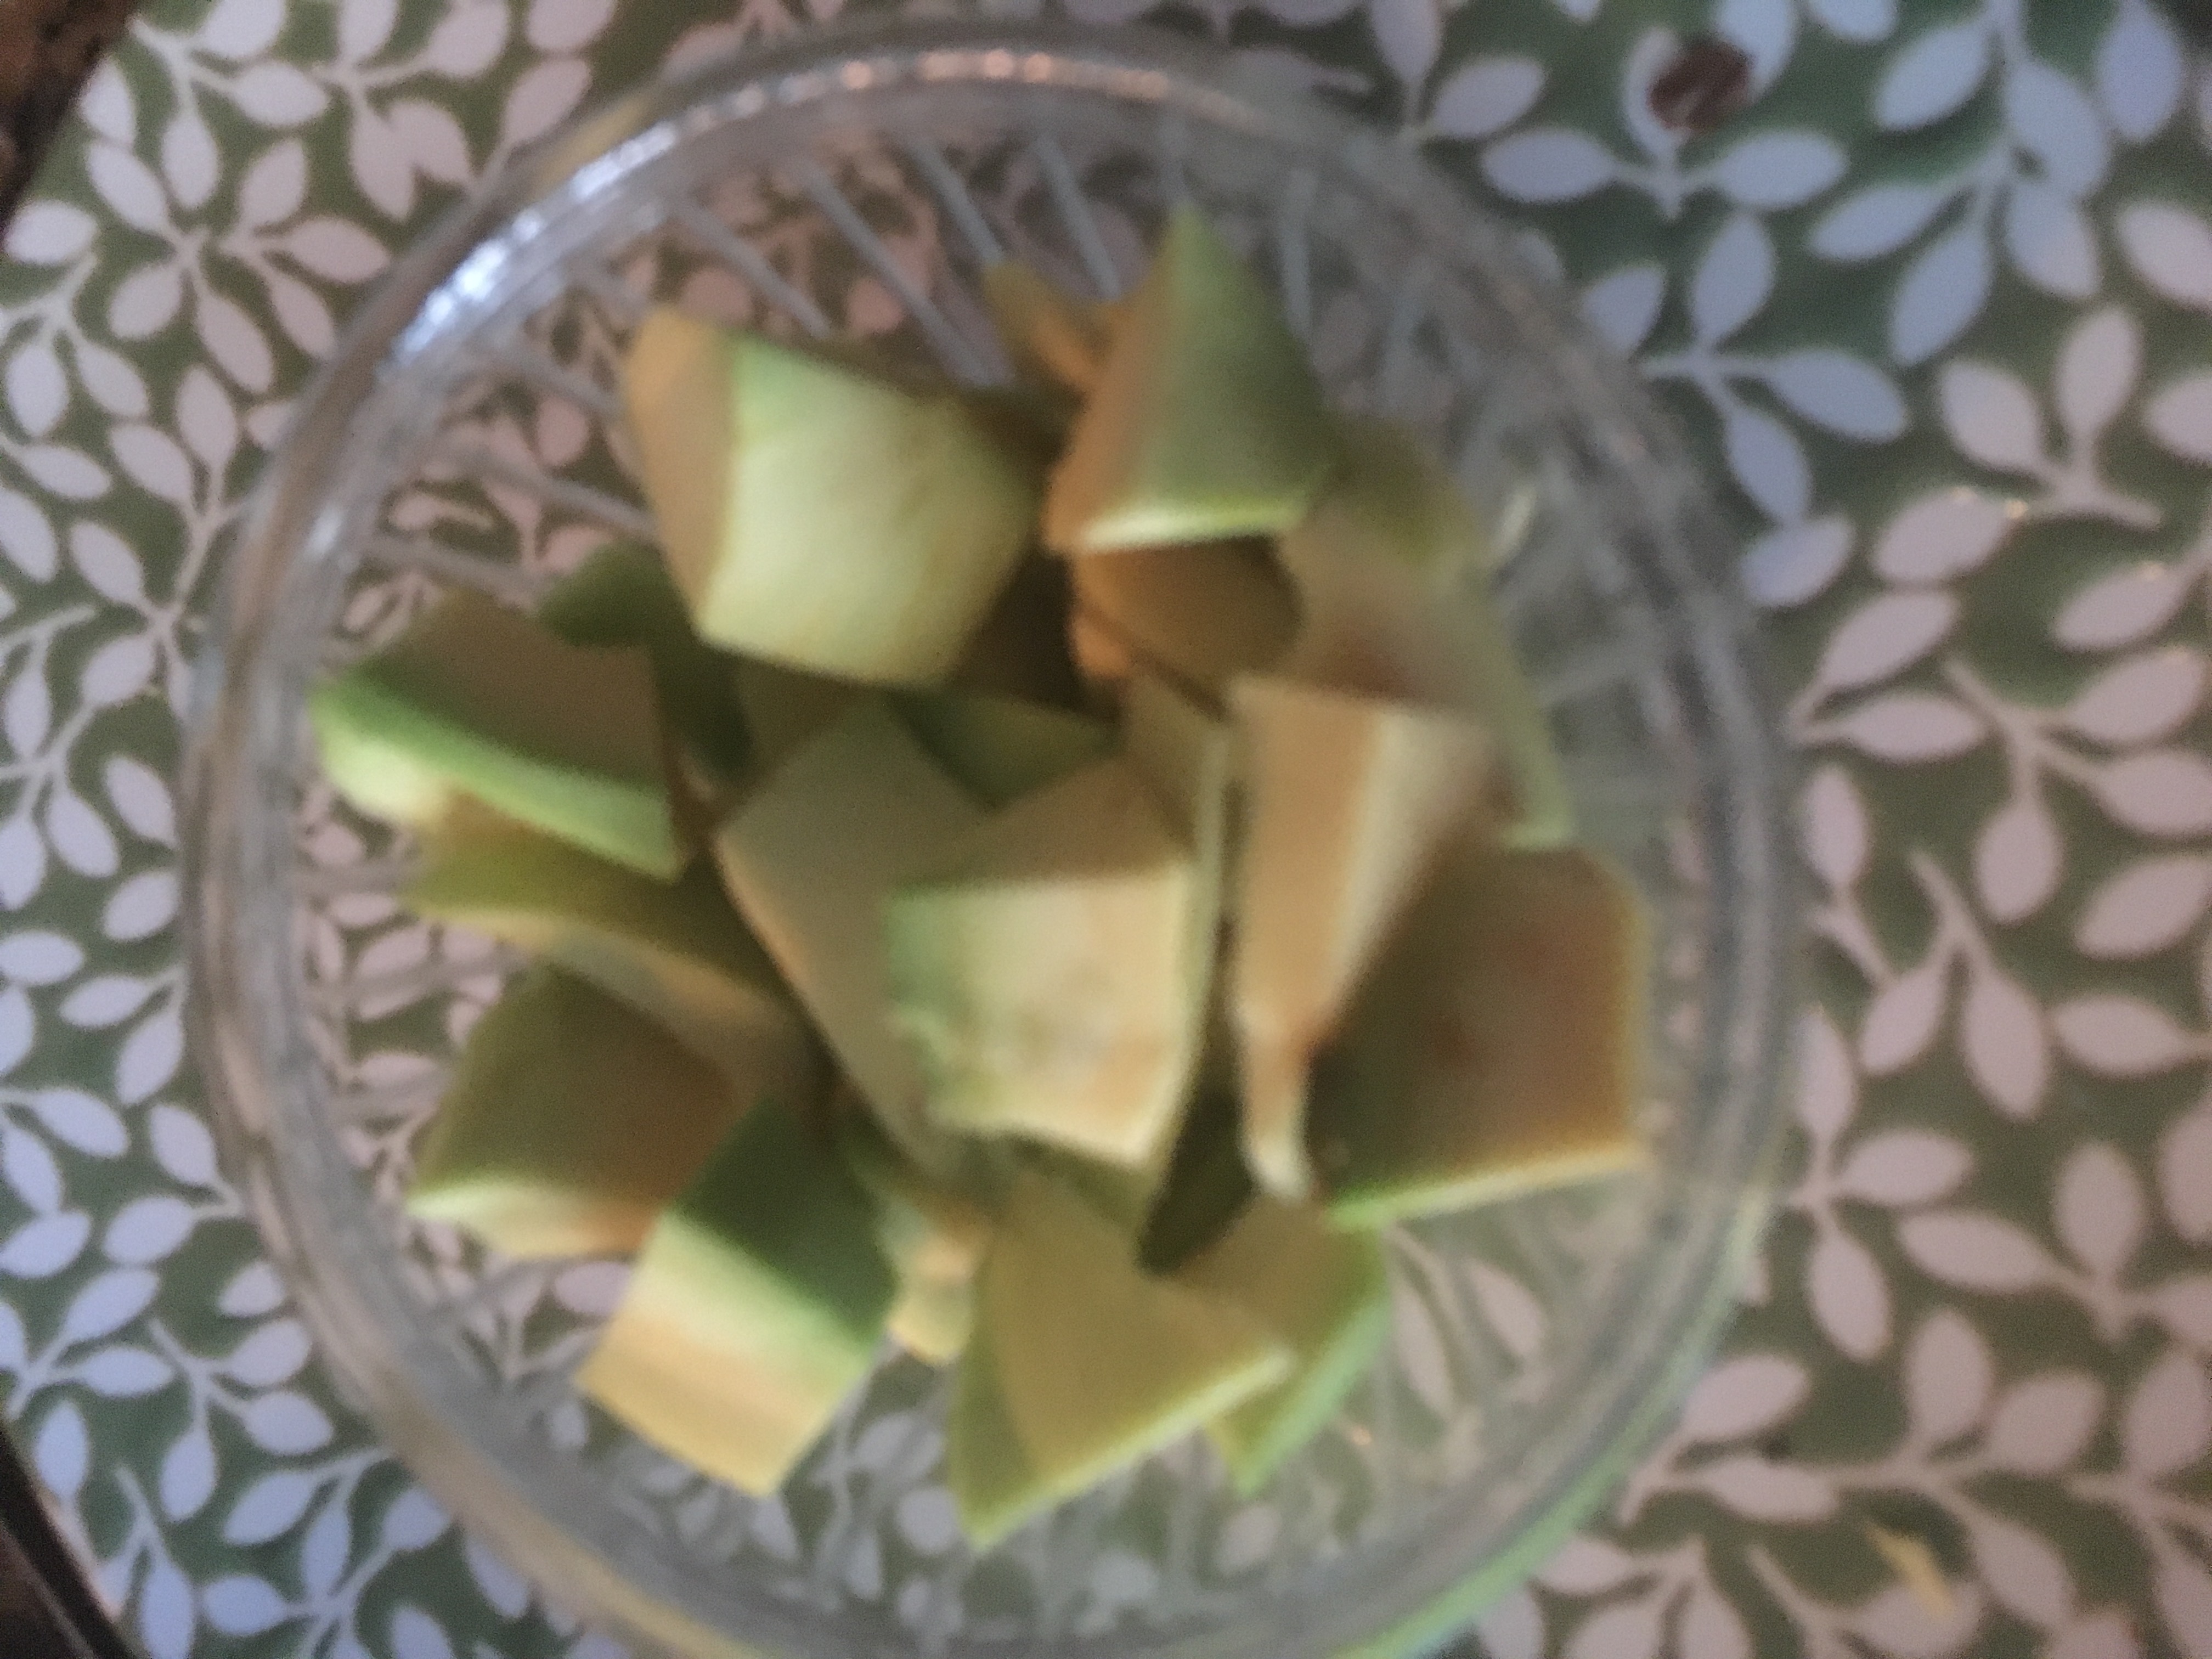
  • Halve the acorn squash and peel as much as you can and then shred.
  • In a deep pan, put the oil to heat, and add cinnamon stick. Once the cinnamon stick doubles and flattens up, add green chillies and ginger and saute for two minutes.

img_2443

  • Add broccoli stem and saute for 2 more minutes.
  • Add shredded squash, salt and mint leaves and saute for a minute.

img_2444

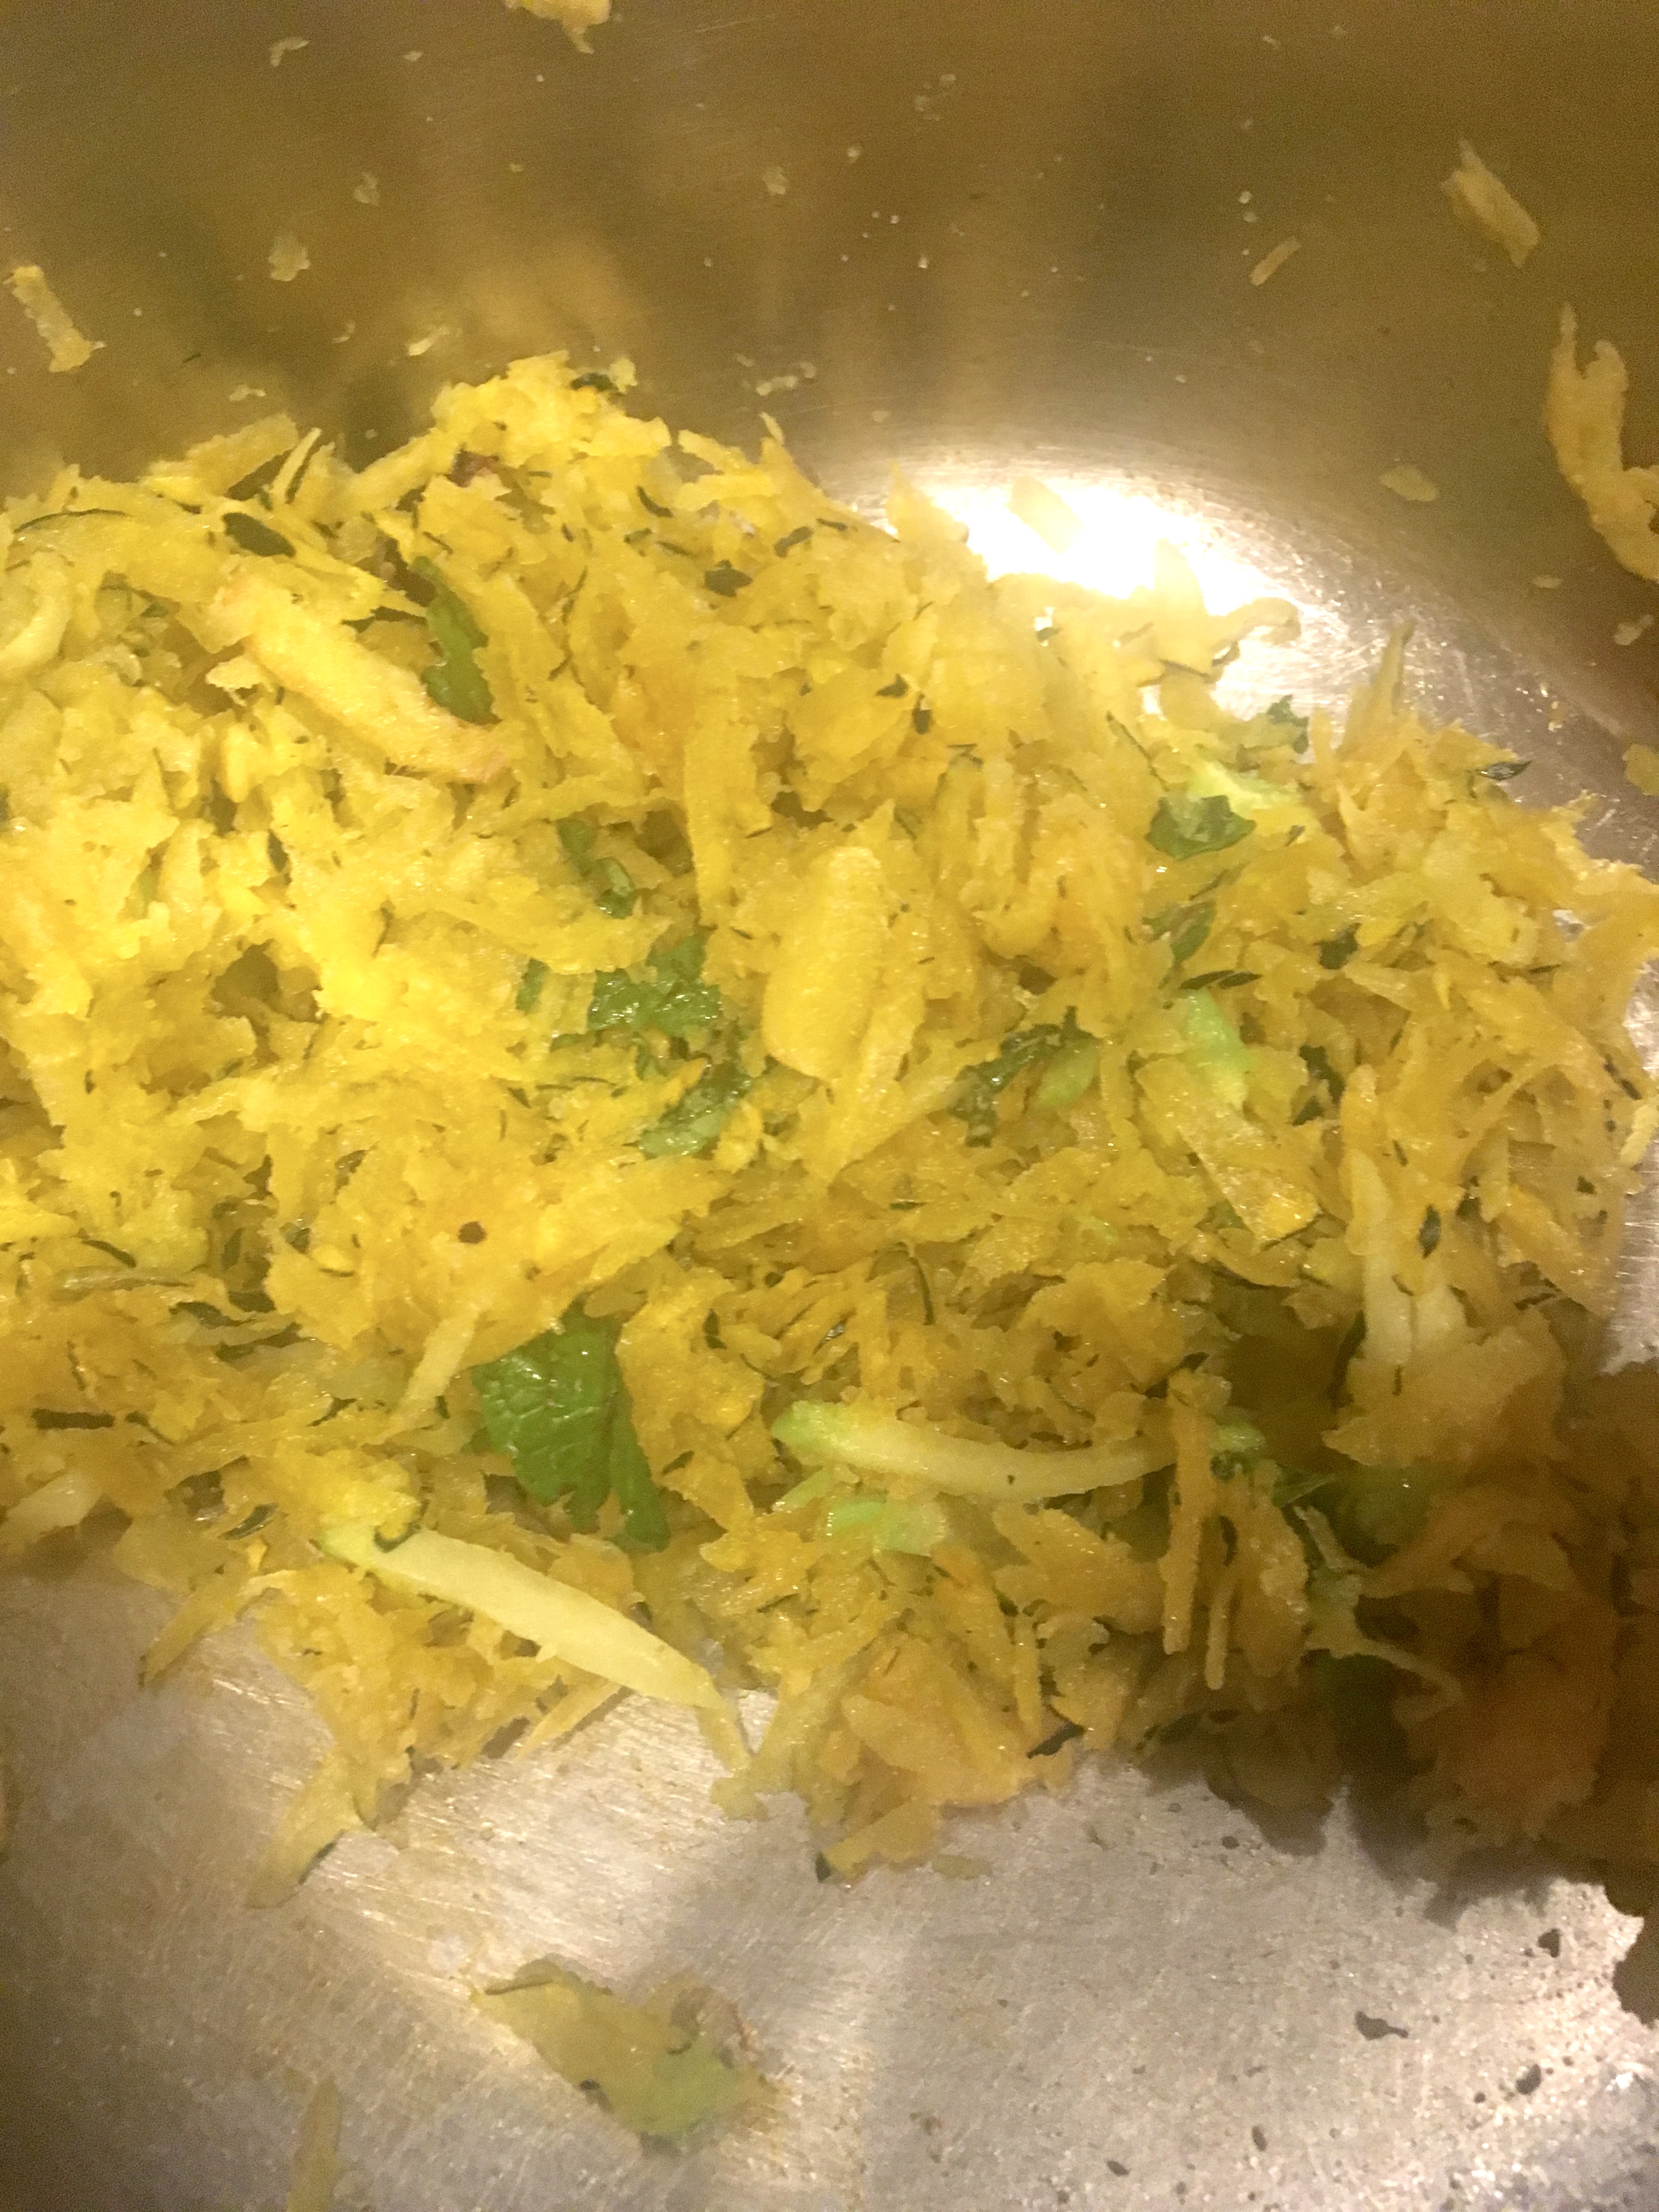
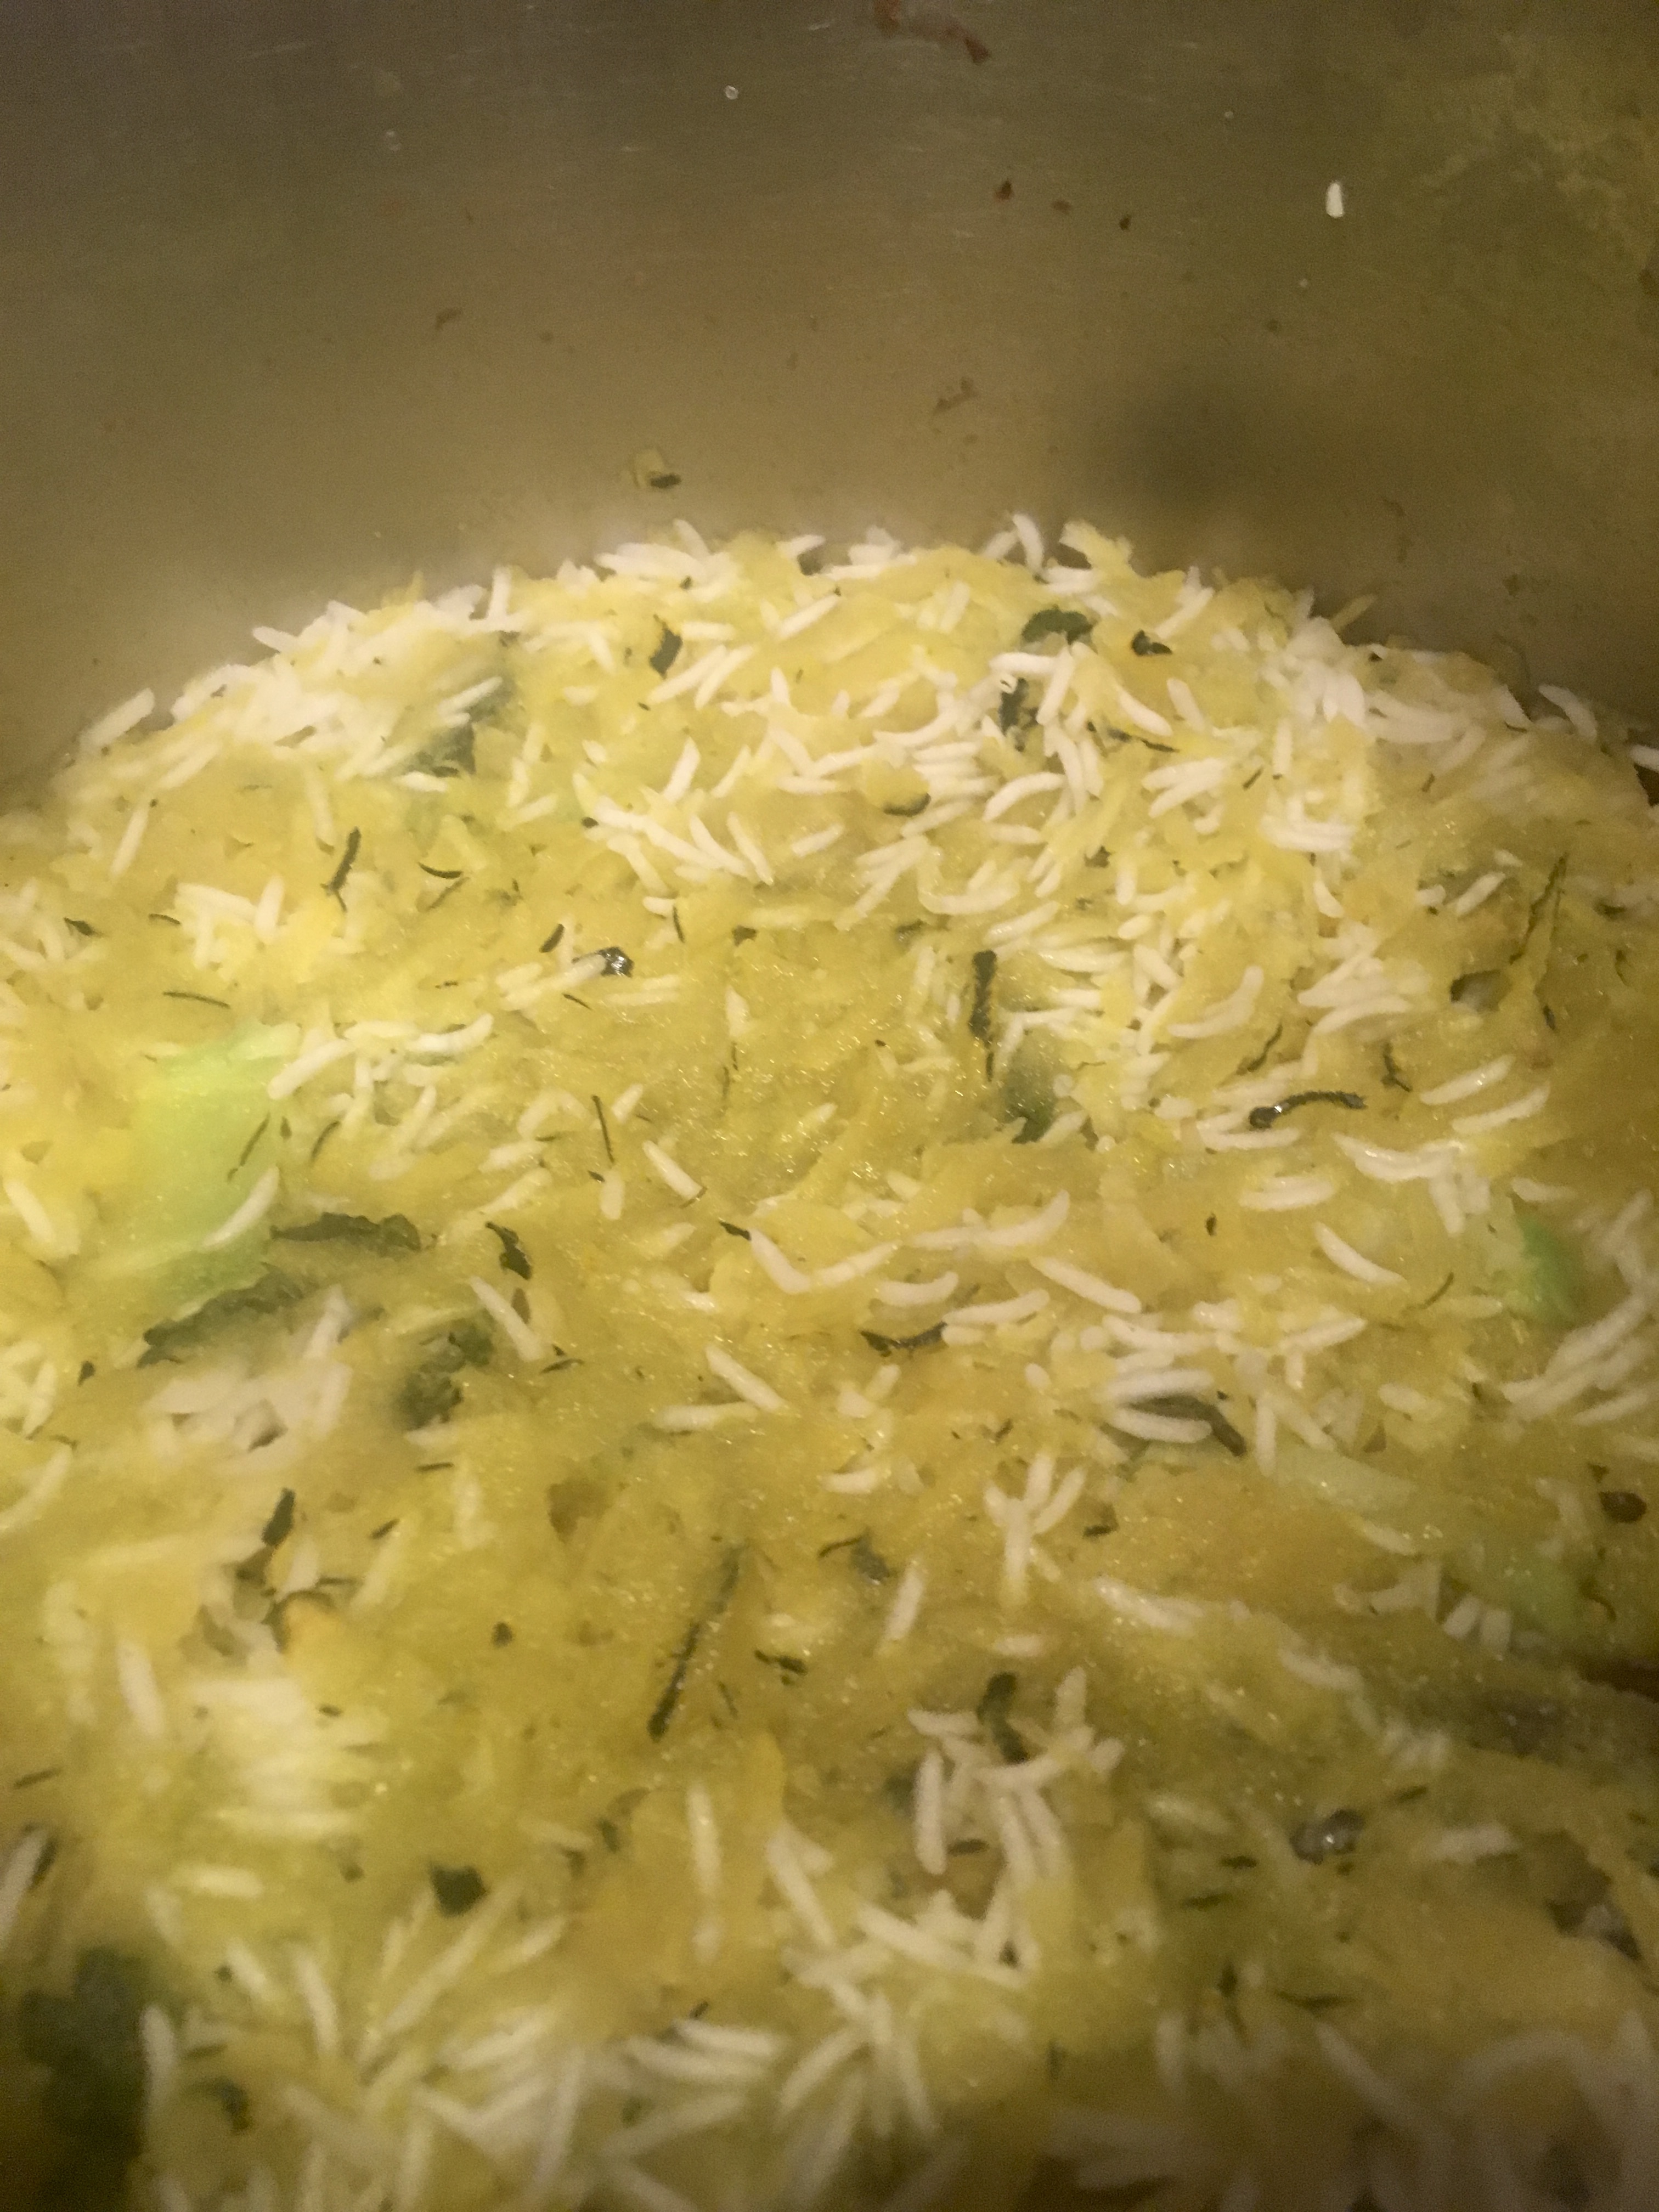
  • Drain all the water from rice and add to the squash and saute for a minute.
  • Add two cups of water, cover and cook on low flame for 15-20 minutes, till the all water is absorbed and rice grain is well cooked.

img_2447

  • Serve hot and garnish it with roasted and salted pistachio for nutty flavor and  itts great to be enjoyed just by itself.

Acorn Squash Pulao

Tips

Using a pre cut version of squash is much quicker, but in that case will have to use the cubes and not the shredded version. I shredded with some skin remaining, and it tasted fine. And as they say, skins of the vegetables hold the most nutrients!

The spice level in this pulao is at a minimum, so as to retain the western feel of the recipe. You might want to double it up, if you want to give it a more Indian touch.

Instinct Factor

Keep relying on your instincts to create a recipe that your heart desirers! Using the skin as well as adding flavor that I thought would go well, turned out right in the end.

Feel Factor

A warm fragrant pulao that is a mix of western and indian cuisine, with the sweetness from squash and cinnamon and spice from the green chillies and ginger, and cooling flavor from mint leaves, all added a variety of flavors to this one pot quick meal recipe of Acorn Squash Pulao. This success has definitely made me want to try more recipes with squash, as they surely are loaded with lots of good nutrients that I find it difficult to get my family to eat, specially Vitamin A, so a great recipe find for sure and not to mention, the fact that I can get Vitamin A , without  having to eat roots!!

[contact-form-7 404 "Not Found"]
Posted on

Apple Pie

Apple Pie

APPLE PIE

Apple Pie is the very essence of the fall season! Falling leaves, falling temperature, falling for pies of all kinds fruit and non fruit!! Making every fall(pun intended) worthwhile:) .Technology is moving at a very fast pace , so I try to keep up as much as I can with it! So decided to enroll in an online cooking class with #Sur La Table, a kitchen store I really really like! They have some awesome stuff, not seen elsewhere, and also I love the french name, having learnt some french while growing up. Literally  Sur La Table means ” On the Table”. It reminded me of attending Alliance Francais classes in Ahmedabad and Bombay, and how I wish I had continued with that language,. Maybe next year I will enroll for french classes!

So the online class had four different pies shown, with each video lasting for about half an hour with detailed explanations. I decided to try out the apple pie, as I love apple pies, and pies as such have such a complicated look, I thought it was really gonna be tough, but to my surprise making the pie dough was as easy 1.2.3!  My daughter was also excited to join me in making this pie for Thanksgiving dinner, as having pie for Thanksgiving is a must! She laid out the lattices and I cut the leaves, and we decorated the pie to give a classic fall look!

The best part was that the recipe did not need eggs, and we just have to give it a little bit time to let the pie chill before baking. Other than that, I think its pretty simple recipe and accurate recipe to follow, So am very happy to discover this recipe and  share it with you all, and hope that the fall season at  your home is full of pies and family gathering!

Hope you all had a wonderful Thanksgiving, and I would like to extend my gratitude and give thanks to you all through this Classic Apple Pie recipe, that has the perfect sweetness, crunchiness and easy to follow and for very warm neighbors who brought me the pie baking dish, all the way from Maine! Can’t thank enough for all the love and blessings!!

Apple Pie

Recipe makes one 9 inch pie

Time to Prep :20 min

Time to Bake 1 hour

Time to Chill 40 min

Ingredients

Flaky pie dough for the base of the pie

  • 1 1/4 cups all purpose flour(I Used Gold Medal’s All purpose flour
  • 1 tbsp sugar
  • 1/4 tsp salt
  • 1 stick( 4 oz) cold unsalted butter cut into 1/2 inch cubes
  • 2 tbsp ice water – or if need be 3 tbsp.

img_2367

  • You will need to use the food processor. Alternatively  you will have to cut in the butter using the pastry tool

For the top layer of the pie

  • Make another pie dough, using the ingredients listed above.

For the Apple filling:

  • 2 1/2 pounds big Fuji or Golden Apples ( or 6 cups of medium sized apple pieces)
  • 2 tbsp fresh lemon juice
  • 1/2 stick (or 4tbsp) unsalted butter divided into two parts
  • 3 tbsp unbleached all purpose flour
  • 3/4 tsp ground cinnamon
  • 1/4 tsp nutmeg
  • 1 tbsp whole milk and 1 tsp butter melted and combined together, for glazing the top of the pie.

Method

Making of the pie dough

  • In a food process mix in all the ingredients and give 5-6 two second pulses.

img_2366

  • Alternatively if using a bowl, mix everything in a bowl and use a pastry tool, to mix in the butter into the dough. Mix in till all dry ingredients are thoroughly incorporated.
  • The mixture should not be totally fine, but should show some butter pieces.
  • img_2368
  • Add one tbsp of ice water at a time and mix in further and give 2-3 one second pulses.
  • Add another tbsp of ice water and pulse two more times, lasting a second each.
  • Check the consistency of dough that it binds.

img_2370

  • Pour the flour on the counter or flat surface.
  • Gently gather the flour into a round ball with hand and bind it all in one piece.

img_2373

  • Wrap the pie dough in a plastic sheet and freeze for half an hour.

img_2374

Making of the apple filling

  • Peel and cut the apples into medium size pieces after removing the core
  • Half way through cutting, sprinkle some lemon juice into the bowl, in order to prevent browning of the bowl. It might be good idea also to rub the lemon juice on the inside surface of the bowl , before starting to cut.
  • In a large thick skillet, put half the butter to melt. Add half of the apples to it and 1/3 cup sugar.
  • Stir and cook for 7 minutes, till the apples have slightly softened or barely tender when touched with a tip of knife.

img_2383

  • Remove from flame and let it cool.
  • Repeat the above process for the rest of apples , butter and sugar and cool the same for at least an hour
  • Mix both the portions of apple filling and add cinnamon powder,nutmeg and all purpose flour.

Rolling the pie

  • Use the two sets of chilled pie dough.
  • Unwrap the dough one at a time.
  • Using a pie roller or with hand or any other rolling pin, roll the dough to about 10 inch wide, or at least 1 -2 inches longer than the pie dish width. While rolling, use the all purpose flour on the bottom and top, so that the dough does not stick to the surface
  • Lift the pie dough, using a thick roller pin, or a big spatula and lay it on the  pie baking dish.

img_2378

  • See that it is evenly laid out, fold backwards and inside any remaining edges and pinch the top edges to give it a smooth look.Chill this base for 15-20 minutes, This will give it a good finish.
  • Roll the second set of pie dough into the same width as the first one.
  • You can either cut the second round into strips, or use as it is  to cover it completely or make some cutouts to make it more decorative.


Assembling the pie:

  • Remove the chilled base. Fill in the thickened apple mix and spread it evenly on to the base.

img_2384

  • If making lattice patterns,  start laying the one inch strips in L shape,( one vertical and one horizontal). So if first strip is vertical, second is horizontal( like x,y axis).
  • Third strip is again vertical , about inch away from the first one. towards right.
  • Fourth strip is again horizontal, about inch higher than the first horizontal strip. (My daughter decide to follow her own way, and hence the picture does give clear indication of the method written over here)
  • Continue till the space on the top is covered, leaving some spaces open for the warm air to pass out.
  • From spare  strips, using cooking cutters, make cut outs of leaves or any design you may wish and add them on the top.


  • Another pattern that I made was all out of leaf pattern made with the help of leaf cookie cutters.

Baking

  •  Brush the top of the pie with milk and butter paste.
  • Pre heat the oven to 400  degrees celsius in convection oven.
  • Bake the pie on the lower middle rack for 30 minutes.


  • Shift the pie to the  higher middle rack for another 30 minutes.
  • Remove and cool for about 20  minutes.

Apple Pie


Apple Pie

  • Slice into triangles  with a serrated knife and serve the beautiful Apple Pie!


Tips

  • Do not double the quantity  of the pie dough and do it together.  I prefer doing it twice, so that the measurements stay accurate.
  • Flakiness of the pie will come if the butter is not totally incorporated, but has some small chunks in it.
  • Alternatively you can, just cover the apple filling with the second round and make some open cuts in the center with a knife for the air to pass out.
  • The color should be beige to golden to ensure that the pie is well done
  • Most fruit based pies do not have eggs,so you can use the dough recipe for all kind of pies in my view.

Instinct Factor

Roll the dough with hand, if it is difficult to roll with a rolling pin and if it breaks while lifting just patch it up.

Time is of key essence as the dough should not get warm, so need to work quick after removing it from fridge.

Apple pie dough can be made before or freeze upto a month. All imperfections get hidden once the pie is cooked, so do not fret!

Feel Factor

Apple Pie, the favorite flavor for many!! A pie crust is the most important part of the pie, so having it at the right consistency is crucial and this recipe does a great job at that. I love the cinnamon apple filling and the color was just warm enough for the cold windy season of fall! A classic pie that came out really classy in taste, and I love the fallen wind look atop the warm apple pie! I love to eat warm pies, however they can also be served with some vanilla ice cream on the side for added flavor. This is surely the way to get me eating apple a day to keep my doctor away!! The ease of this recipe is the making of pie dough, and next I will try some lentil pie, that I had it once at yummy Proper Pie  which bakes pies like those in New Zealand.! So plenty reasons to be grateful for and one of them for the eggless classic apple pie recipe and the lovely pie baking dish and the loving family to cook with and share with!!


[contact-form-7 404 "Not Found"]


Posted on

Eggless Rangoli Spice Cupcakes

Eggless Rangoli Spice Cupcakes

Eggless Rangoli Spice Cupcakes

Autumn weather is one of my favorite weathers, as the temperature cools down, the leaves are turning color, and your body demands for some warmth from the rich spices that you are so thankful to nature for.. Be it ginger, clove, all spice, nutmeg, cinnamon. all of them giving a cozy warm feeling and a sweet fragrance in the air. Autumn spice cake, at Savory Grain, that I recently had was one of the best spice cakes I had, along with delicious vegetarian food that they serve, mostly made from vegetables sourced locally. Having tasted something so delicious, I had to try to make this on my own. So I found this recipe at Cooking classy, but had to use my past experience, trying to replace eggs, it called for. I ventured with all ingredients that I had read about, and decided to give it a chance and the result was very pleasing as well as delicious. The true test if the ingredients were correct, was to check if  the cake does not leave domes at the top. What a satisfying feeling  to see the cupcakes stay flat on top, like they should be!

The eggless rangoli spice cupcakes were made for  Diwali celebratory event for a Hindi Kavita group that we have just started and it happened to be also my birthday! I wanted to create a dessert that matched the fall weather, bring in the color and design of Diwali,  as well as make the birthday girl happy with some warm cupcakes with some fruit and spices. I am a big cupcake fan, as the best cake was what my mother use to make in  a gas oven, and one that did not need any frosting , for it to be delicious. Personally I do not appreciate butter/ cream frosting. So came up with this sprinkled sugar concept that can also have some dots, akin to how dots are made for Rangoli during Diwali. Rangoli is a fine sand mandala done with hand., which I am very fond of. So wanted to see how to represent Rangoli over a cupcake. The outcome  was deeply appreciated by guests as well as the birthday girl as this recipe got more attention over a nice cake from Whole Foods! Now that was  a true birthday gift for someone who likes to  explore while cooking!!

The flavor had a bit of banana and applesauce, as well as clovers, ginger and all spice and all together, the taste was delicious, as people wanted another! Buttermilk and brown sugar keeps the cake moist from within The hidden ingredient was avocado, whose taste could not be felt but could see it in the richness of the texture. This is a quick recipe, in the sense, because of the fruit and spices, one can skip the frosting too, and go easy on calories, and the eggless rangoli spice cupcake can be a great accompaniment along with tea/ coffee because of the masala spices in it!

Spice up the fall with eggless rangoli spice cupcakes, and happy baking to the bakers, who find baking a highly therapeutic act just as I do! I am happy baking as the weather for baking is here and plan to explore a few more cookies, as  fall turns to winter and holidays are just around the corner to enjoy these treats with family and friends!!

Eggless Rangoli Spice Cupcakes

Recipe makes 36 cupcakes

Time to cook : 35 min

Prep time : 15 min

Decoration: 10 min

Ingredients

  • 4 1/2 cups King Arthur Unbleached Cake Flour
  • 2 tsp baking powder
  • 2 tsp baking soda
  • 1 tsp salt
  • 5 tsp ground cinnamon
  • 2 tsp ground nutmeg
  • 2 tsp ground ginger
  • 1  tsp allspice
  • 1.2 tsp ground cloves
  • 3 1/2 cups packed  light-brown sugar
  • 1 1/2 cup  vegetable oil/peanut oil
  • 1 1/2 cup (185g)sweetened applesauce
  • 1 banana chopped
  • 1 avocado sliced
  • 4 tsp vanilla extract
  • 3 tbsp white vinegar
  • 2 cup (240 ml) buttermilk
  •  1 1/2 cup water
  • 5 tbsp sugar
  • sugar sprinkles

Alternate Cream Cheese Frosting

  • 24 oz cream cheese, nearly at room temperature
  • 1 cup unsalted butter (4 oz), nearly at room temperature
  • 7 cups (440g) powdered sugar
  • 1 tsp vanilla extract

Method

For the cake

  • Preheat oven to 350 degrees.
  • In a mixing bowl whisk together flour, baking powder, baking soda, salt, cinnamon, nutmeg, ginger, allspice and cloves for 20 seconds, set aside.img_2227
  • Pour  brown sugar  in  to the bowl. into the bowl  Break up brown sugar with fingertips until no clumps remain.
  • Add oil and blend for 2 minutes.
  • Add applesauce and blend in.

img_2228

  • Add in 1/2 of the flour mixture and mix on low speed until combined, then blend in buttermilk, then add remaining 1/2 of the flour mixture and mix until well combined.

img_2233

  • Set the oven to pre-heat at 375 degrees for convection baking, and 350 degrees for normal baking.
  • Puree the banana and avocado and add it to the mix and mix in for a minute.

img_2231

  • Add vanilla essence and vinegar and blend for 2 minutes.

img_2236

  • Line the muffin or cupcake tray with liners.
  • Fill in the cake mixture upto 3/4 of the mould.

img_2239

  • After 10 minutes  switch the tray from top tray to bottom and back to front.

img_2240

  • After ten minutes switch the trays back to original position and bake till the cake leaves edge and the toothpick shows the cake is well baked.

img_2241

  • Bake in preheated oven until toothpick inserted into center comes out clean, about 30 – 32 minutes.

img_2246

Decorating the cupcake

  • Allow to cool several minutes and then cover it.
  • When completely cooled, mix the sugar and water and brush the cupcakes  with this water via a brush or spoon and leave it to soak and dry for 20 minutes

img_2247

  • Use a cookie stencil of your choice and sprinkle colored sugar on the top.

img_2251

Eggless Rangoli Spice Cupcakes

Alternate Cream Cheese frosting:

  • In the bowl of an electric stand mixer fitted with the paddle attachment cream butter and cream cheese until smooth. Mix in powdered sugar and vanilla and mix until well blended (at this point I like to freeze the frosting in 5 minute increments, then mix again with stand mixer, then freeze another 5 and more as needed until it’s a stiffer yet creamy consistency). Spread the cream cheese frosting and sprinkle it with colored fro Recipe source: Cooking Classy


Tips

Using cake flour makes the cake more softer. One can also try with all purpose flour, but the texture may have slight variations than when made with cake flour. Using unbleached flour helps so does brown sugar. If you do not have brown sugar, use  white sugar, and in case it is not that moist, sprinkle some more sugar water, for it to moisten,

Using a proper cup for measuring will help you perfect the recipe. A proper measure for Liquid as well as Dry Measure Cup.

Instinct Factor

Instinct sometimes arises from a fleeting thing that you read somewhere and remembered! Something like this happened while making this cake as decided to throw in vinegar, avocado and banana into the recipe.

Ensure that the flour is well mixed in  and so are the ingredients.  You can replace 1 bananas with one more avocado, if you want to avoid excess sugar.

Feel Factor

Ever thought that adding avocado to the cake can do the magic ! Well I was happy to mix in this ingredient loaded with good potassium and healthy fat into the cupcake and see it add texture and moistness to the cake. It did not overpower the other flavors of the cake, and could taste the banana, cinnamon, brown sugar, all spice as well as cloves and vanilla! What a delectable dessert to have on a chilly fall evening and the crunch of sugar sprinkles on the top was a perfect balance to the spice in the cake. I prefer a cake like this than to those with frosting, so truly enjoyed the fall spice cake that all should try, wether at home or outside!! Kida and adult will surely demand more than once as it has the fruity sweetness in in too:P


[contact-form-7 404 "Not Found"]
Posted on

Kesar Peda Saffron Milk Fudge

Kesar Peda Saffron Milk Fudge

Rajkot Kesar Peda Saffron Milk Fudge is the “sweetmeat” that has put Rajkot on the national dessert map of India. Since I hail from this town, I have grown up seeing this dessert being made, with memory of the halwais, constantly stirring the milk, and huge quantity of kesar peda saffron milk fudge being shipped outside Rajkot. It is also one of must bought item for tourists visiting Rajkot. I had a constant order from my in-laws to get a Kesar Peda from Rajkot whenever I visited:)

Since this is a delicacy well beyond my talent, I had to do some research to find a recipe that looked closest to the ones from Rajkot, and to no surprise of mine, it came from Tarla Dalal. I am so glad they are continuing her webpage and tutorials with her assistant, as her legacy in cooking is truly timeless.

It was a labour of love, making these Kesar Peda Saffron Milk Fudge, more so as I was making for the first time, and so was more cautious than normal and I think the final result was definitely thumbs up on taste! Texture is yet to be determined, but the house was full of the saffron milk aroma, which was the aroma you got when you opened a box of fresh kesar pedas, specially those that were bought from the most popular vendor Jay Siyaram Pedas. In their pedas, they mark the pedas with their rubber stamp mark, which means a salutation to lord Ram and Sita.

In my own way, it was a celebration for me too, as for the first time I did Mandana style Rangoli, depicting and inspired originally from Lord Mahavir. Since Deepavali, Festival of Lights, is just round the corner, what better way to celebrate the Nirvana kalyanak,of Lord Mahavir and the returning of Lord Ram and Sita, both being the reasons Jains and Hindus celebrating Deepavali, than with this golden flame colored sweet that has the texture similar to fudge and totally melts in your mouth.

Enjoy the Kesar Peda Saffron Milk Fudge with your near and dear ones, as it is truly worth the time, as all ingredients are fresh, including khoya. I will try to make another batch with condensed milk too, and post that recipe soon too! But as they say, everything else is a copy, the original is always the best!! A step closer to home, after relishing this awesome golden color kesar pedas with a hint of cardamom The light of the lamp, mirrored in the color of the pedas, signifies the light of knowledge to me!!

Wishing you all a very Happy Diwali and wishing you a year of prosperity and knowledge!!

Recipe makes 15 Kesar Pedas

Time to cook:  1 hour

Prep time 5 min

Ingredients

  • Half gallon whole milk
  • 1 1/2 cup sugar
  • 4 tbsp milk
  • 1 1/2 pinch of saffron
  • 1 tsp cardamom powder
  • Ghee for greasing
  • Lemon juice 1/4 cup plus 1 tbsp
  • Cornflour – 2 tbsp plus 1 tsp

Method

  • Heat two tbsp of milk for 1 minute in microwave and immerse the saffron in it. Ensure that the color is nice bright golden color. Add more saffron if needed.

img_2119

  • Heat another two tbsp of milk and mix the cornflour in it.
  • In a nonstick or thick bottom pan put the milk to boil

img_2120

  • Reduce the temperature once the milk boils over.
  • Continue to simmer stirring once every few minutes, till the milk reduces to half its original quantity.

img_2127


  • Add sugar and stir a few minutes.
  • Add the saffron milk and boil and stir for 7-8 minutes.

img_2129

  • Add dissolved cornflour and stir for 6-7 minutes.
  • Add lemon juice and stir till the mixture thickens and starts leaving the edges.

img_2130

    • Remove from flame and let it cool completely.
    • Add cardamom powder and mix in thoroughly.
      img_2132


  • Using ghee to grease the palms, make round balls about 1 1/2 tbsp size.

img_2139

  • Reshape the balls once again to ensure that they are firm and holding shape.
  • Use any shape to ident designs at the top or leave it plain.img_2136
  • Brush some more saffron dipped with milk on the top for festive look
  • Leave it aside for at least a few hours for the kesar peda to firm or you can refrigerate it for a couple of hours to firm it faster
  • Enjoy this utterly delicious kesar peda saffron milk fudge.

Kesar Peda Saffron Milk Fudge


Tips

Waiting for milk to boil and thicken over, I went on a medium low flame, as did not want it to burn. Hence the recipe took double the time needed. However if one wants to watch it over, the cooking time can be cut to half.

Ensure that the consistency is thick enough in the end like a khoya or mara or a thick paste to determine that it is well cooked. Next time, I will try to cook a bit more so that the mixture is more drier and maybe add a bit more of cornflour so that it thickens faster,

Grease the vessel in which you are boiling milk with ghee, prior to pouring milk in it, as this will ensure it does not stick at the base.

Instinct Factor

Patience and perseverance  paid off while making the Kesar Peda Saffron Milk Fudge, as it does require a bit of watching over and since was doing this for the first time, had to ensure I do not mess it up!! A wooden spoon for stirring helps in the milk not boiling over! Kept going back to my childhood memories of strolling by the peda manufacturer’s open shop, where i recollected large trays of work in process pedas

Top it with pistachio or silvered almonds for  a nutty topping, however I prefer the saffron and cardamom combination.

Feel Factor

Golden looking Kesar Peda Saffron Milk Fudge on the DHANTERAS DAY of Diwali are akin to having gold coins on this day of wealth!! The texture was a bit softer and less grainy than the ones in the store, but it tasted better as that is how a fresh pedas tastes, and now I can have the fresh taste of the Kesar Pedas Saffron Milk Fudge much longer than usual! Achieving this level of success has made us so so very happy, for two reasons, as this is from my hometown, which is famous for its pedas and secondly  as it is a favorite dessert of my husband! So definitely Diwali celebrations have started for us on the right note with rangoli mandana(inspired from Lord Mahavir and Non Violence)and perfect sweetness , shape, color, flavor and texture and freshness with this gold coin Kesar Peda Saffron Milk Fudge!!

Kesar Pedas Saffron Milk Fudge

Posted on

Jalebi Spiral Doughnut

Jalebi Spiral Donut

Jalebi Spiral Doughnut, also popularly recognized as the national sweet of India, has its earliest reference in India, in a Jain manuscript Priyamkarnrpakatha written by Jinasura in 1450 AD, The traditional name for Jalebi was Jal-Vallika meaning “dipped in water”, which in later dialects in India became Jalebi, Jalepi , Jilabi and so on.  In Sanskrit it was also alternatively known as Kundalika, which means coiled rope, circle, which is how the shape of this jalebi spiral doughnut. Personally, it reminds me of two things, one is the ripple effect of stone thrown in water, and secondly it reminds me of the countless galaxies that exist in our universe! It so nice to see nature reflected in our daily food and day to day activities!!

The current recipe for making Jalebi, is still very similar to what has been documented in 17th-century classic Bhojan-kutuhala by Raghunath. All these evidences clearly give more weight to the theory that this is an Indian Sweet as compared to some claims that it originated from Persia, where it was known as Zelbia or Zoolabiya. The Persian trade route would have definitely made the travelers excited in their talks about this aphrodasiac dessert which is prominent dessert at weddings and also for major national celebrations and holidays. The fact that Jalebi it was mentioned in the manuscript with the name Priyam, makes me think it was aptly made by the rich merchants to please their guests! And boy it pleases so many across the world, as it is found in India, Pakistan, Bangladesh, Persia, Iran, Africa, Egypt, Turkey, and even Israel. And it seems in the USA, a Syrian used it to make ice cream cones, till the current ice cream cones were made.

In Gujarat, traditional celebrations of Dusshera is done with jalebi and gathiya, and I have an extreme liking for jalebi. Hence, I had to try it out for Dusherra. So I opted to trying out the Gits Instant Jalebi Mix using a cookie decorating nozzle. The result was very satisfying as I was able to get a great shape, that held even after hours, the right texture that was crispy on the outside and soft on the inside, and the color was the shining golden! Next time I will try to use a different nozzle, so that the thickness is a bit more. I have to admire that the Gits Instant Mix are often my source for instant and reliable recipes and for which I have also blogged earlier for making Idlis, Dhoklas, Handvo and now even desserts.

Jalebi Spiral Doughnut has an enticing shape, a firm texture, inviting color and fragrance. It becomes simple to make with an instant mix, and it would be not surprising if Jalebi, can also be one of the easiest fried donut recipes. Even if the shape is not totally perfect, it does not matter, as one cannot go wrong with this fried dough dipped in saffron sugar syrup! Enjoy these lovely swirls of delicious sweetness as we get closer to the festival of Diwali!!

Recipe makes about 25-30 2inch wide Jalebis

Cooking Time : 30 minutes

Prep Time: 5 minutes

Ingredients

  • 1 pack of Instant Jalebi Mix
  • Oil for frying
  • Icing bag, nozzle or ketchup bottle for making jalebi.(In India, the Gits Packet includes the bottle too!)
  • 2 cups sugar
  • 11/4 cup of water
  • saffron strands
  • few drops of lemon
  • 1 tbsp of milk(optional)

Method

Cooking the sugar syrup:

  • Mix the sugar and water and bring to boil.
  • Boil vigorously about after 8-10 minutes.

img_1916

  • Add 1 tbsp milk and a few drops of lemon, to clear the water.

img_1917

  • Remove the froth with a slotted spoon to make the sugar syrup clear of dirt.

img_1918

  • Add saffron strands to the water and keep it lukewarm, ready to be dipped.
  • The consistency of sugar syrup or chasni should be for one string.
  • Make the sugar syrup first, before making the Jalebi.

Making the Jalebis

  • Mix the ingredients for the pack with 190 ml of water plus 6 1/2 tbsp of water.
  • Whisk the mix thoroughly with hands.
  • Continue mixing till it is an extremely smooth paste.

  • Put the oil to heat on a medium flame
  • Pour the mix into a icing bag or a ketchup bootle. I used a Kuhn Rikon cookie decorating bottle with nozzle#1

img_1923

  • Make swirls into the oil on a low heat. The swirls will hold shape and rotate on its own, when the oil temperature is appropriate.

img_1927


  • Cook for a a minute or so and flip over with a slotted spoon. Alternatively  you can use tongs too.

img_1928

  • Cook the other side for a minute and a half and remove and instantly drop it into the sugar syrup. The color should be light pink, as the above image does not give the indication of the cooked jalebi color.
  • Ensure that the sugar syrup is always lukewarm, so keep it on a low heat continuously.
  • Press the inserted Jalebis so that they soak up the sugar syrup.
  • Remove from the syrup after a minute or so and serve.
  • After 10 minutes, on cooling, can be  stored in an airtight container.
  • Enjoy them hot, cold, with milk rabri, or just as plain simple snack and sugar shot!


Jalebi Spiral Donut

Tips

For Vegan recipes, milk can be avoided in the sugar syrup, as it is mainly used as a cleanser. To get a better control of the shape keep the nozzle close to the oil so that you can go with the flow of the rotating swirls.Do not overcook, the jalebi as that will make them brown in color and also stiff.

A delay in the transfer to sugar syrup will yield it not evenly colored, as well as it will entail crystallizing of sugar on the top. Frying in oil is more preferable to hold the texture, as compared to frying in ghee, though folks in Rajasthan and some other parts, fry only in ghee!

Instinct Factor

Using a nozzle was an instinct based, as was to figuring out how to swirl! Try topping it with cinnamon powder to create a new flavor.The sugar syrup can also have additions of rose water and cardamom powder for extra flavor.

Feel Factor

A sense of joyful accomplishment on savoring Jalebi Spiral Doughnut, a  childhood favorite dessert of mine, specially from my hometown Rajkot, where it is savored with fafda ghatiyas. I distinctly remember watching in awe some of the kandoi making these delicious savories and snacks and in my wildest dream I did not think I will be doing this one day! The taste was great, the look was sharp and the texture was firm as I liked it!!! By making this, I surely was happy I celebrated Dusshera in its true sense and the joy of sharing these sweets with friends and family made it even better! Happy Dusherra though belated one, to all my readers!!

Jalebi Spiral Doughnut


[contact-form-7 404 "Not Found"]


Posted on

Healthy Churma Ladoo Jaggery Sweetballs with Wheat and Pearl Millet

Healthy Churma Ladoos with Wheat and Pearl Millet

Ganesh Chaturthi, celebrating the birth of Lord Ganesh, cannot be complete without making Churma Ladoo. So I decided to try making the Healthy Churma Ladoo Jaggery Sweetballs with Wheat and Pearl Millet. Lord Ganesh is known as the harbinger of all things favorable and auspicious, and everyone welcomes him to their homes with intense devotion, worship him with sincerity and in the end, immerse or do visarjan in water. Huge idols with lot of artistry are created. Prayers are done with lot of joy and enthusiasm. Ganesh Chaturthi co-incides with Sanvatsari for Shwetamber Jains. A day after the Ganesh chaturthi, the Das Lakshan  of Digamber Jains start and culminates after 10 days. The last day of Das Lakshan and the Visarjan or Immersion of  Lord Ganesh, again co-incide on the same day. This close proximity of important festivals for  Hindu and Jain religion highlight the close evolvement of  Jain and Hindu religions. Indians believe very strongly in the rising moon’s energy to enable their tasks. In Jainism, the fifth day of the rising moon period is considered highly auspicious for obtaining the right and true knowledge, and knowledge being the central tenet of Jainism, hence all good things start on the fifth day of the rising moon, and that explains in my view, why Das Laxan starts on the fifth moon day and ends on the anant chaturdashi (14th day) near full moon day, enabling all to maximize their spiritual learning and progress, aided by the good vibrations during a rising moon period. Intermingling of rituals, religions and customs makes one think, that all religions are part of the same truth, viewed differently and having a common goal of liberation.

As a young child, my grandmother would make gor jaggery ladoo from leftover roti. Chuma ladoos which come originally from Rajasthan, were either fried in ghee or made via bati(cooked in oven) and made with sugar. Obviously the more ghee or fat, the more tasty it is going to be! But since we are going the healthy way, I resorted to cooking chapati/bhakri and added the bajri pearl millet to make it even more healthier. The crunch comes from semolina, which maybe avoided if you have bhakri atta which is a little more granular than normal wheat flour for roti.

The covering of poppy seed and added flavor of nutmeg,cardamom and cashews bring more texture , taste and color to an ordinary jaggery ladoo. By not frying it in ghee, we have reduced the fat content to half, so thats a big thumbs up for healthy alternative in this recipe.

Through this post on Healthy Churma Ladoo with Wheat and Pearl Millet, I would like to invoke the blessings of Lord Ganesh and may all good things come your way and  convey Micchami Dukkadam from my side to all Jain Shwetamber/Sthanakvasi readers of this blog!


Recipe makes about 15 ladoos

Time to Prep : 7 min

Time to cook : 30 minutes

[shopeat_ingredients][/shopeat_ingredients]

Ingredients

  • 1 cup whole wheat flour for roti
  •  or 2 cups whole wheat flours for bhakri
  • 1 cup semolina rava( not to be used if using bhakri flour)
  • 1 cup pearl millet flour
  • 1/3 cup milk
  • 1 cup water
  • 1/2 cup ghee unmelted
  • 1 cup sliced jaggery
  • 1/4 cup cashew pieces
  • 1/2 tsp nutmeg powder
  • 1 tsp cardamom powder
  • 7-8 strands of saffron

IMG_1711

Method

  • Mix the flours, milk and water and knead all into a stiff dough.

IMG_1712

  • Divide the dough into six parts and make balls.
  • Roll the dough into a slightly thick rounds as in Bhakhris.
  • Indent the rolled dough with end of the rolling pin, so as to cook well.

IMG_1714

  • Heat a thick griddle on a low-  medium flame.
  • Cook the bhakri on medium flame, so that is in not too stiff, and also not too soft.

IMG_1716

  • Cool the bhakris and break them into pieces.

IMG_1717

  • Crush the pieces into a food processor into fine granular crumbles.(the below  image is after mixed with ghee)

IMG_1738

  • Heat the ghee.
  • When the ghee melts, add jaggery, nutmeg, cardamom and stir till jaggery melts on low flame.

IMG_1718

  • Pour this melted ghee into the crumbled roti pieces and let the mixture cool.
  • Once it is at bearable temperature, start making round balls.

IMG_1721

  • The first level will be rough, and you will have to go over two three times to get a smoothened finish.
  • In a small deep bowl, or in  shallow plate, sprinkle poppy seeds and roll the ladoos in them.

IMG_1724

  • The amount of poppy seeds should be based on how thinly or thickly you want the ladoos to be covered with poppy seeds.
  • Heat 1 tbsp of water in microwave and add saffron strands to it. Leave if for 1-2 minutes and decorate the ladoos with saffron water.
  • Enjoy and invoke the blessings of the the lord!

Healthy Churma Ladoo Jaggery Sweetballs with Wheat and Pearl Millet

Tips

Ensure that the rotis are not too stiff after cooking , as that will leave sharp pieces and it will not not give a smooth texture. If after mixing in ghee, it still feels hard, just do another round in food processor, till it reaches the fine texture. Do taste the sweetness before making them into ladoos.

If not using semolina, you can make it like roti and crush into finer pieces, this will make it more softer.

If finding it difficult to gather into a ball, add some more ghee as required.

Instinct Factor

Combining the wheat and pearl millet was instinct based, as this is how my mother eats bajri no rotlo at home. And the need was there to consume bajri on a regular basis.

When you mix the ghee, you should be able to able to gather it firmly into a ball using your fist. It might need some pressure and 2-3 rounds of going over the ladoos to get the texture right.

If you want to kick it up, hide some pennies and dime, for little kids to get attracted to eating these churma ladoos!

Feel Factor

Memory of my maternal grand mother allaying my feeling of being separated from my mom, even  for a short while. through this mouth watering churma ladoos , which she used to make from leftover chapatis. And I would instantly be all calm and happy! Re living those moments with a healthier version of the same. Healthy Churma Ladoo Jaggery Sweetballs with Wheat and Pearl Millet are  attractive and I enjoy the saffron and nutmeg flavor in this mix along with jaggery.  Not to mention that I am significantly less guilty of eating this quintessential Ganesh Chaturthi dessert! A great way to intake pearl millet, jaggery, ghee , nutmeg, all appropriate things for the incoming fall and winter! For a devotee, Lord appears in all places, so it seemed to me in this pic of Healthy Churma Ladoo Jaggery Sweetballs with Wheat and Pearl Millet, Ganpati Bapa Morya!!


Healthy Churma Ladoos Jaggery Sweetballs with Wheat and Pearl Millet


[contact-form-7 404 "Not Found"]
Posted on

Avocado Banana Chaat

Avocado Banana Chaat

When things are meant to be, they just happen! Something like that happened for this Avocado Banana Chaat. I had dinner guests who are strict Jain Vegetarians, and hence had to find some summer recipes that would suit their needs, as well as my need for some chaat on the menu. I often think of the awesome Avocado Banana Chaat that I once had at Rasika, in Washington D.C. It was truly unique as it had avocado and indian spices. Rasika made an impression on me with its unique combination and superb presentation. And I always wanted to recreate this appetizer in my home. The guests  served as an inspiration to look out for the recipe on the web. A click on one of the google search for avocado banana chaat, accidentally led me to a link on the Chef at Rasika himself explaining this recipe of Avocado Banana Chaat! I felt as if I had hit a goldmine!! And I can confidently say that the appetizer hit a gold medal with my guests too!

The recipe is simple, healthy, and the tamarind sauce can be made in advance and used as needed. All you need is ripe avocados to enjoy this delicious, tangy, appetizer that is just one of the coolest way to have avocados. Almost like having an avocado bhel feel! The recipe is great for pregnant women and people on the path of improving their good cholesterol(LDL) as Avocados are good source of good fat! So along with Guacamole, keep this Avocado Banana Chaat in your menu for dinner party lists, as it is colorful, easy and super healthy and highly novel item too! The interesting flavor of the caramelized banana sprinkled with black pepper is what gives it and extra dimension to this already cool appetizer!!

No summer is complete without a chaat, so start a healthy ABC with this Avocado, Banana, Chaat🙂

Recipe makes for 15 people

Prep Time :  15 min.

Cook Time : 15 min

Avocado Banana Chaat

Ingredients

[shopeat_button]

  • 20 Avocados
  • 2 cups jaggery
  • 2 cups dates
  • 1/2 cup tamarind paste( or 2 cups dry tamarind)
  • 1 tbsp fennel seeds
  • 6 dry Red Kashmiri Chillies
  • 1600 ml water
  • 7-8  About to ripe bananas
Method
  • Put  water to boil
  • Add all the ingredients and boil for 30 min on fast flame.
  • When the water reduces to half. remove from flame


IMG_1185

  • Using a hand blender, blend all the ingredients

IMG_1193

  • Sieve the mixture  and remove the coarse parts.
  • Cool the tamarind paste.
  • IMG_1223


  • Peel the bananas and cut into half and slice each half vertically into two more pieces.
  • On a non stick or thick bottom shallow pan, put  some oil to heat.
  • Griddle the bananas for a few minutes on slow-medium flame till reddish brown.

IMG_1212

  • Remove from flame and sprinkle crushed black pepper and a pinch of salt on them
  • Skin the avocados and remove the pit and dice them into cubes.
  • Gather  the chopped avocados in a small bowl, and invert the bowl in the plate.

IMG_1214

  • Top it with tamarind paste and surround it with caramelized bananas.
  • Serve immediately.

Avocado Banana Chaat


Tips

Ensure that avocados are not extremely ripe, as then it is not possible to cut into cubes. Also if you cut the avocados in advance, pour some lemon juice on it, for it to avoid oxidation.

If well cooked, the tamarind paste will give off a nice glaze from the caramelization of the jaggery.

Instinct Factor

Just trust your heart to let you know what the body needs!

Feel Factor

To recreate what a master chef creates at his restaurant, is a wonderful feeling! And the feeling gets even more satisfying when the recipe turns out good and the guests enjoy this colorful chaat appetizer that becomes the spotlight for the evening! It is extremely colorful and healthy chaat recipe with avocados and banana, that will give you enough grounds for something to really chat about 🙂


[contact-form-7 404 "Not Found"]
Posted on

Eggless Rose Petal Ice Cream with Gulkand

Eggless_Rose_Petal Ice Cream with Gulkand

Eggless Rose Petal Ice Cream with Gulkand is a flavor that is unique to Rajkot, India, from where I hail. It is a town known for its fondness of food and fun, with the town coming to a complete halt in the mid-afternoon, for all to digest and rest from the huge lunch meal!! Its a royal city in all aspects, for the food, flavor, fun and definitely the cooler breeze every night!. This ice cream has the obvious satisfaction of having an ice cream and also the deliciously unique flavor of rose petals in the ice cream, with the fragrance of rose water and rose petal jam or known as Gulkand in India. And to get the rose pink color, we have the rose syrup, and  all the rose ingredients are from the fragrant roses knowns as desi gulab in India  or well known as  Damascus Rose.

I tried using the petals of  Mister Lincoln Rose, which used to grow in my previous home, and my neighbors still remember the fragrance and taste of  rose petal ice cream from home grown rose! It was that day when I made rose petal ice cream from Mister Lincoln Rose petals, that got me all excited about trying new flavors and in some sense my ice cream journey started 8 years ago from that day.

A lesson learnt from my experience of ice cream making for a medium size group, is to  invest in two/three  ice cream containers, to allow you to make bulk quantity that will truly satisfy everyones’  mental and physical cravings of ice cream! A delectable ice cream flavor that has lovely rose pink color and you will not know what you are missing till you have a bite of it! Summer experience is not complete without experiencing this truly summer feel  flavor of eggless rose petal ice cream with gulkand , and also without the joy of discovering the delicious and hidden combination of  rose  petals and  gulkand (rose petal jelly)!

A garnish that will go well with this is silvered almonds or pistachios. if you please, not that it needs anything extra. Rose for romance, rose for love, rose for fragrance, rose for perfume, and now rose for ice cream too!  Enjoy this super flavor that one guest described as “this a s the most delicious thing I ever had ” and I am in complete sync with this statement as this is the only flavor I prefer, when visiting back home!

Eggless Rose Petal Ice Cream with Gulkand

Recipe makes 1 quart of  eggless rose petal ice cream with gulkand

Cooking Time: 45 min


Churning time : 30 min

Chilling Time: 1-2 days

Ingredients
  • 1 cups whole milk
  • 2 cups heavy cream
  • 1  tsp rose water
  • 2 tbsp  gulkand or rose petal jam
  • 1/3 cup plus 1 1/2 tsp Rose syrup ( Dabur brand)
  • 2/3 cup sugar plus 1 1/2 tbsp sugar
  • 3 tbsp dried rose petals
Method
  • Boil the milk and sugar  for 3-4 minutes, add the petals and continue simmering for 2 minutes.

IMG_1170

  • Add the rose syrup and rose petal jam or gulkand and stir for another minute.

IMG_1172

  • Blend all the ingredients, using a hand blender and chill the mixture for at least an hour.
    IMG_1177
  • Mix the heavy cream into the mixture.

IMG_1182

  • Use a well chilled container for making the ice cream, one that is chilled for at least two days.
  • Churn the ice cream for at least 30 minutes

IMG_1191

  • Remove the freshly mixed ice cream into a ice cream container and chill for at least a day or two  to get a great texture.

IMG_1194

  • Garnish with silvered almonds, pistachios or just have plain Rose Petal Ice Cream, and you will have tasted one of the most delicious flavors and original ice cream flavors from Gujarat, India!

Eggless Rose Petal Ice Cream with Gulkand


Tips

Well chilled container will make a great texture. While freezing the ice cream, if you have an aluminum container, it will shorten your freezing time. Ice cream without any garnish also tastes very yum!

Instinct Factor

If you desire for something, and if it is meant to be, things will show up your way! Felt this, as wanted  to really make this, but was wondering how to get rose leaves, as the western roses, do not have a sweet flavor, An unexpected trip to an Indian Grocery not visited, led me to accidentally discovering the dried rose petals from India. Hence was able to create an authentic flavor as I had in India!  Not only that, found the rose syrup too(Dabur) brand. Gulkand and rose water which were easily available at most Indian stores.

Feel Factor

Having an authentic flavor from my hometown Rajkot, recreated in USA with ingredients from USA, made me feel so much closer to home. One things that was missing was the use of there fresh rose petals, which has even better texture and flavor! And the ice cream in India was white in base, without the use of rose syrup. This flavor is the only flavor that I prefer to have when visiting home! The use of rose syrup gave it a nice rose pink color which was an added bonus to this experience and a color I could fall in love with!. Back in India the base does not have rose syrup, so is primarily white in color with red rose petals showing through well One gets the ultimate combination of rose fragrance,  petals crunch, cooling feeling, as well as the  lovely rose pink color that is just pure joy to see and relish!!  And a guest summed it well- ” this is one of the most delicious flavor she has ever had”!!


[contact-form-7 404 "Not Found"]


Posted on

Strawberry Avocado Smoothie

Strawberry Avocado Smoothie

Strawberry Avocado smoothie was inspired so as to have more potassium and healthy fat in the daily food consumption. On researching more on this combination, on google, I found I was not the only one with the strange idea! This smoothie is highly recommended on fitness web pages, which made me happy as I liked this combination. I guess I am more of smoothie person, and some are not. Such as, I am not a frozen yogurt person, as yogurt per se has to be salty in my opinion. If you love avocados, and I am crazy about them, you will definitely like this combination. Its refreshing and cooling, using what is freshly available as summer fruits. Most smoothie starter mixes available in the stores, have some salt in their base, and I prefer to have too.

What was most satisfying to know was that avocados are grown in TamilNadu, Kerala, Karnataka and Sikkim, where it is known as “butter fruit” as the avocado pulp is thick and smooth to spread. And in India, this is often used in milkshakes and ice cream! Something I was totally unaware of, as my exposure to avocados was only after coming to USA.  Avocado is one of the top 10 anti aging fruit, which truly highlights, how many good things are packed in this tiny fruit, which is also known as avocado pear. I am just happy to consume avocados in any way that I can, as taste of God’s own butter fruit, is simply divine. Avocados also become an easy option for vegan diet followers to eat butter! And to put things in perspective, wiki says there is evidence of Avocado fruit found in Mexican caves, as far back as 10,000 BC!!

So strawberries are just heart stealing for many and adding avocados to them makes the combination highly appealing for the mind and the body! I am an avid gardner too, so a pink green combination is totally attractive in this Strawberry Avocado Smoothie! Enjoy!

Strawberry Avocado Smoothie

Recipe makes 3 glasses of 20 oz each

Cooking time 5-10 min

Ingredients
  • 1 cup chopped strawberries
  • 1/3 cup avocado
  • 1/2 cup milk
  • 1/2 tsp ground flax seed powder(optional)
  • pinch of salt
  • 1 tbsp of sugar based on the sweetness of berries
  • slices of avocado for garnish
Method
  • Chop the avocados and strawberries

IMG_1093

  • Add rest of the ingredients.

IMG_1095

  • Blend everything in a blender.
  • Chill for ten minutes if possible.
  • Serve after garnishing with avocado slices.

IMG_1099


Tips

Use the avocados as soon as you chop them, as they tend to get brown with oxidation. To retain the green color, add lime juice to the chopped avocados.

Instinct Factor

Play around with the ideas in your head!

Feel Factor

Cool pink and green smoothie that is so wholesome for the mind, body and soul with much needed nutrients and fat needed by the body to slow the aging process!


Posted on

Sudanese Gibna Baida Sandwich

Sudanese Gibna Baida Sandwich

Sudanese Gibna Baida Sandwich is all about the cheese! What’s in a cheese? Everything! The earliest invention of cheese now dates to 5000 BCE, per the pottery found in Poland. Cheese making developed as soon as cows and sheep were used for farming. The pictorial description of cheese formation process is well described in tablets in Egypt  and Sumeria. Gibna Baida is how the white cheese in Sudan is known as. It is a part of the cheese categorized as salad cheese, and resembles its texture to Feta cheese, as commonly known. The difference is Greek Feta cheese is made from sheep’s milk and combination of sheep and goat sudanese Gibbna(popular name for Gibna Baida) was originally made only from cow’s milk and without any additions of rennet. To know  more about discovery of cheese, do read this Smithsonian article  on History of cheese  Like feta cheese, it is also stored in the whey or brine, but it is less salty than feta. It is more like the Indian Paneer cheese, only most crumbly and softer.

So as this is a part of the category of  salad cheese, the way to eat this in sandwich, which was shown to be my sister in law, whose family is originally from Sudan, is that you mix the salad vegetables , like cucumber and tomatoes with the cheese.  Since Gibna Baida is not so easily available over here, my sister in law decided to use feta cheese,  and she was happy with the overall taste of the sandwich.

I enjoy eating this sandwich in the hot summer days, as often on hot days, I prefer eating salad that cools your body, and this definitely has a cooling feel to it. Its a new taste to have a flavored salad with indian spices in your sandwich, but you got to try to it appreciate it!

My daughter gave two thumbs up for this, and I liked it to, specially as I used the creme fraiche ( similar to indian white butter) as the base. My sister in law used this to take it on a long journey,and everyone seemed to enjoy this. So thinking of hiking, long drives? Think of Sudanese Gibna Sandwich as an option! I have still retained the Gibna name, even though I have used Feta and Paneer, as the inspiration is from Sudan!  For my personal consumption I used crumbled paneer, as I wanted to go low on salt as well as avoid any rennet based cheese, as rennet is animal based product.

So say cheese, take lovely pictures  and enjoy the summer with this cooling salad based Sudanese Gibna Baida Sandwich for all!

Sudanese Gibna Baida Sandwich

Recipe makes 5 sandwiches

Ingredients
  • 1 1/2 cup chopped tomatoes
  • 1 1/2 cup chopped cucumbers
  • 1/3 cup chopped avocados (optional)
  •  1 1/2 cup of gibna baida cheese or feta cheese or crumbled paneer
  • 3 1/2 tbsp oil
  • 1 1/2 tsp red chilli powder
  • 1 1/2 tsp corainder powder
  • salt to taste
  • 10 bread slices with the crust removed
  • [shopeat_button]

Method

  • Mix everything in a bowl, except the bread slices. The one on the right has avocados and paneer.

IMG_1102

  • Butter the bread slices.
  • Layer the bread with the salad and cheese mix.

IMG_1111


  • And top it with another slice and cut into pieces as you desire. I have a liking for triangle, as somewhere I read recently that triangle, is the most stable shape in geometry! Display in a pinwheel form or listen to your creative voice and enjoy!

Sudanese Gibna Baida Sandwich


Tips

Mix all the ingredients, just when you are about to make sandwiches.  Add olives if you prefer, as they will go well with this combination.

Instinct Factor

You can try leaving  a block of paneer  in the whey to create the original feta/gibna baida cheese texture and taste

Feel Factor

I can survive on sandwiches, seven days a week, and am always looking to vary my sandwich of the day! This is an excellent, quick way to eat salad flavored with oil and spices, and specially tastes great with white indian butter  or creme fraiche by Vermont bakery, available at Whole Foods. THE creme fraiche is made very similar to the way Indian white butter is made. The crust removed bread tastes great with the salad and cheese and Sudanese Gibna Baida Sandwich is a great summer sandwich to enjoy!

[contact-form-7 404 "Not Found"]