Posted on

Stuffed Mirchi Peppers

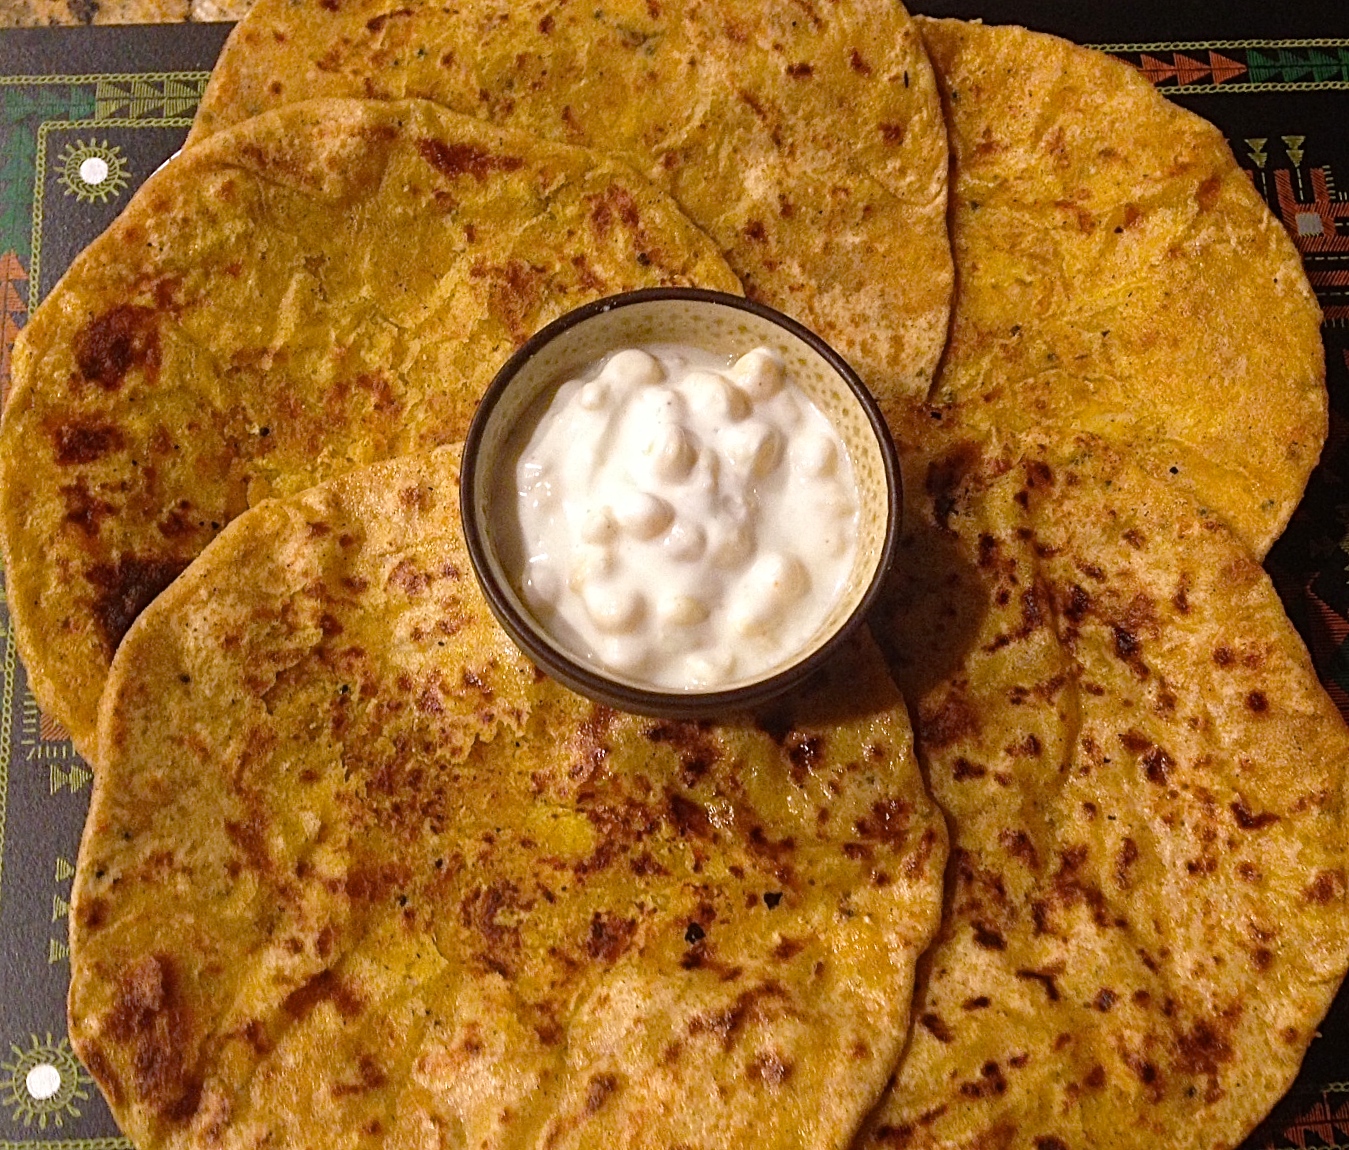
66th Republic day of India is kicking excitement in India and USA, with the President of USA  Mr. Obama visiting India for the majestic celebrations of Republic Day. The grandeur, glory, sights and sounds of the parade march is yet to be seen by me, but am hopeful that will happen one day for sure!! Caught up in the excitement, I found a perfect opportunity to make something that symbolizes India in terms of food and color-Stuffed Mirchi Peppers!! Indian cuisine is known for its spicy and colorful cuisine. Chilli peppers originated in the Americas so just the right shape to symbolize the  warming of Indian – American relations.

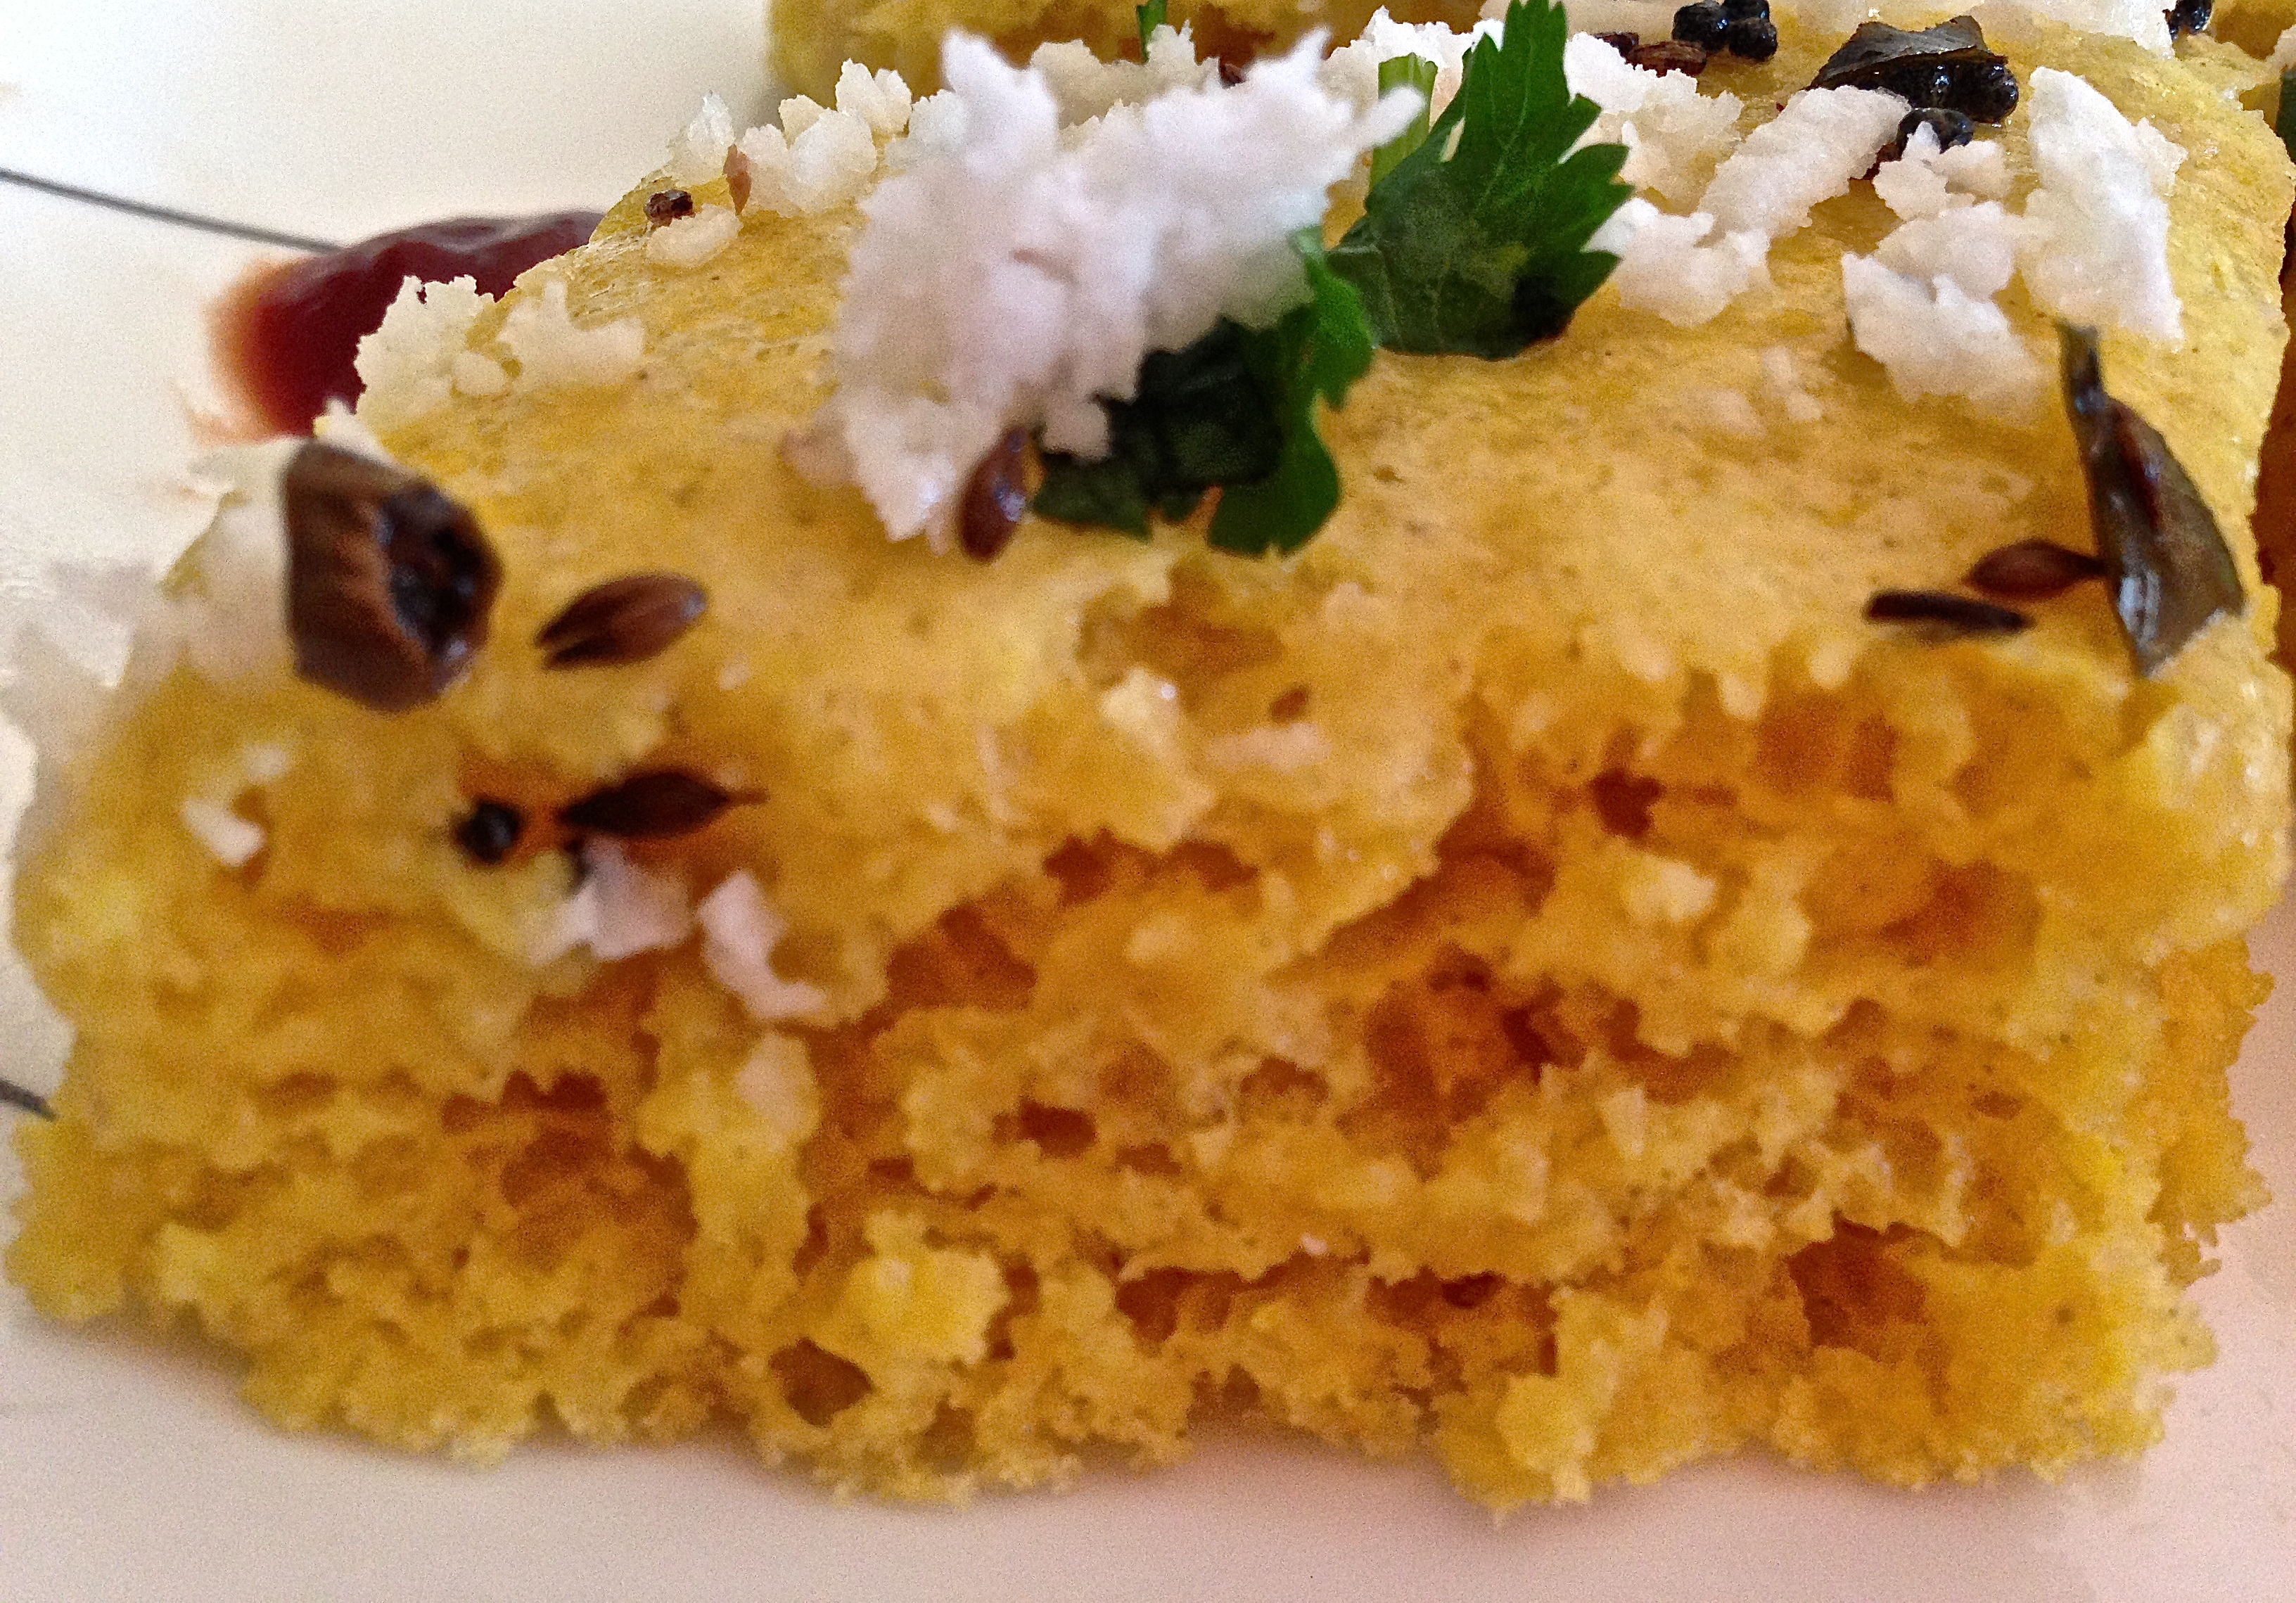
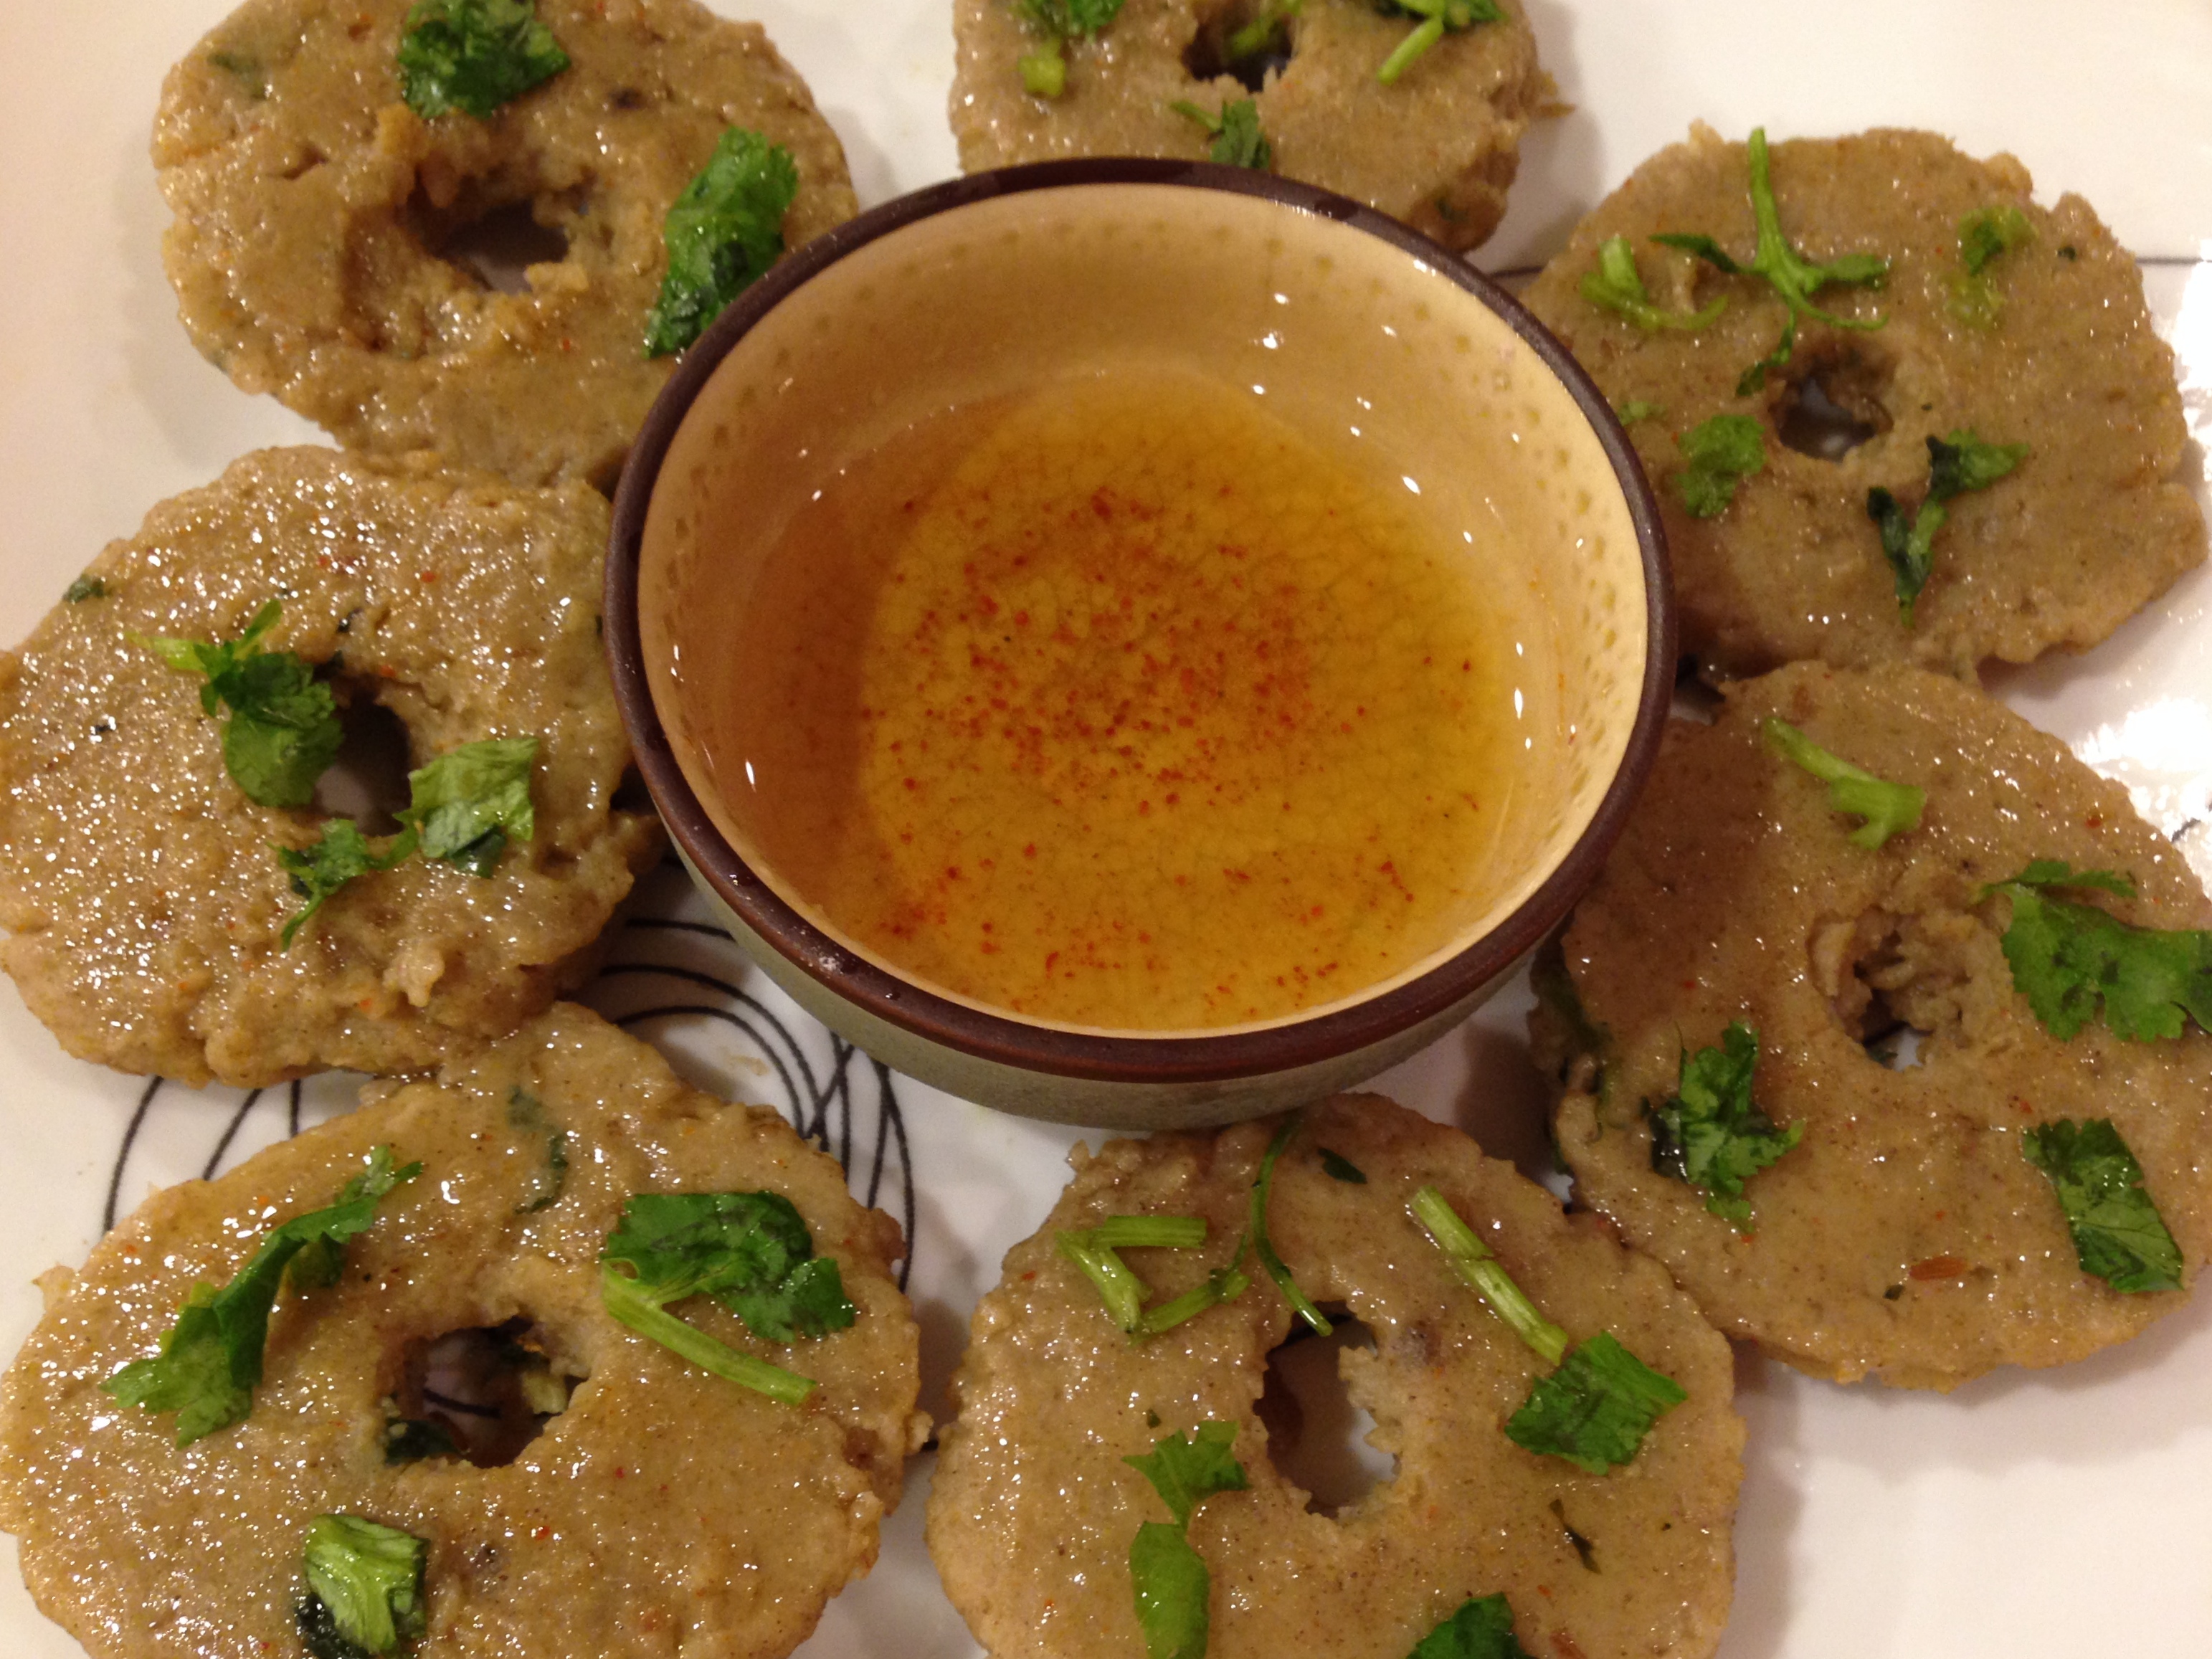
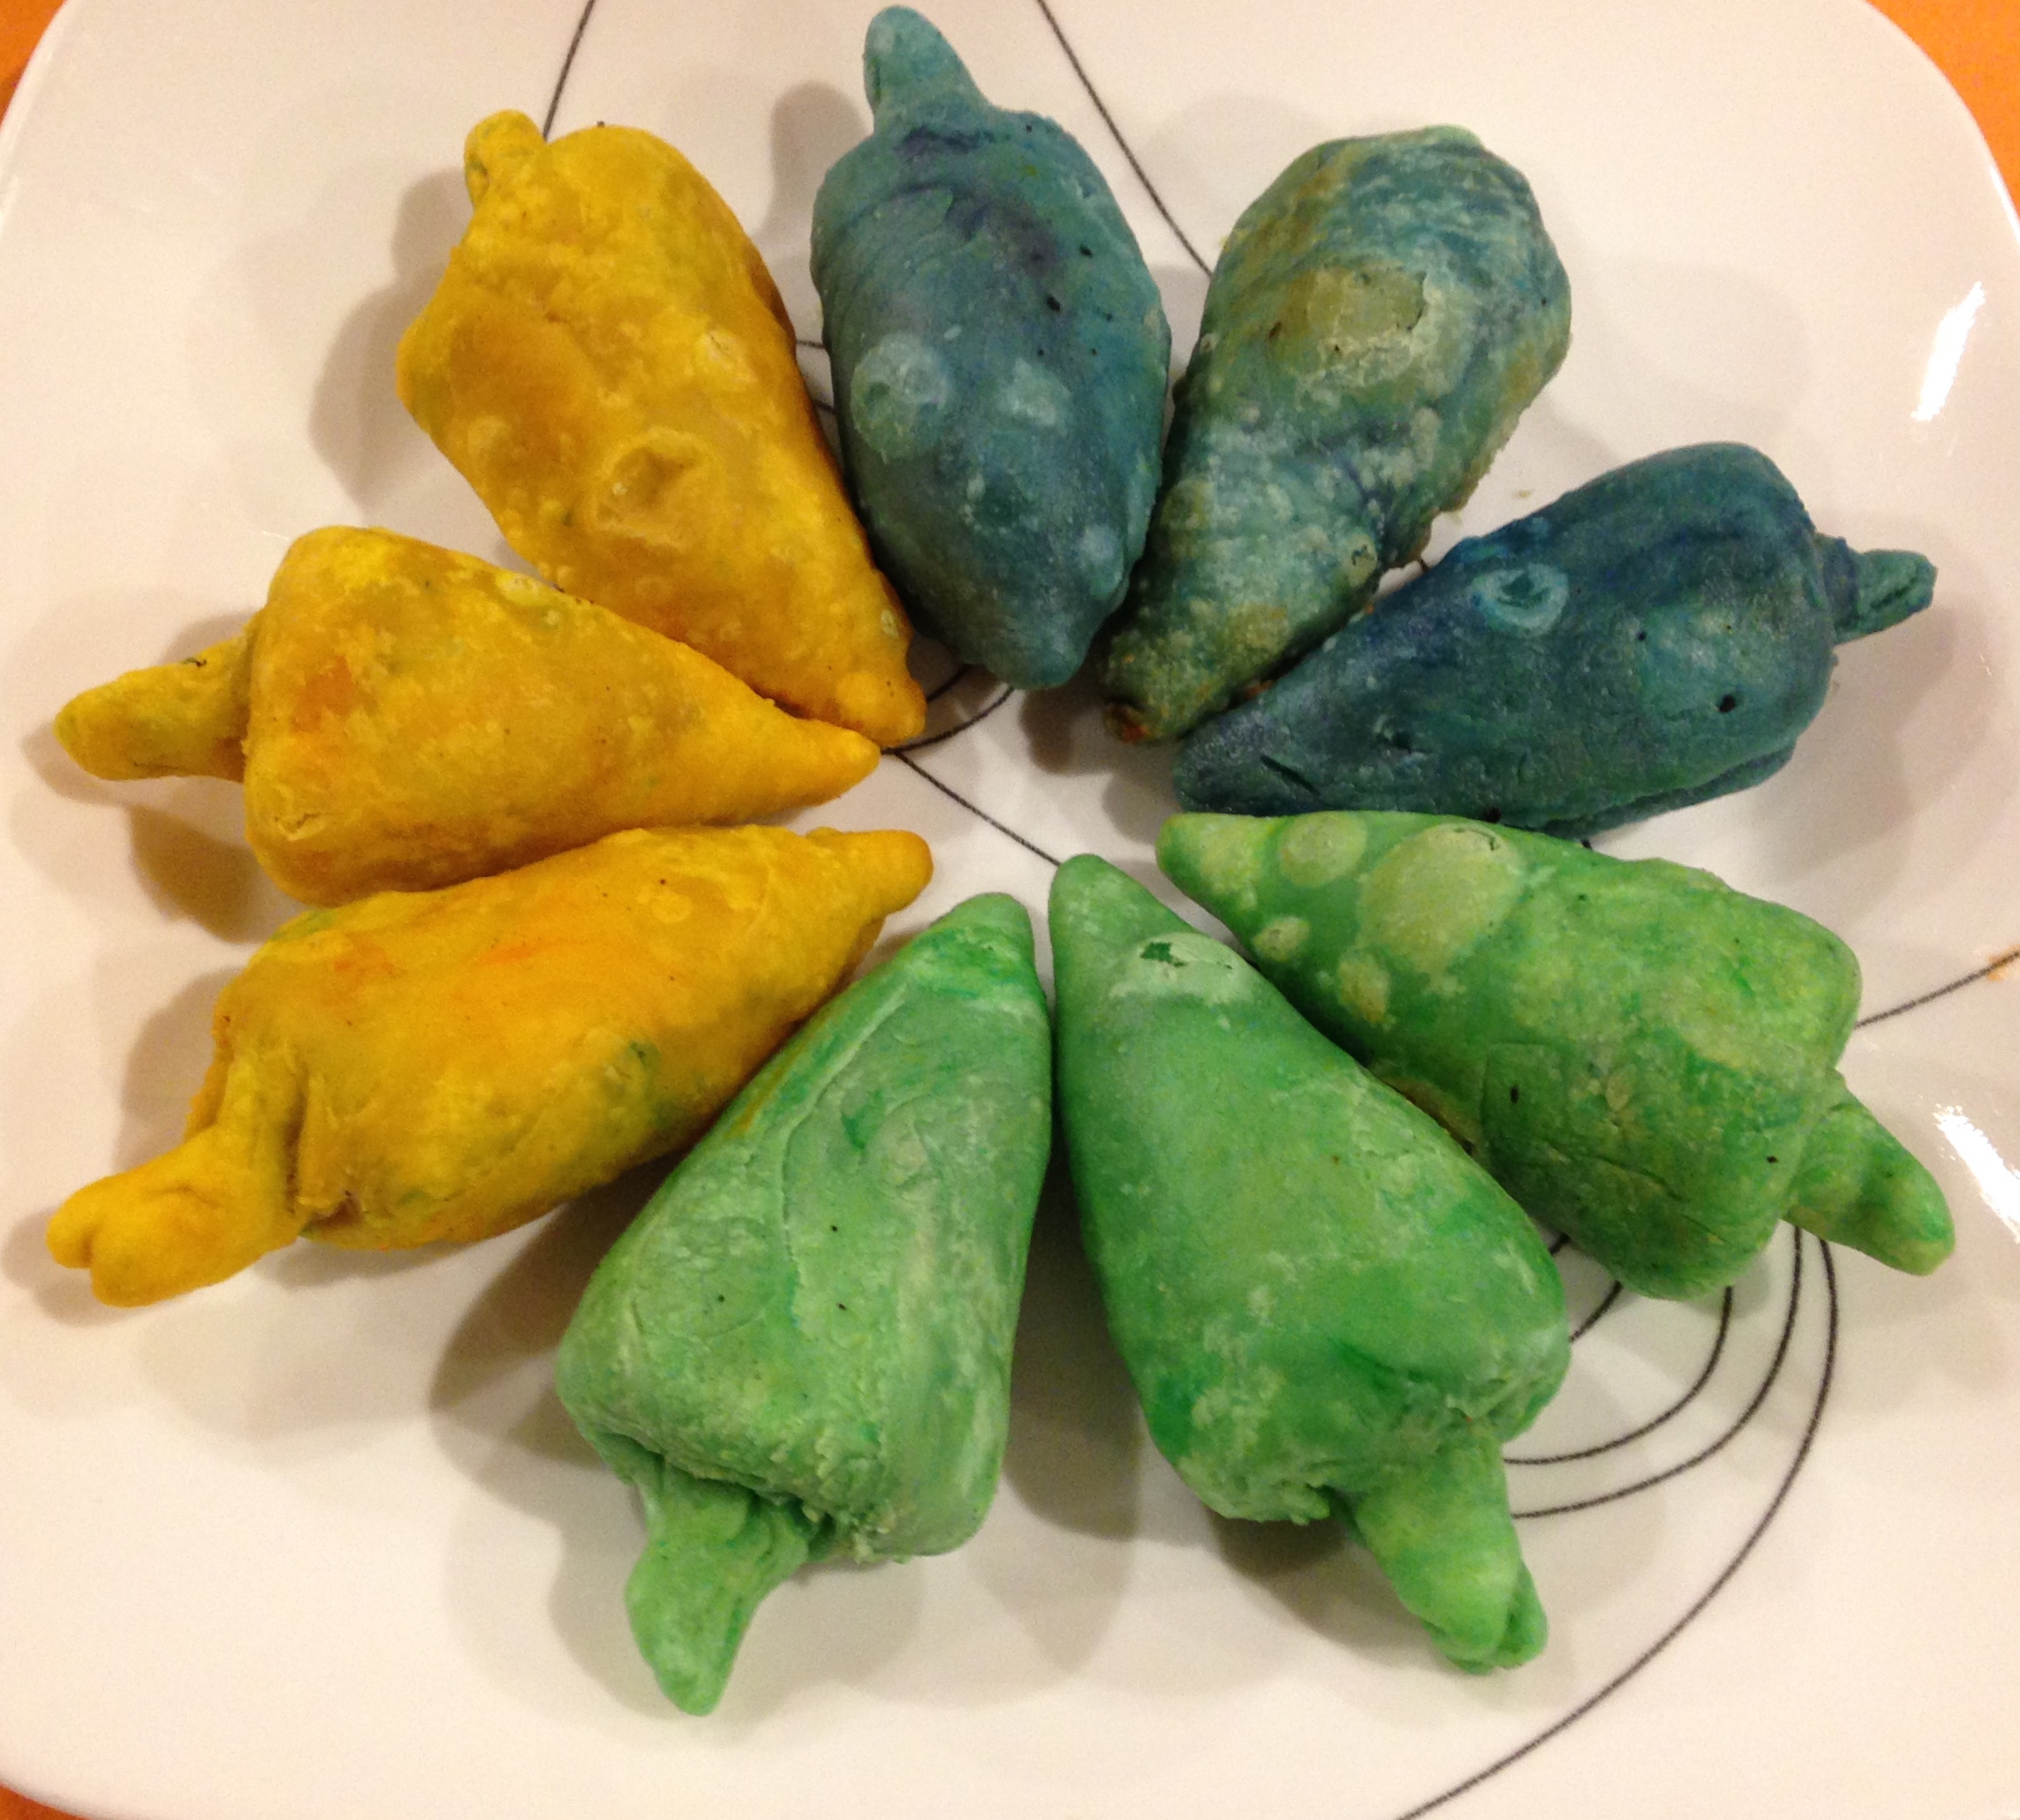
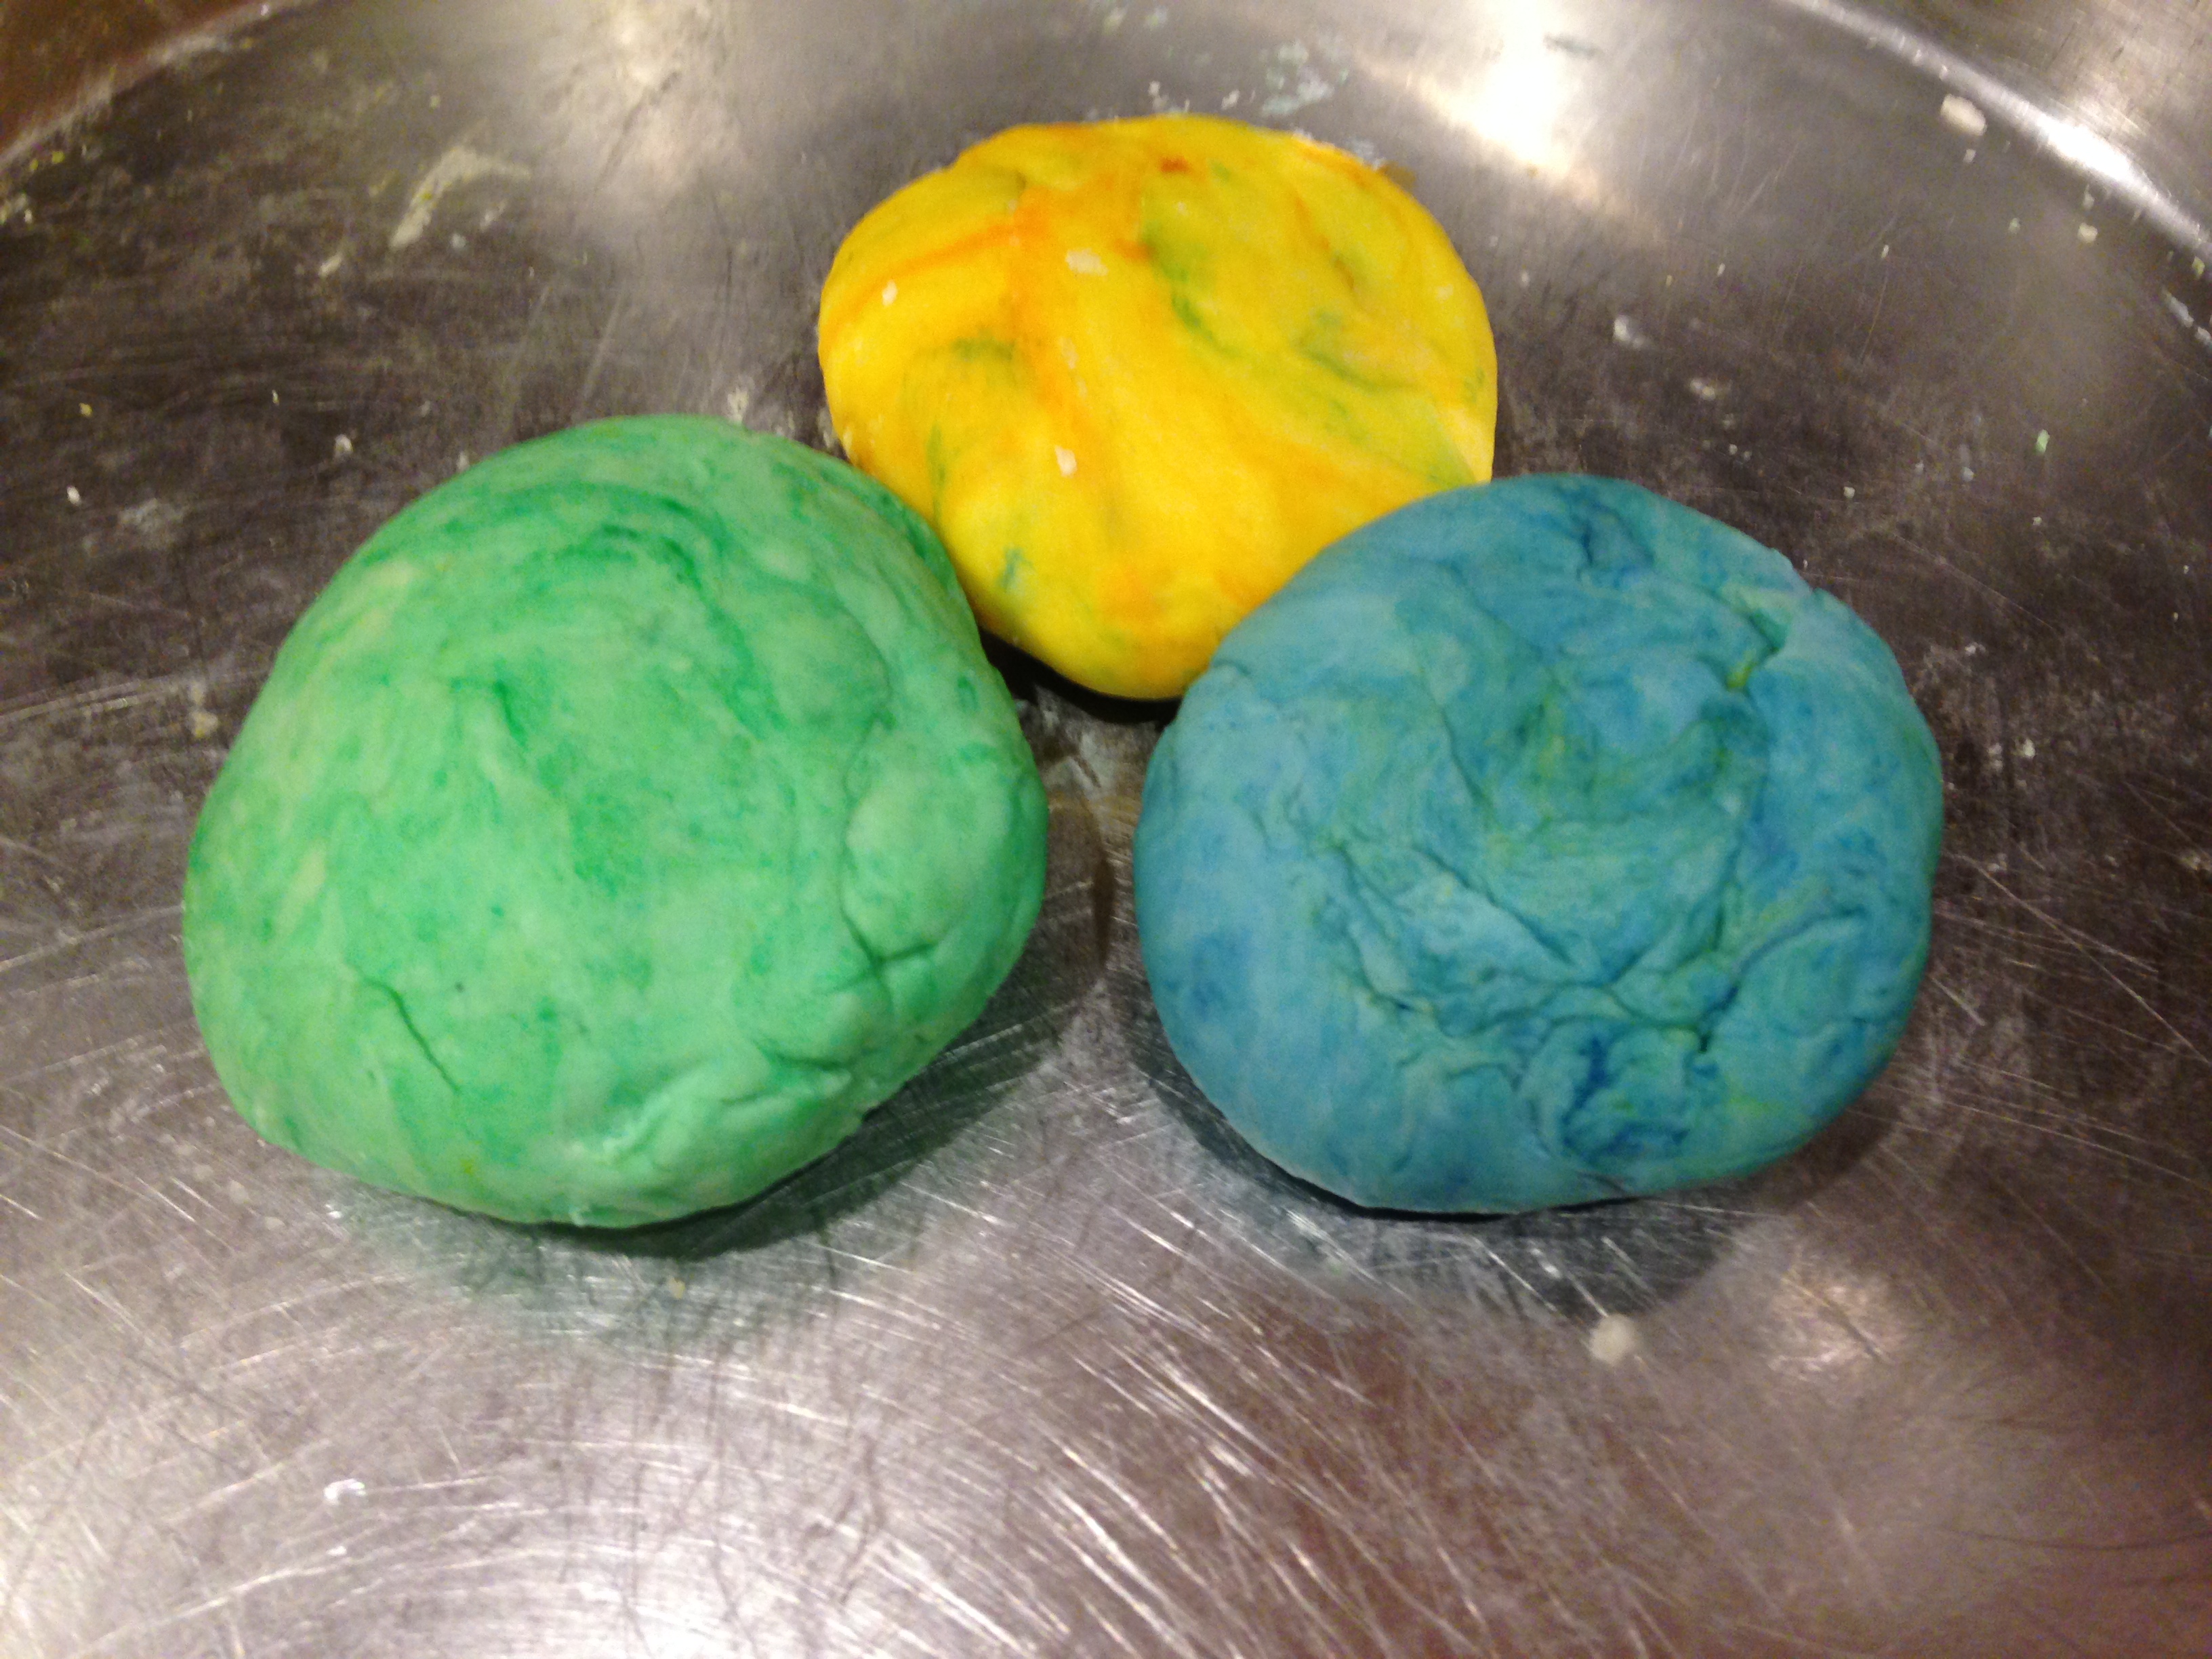
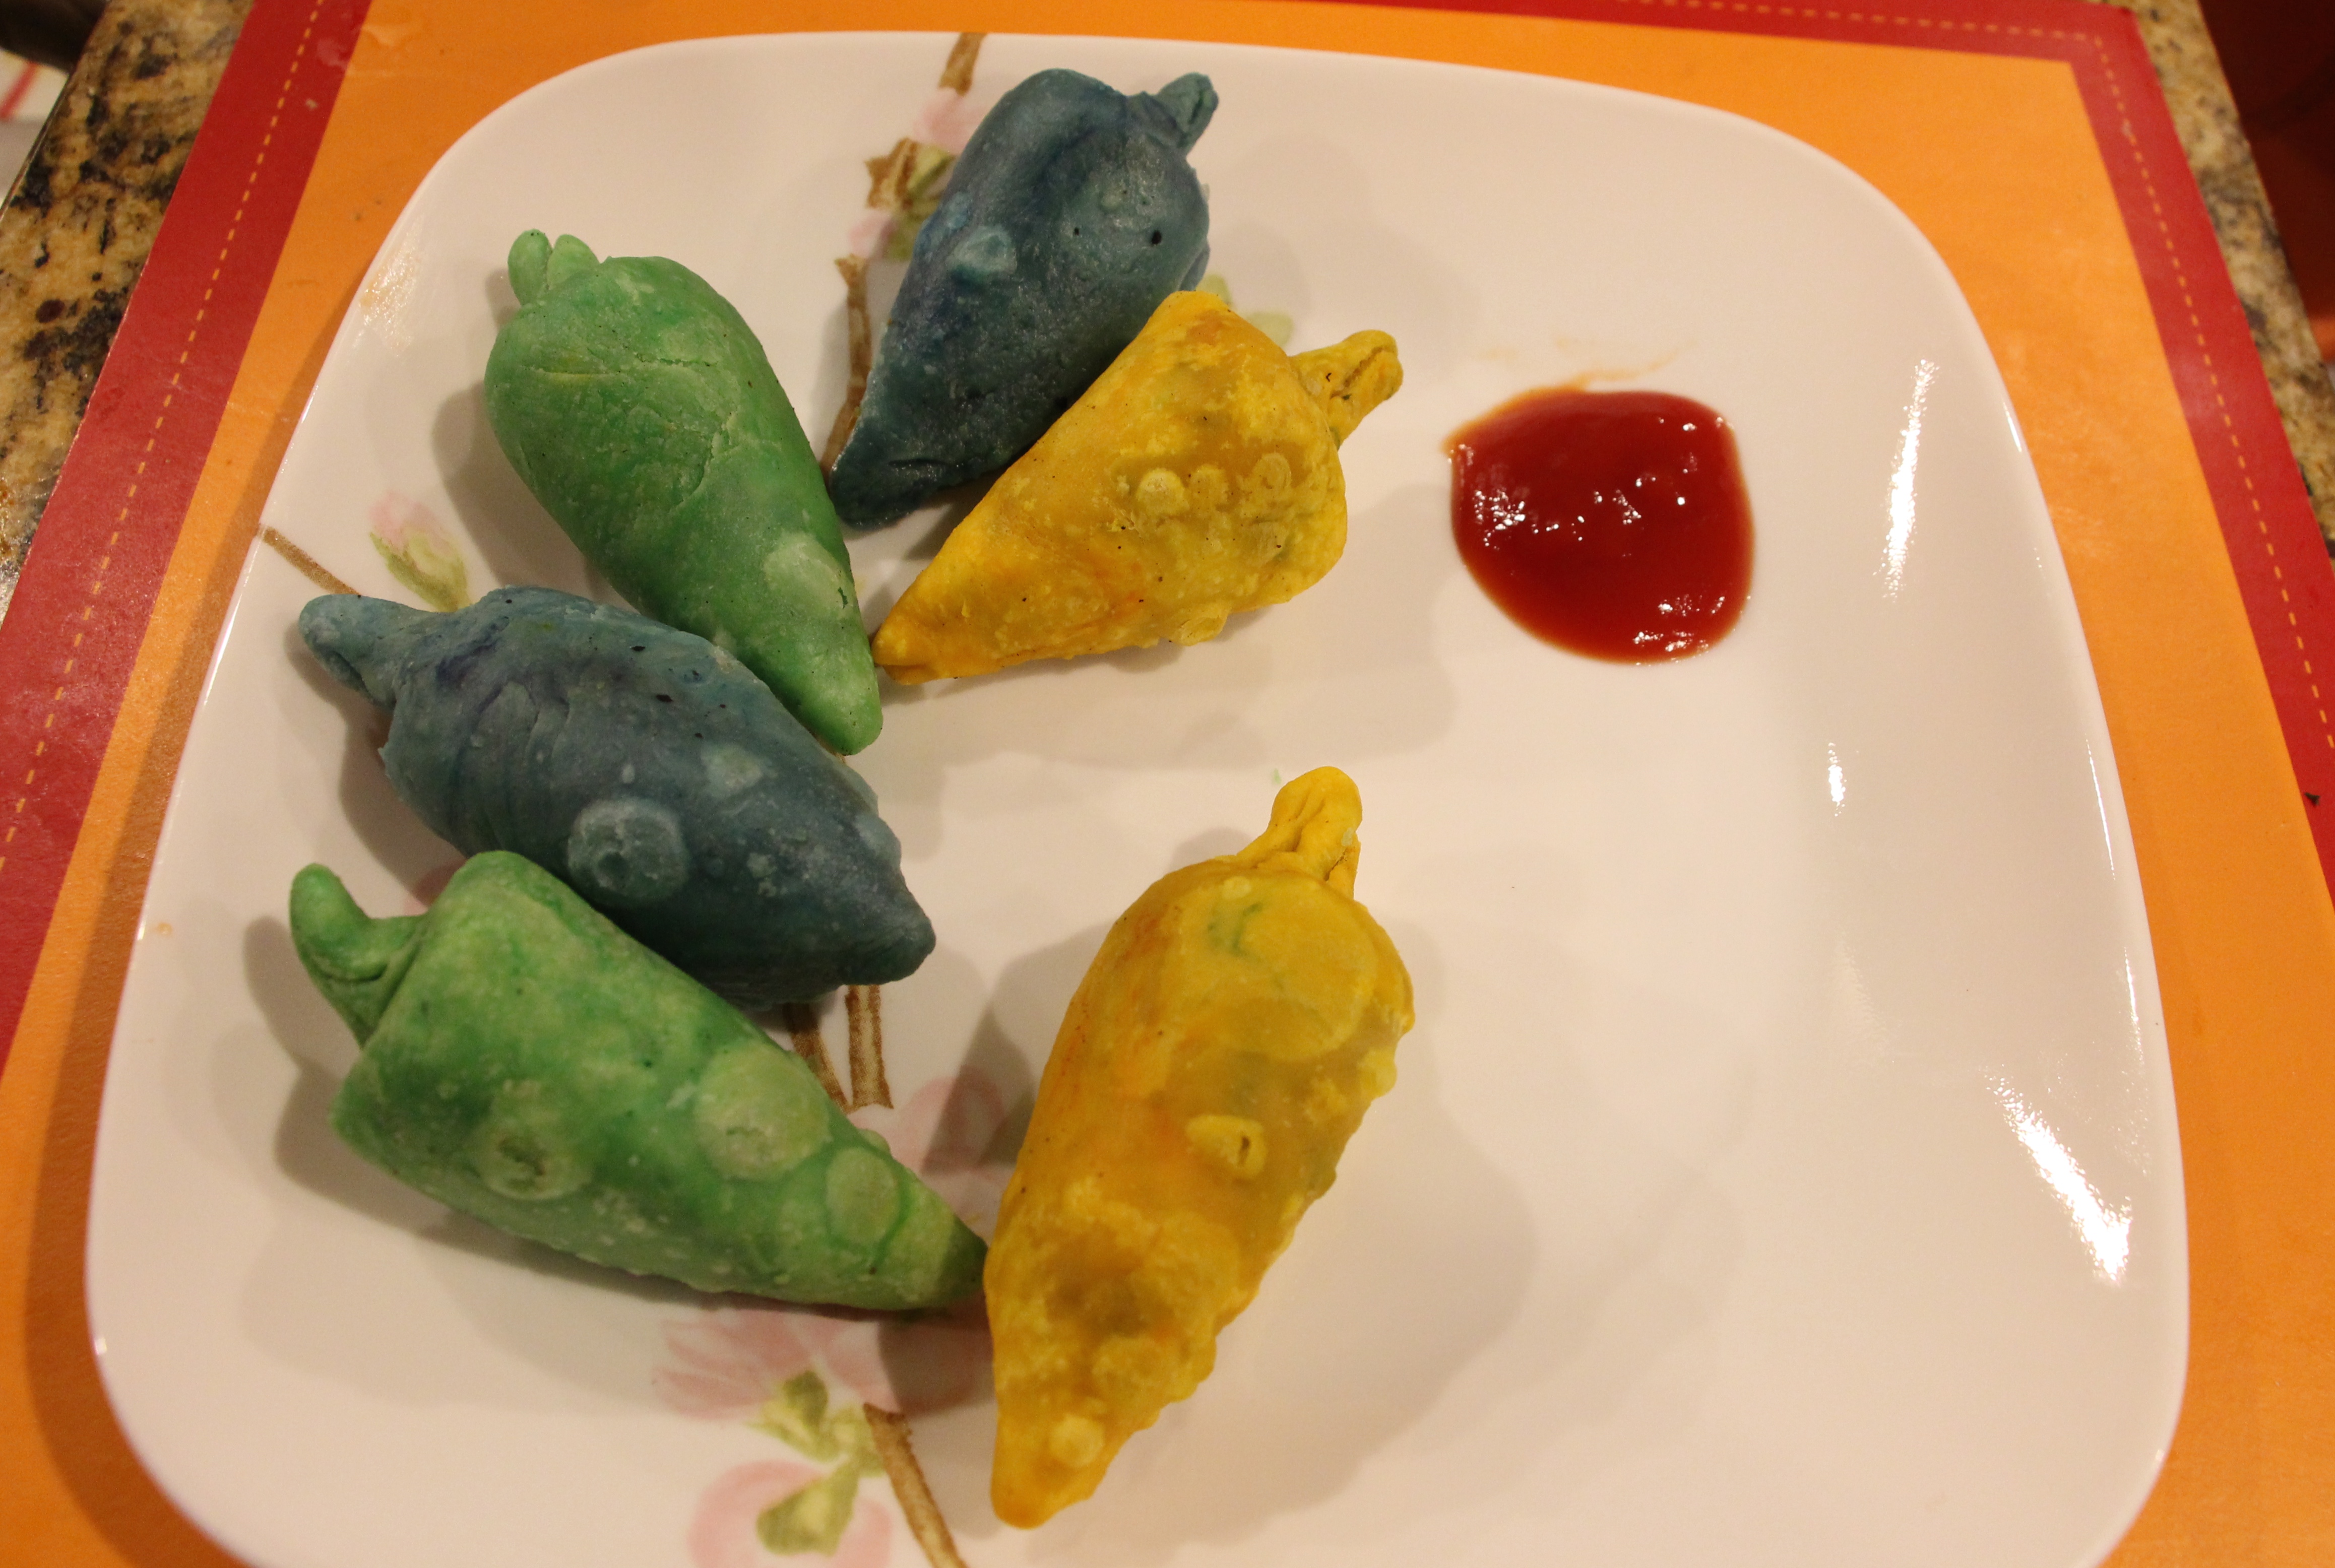
Stuffed Mirchi Peppers can easily fool some into thinking that they are real raw chilies!! I owe my mother gratitude for introducing me to this wonderful recipe as a young kid, which I made it more colorful by using more colors in sync with India’s Flag having Orange, Blue and Green. Yellow Stuffed Mirchi Peppers representing the orange in the Indian Flag.

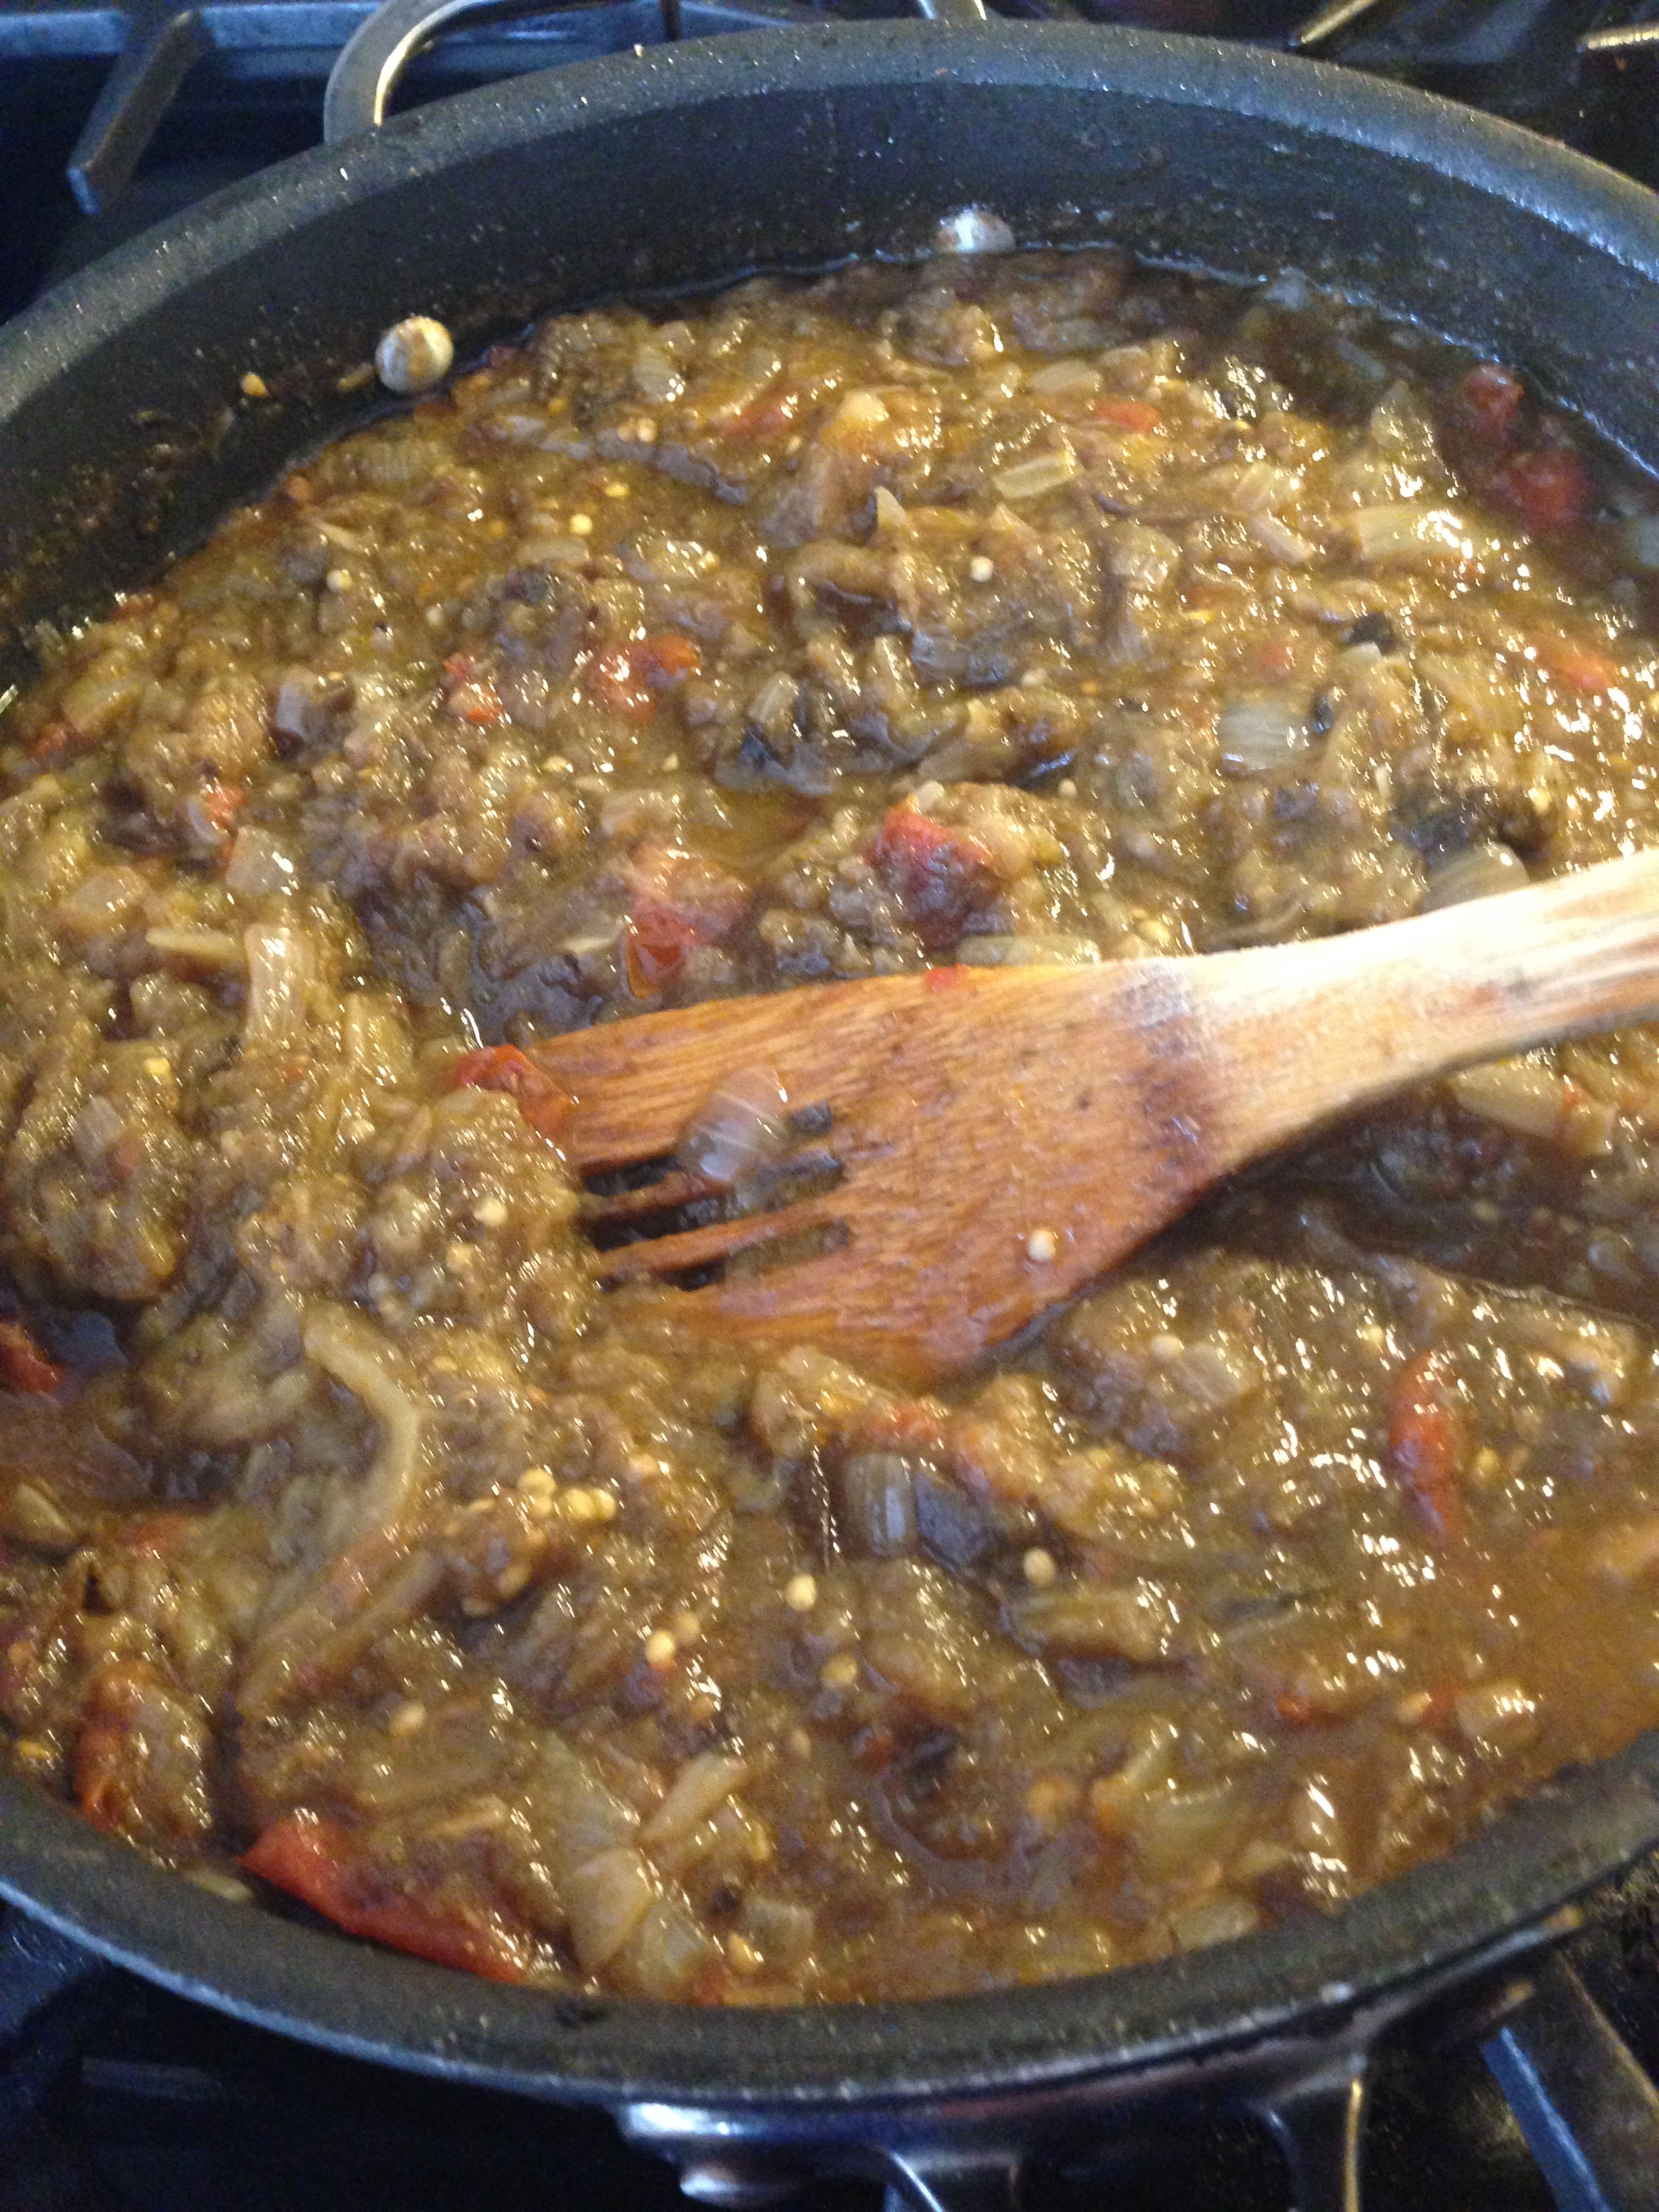
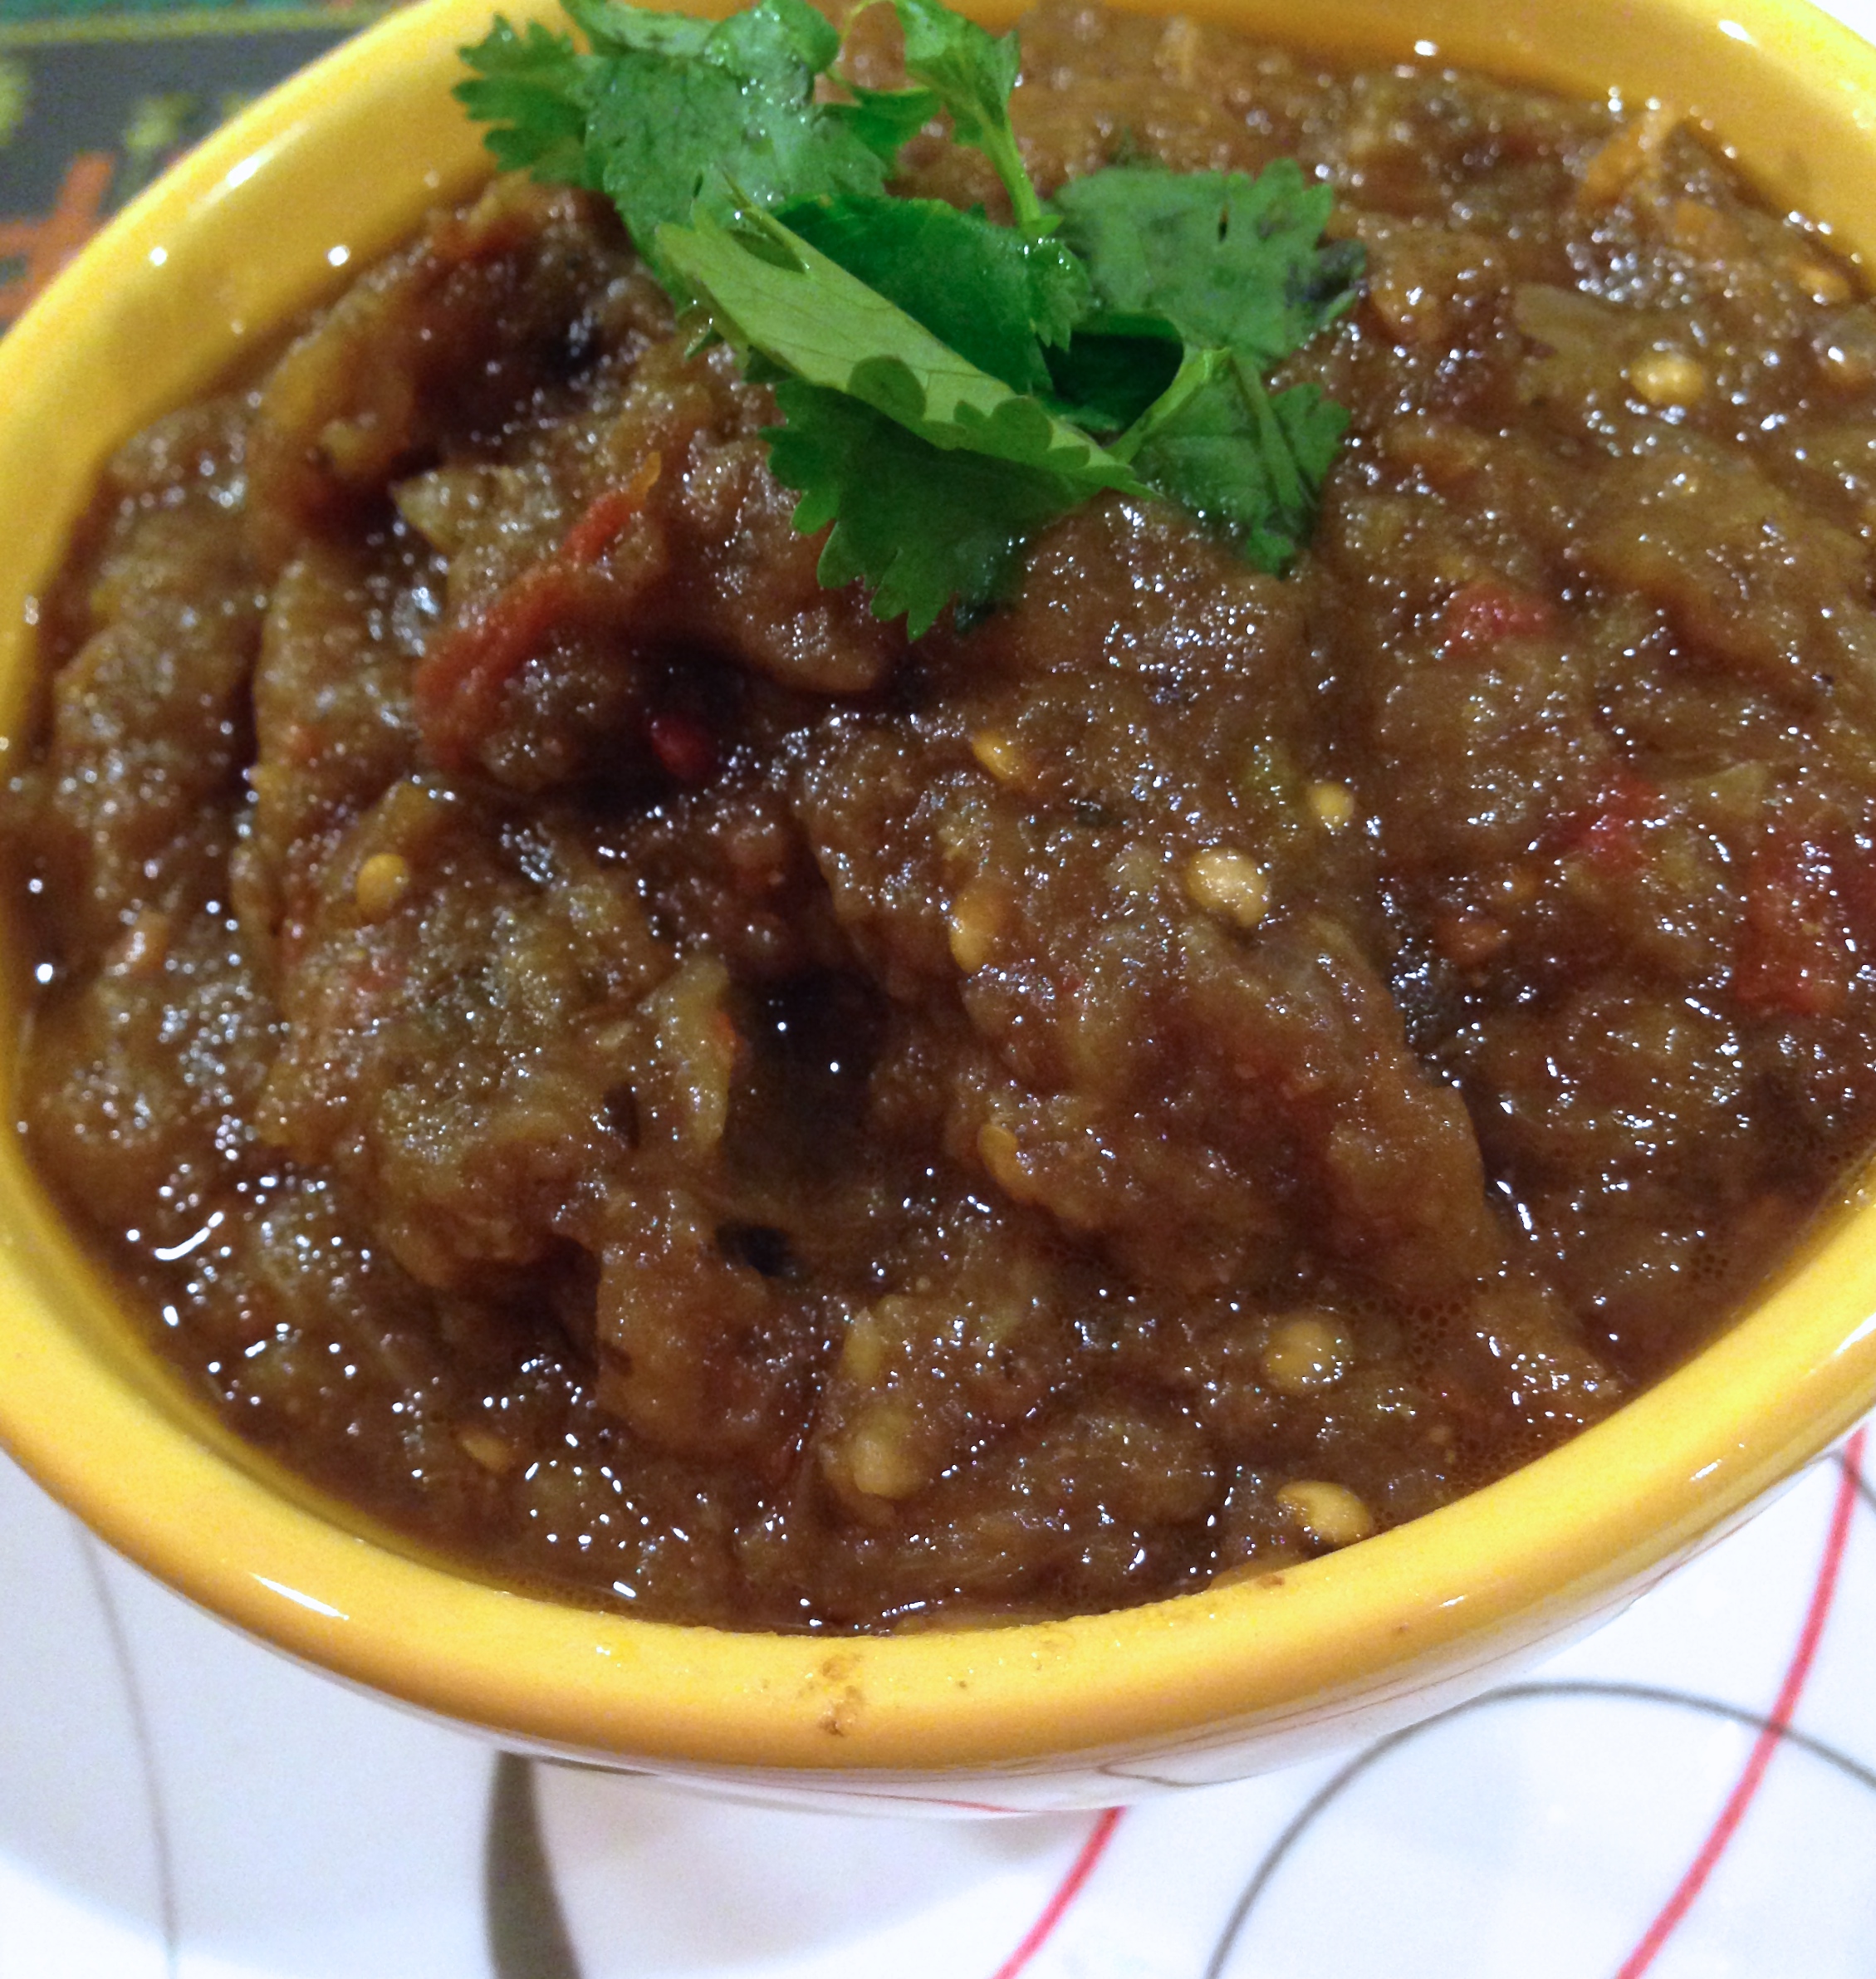
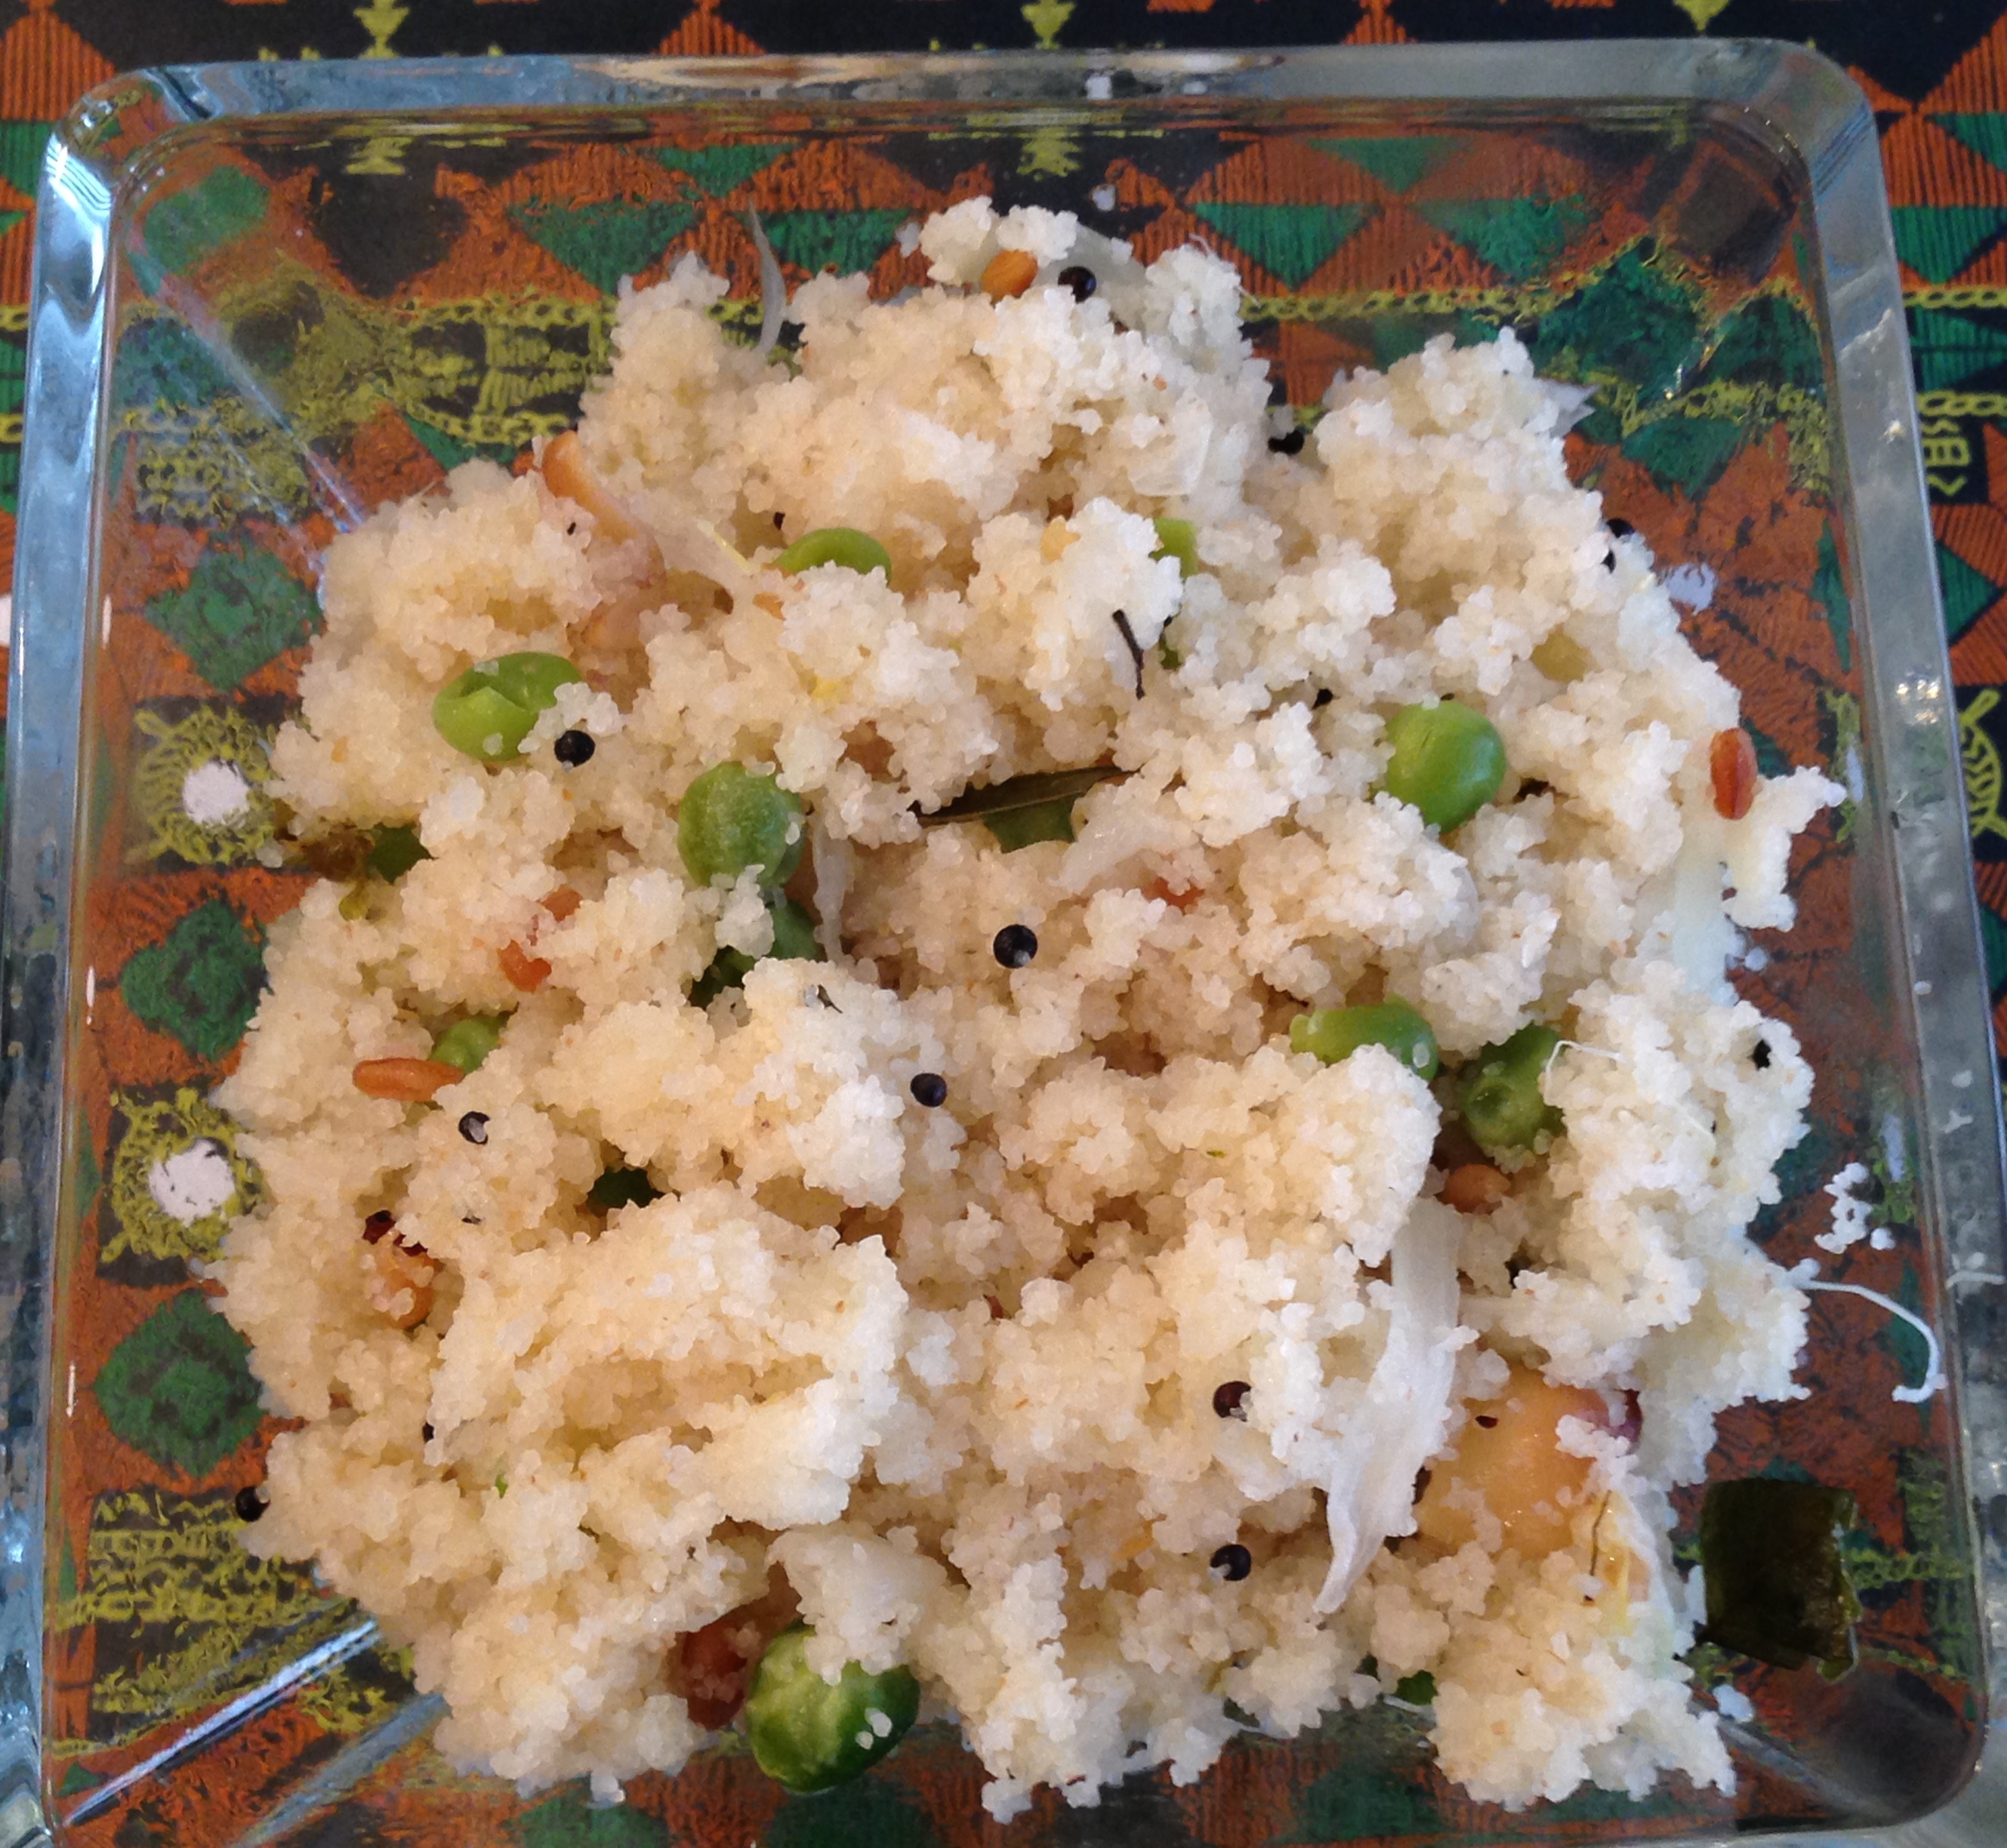
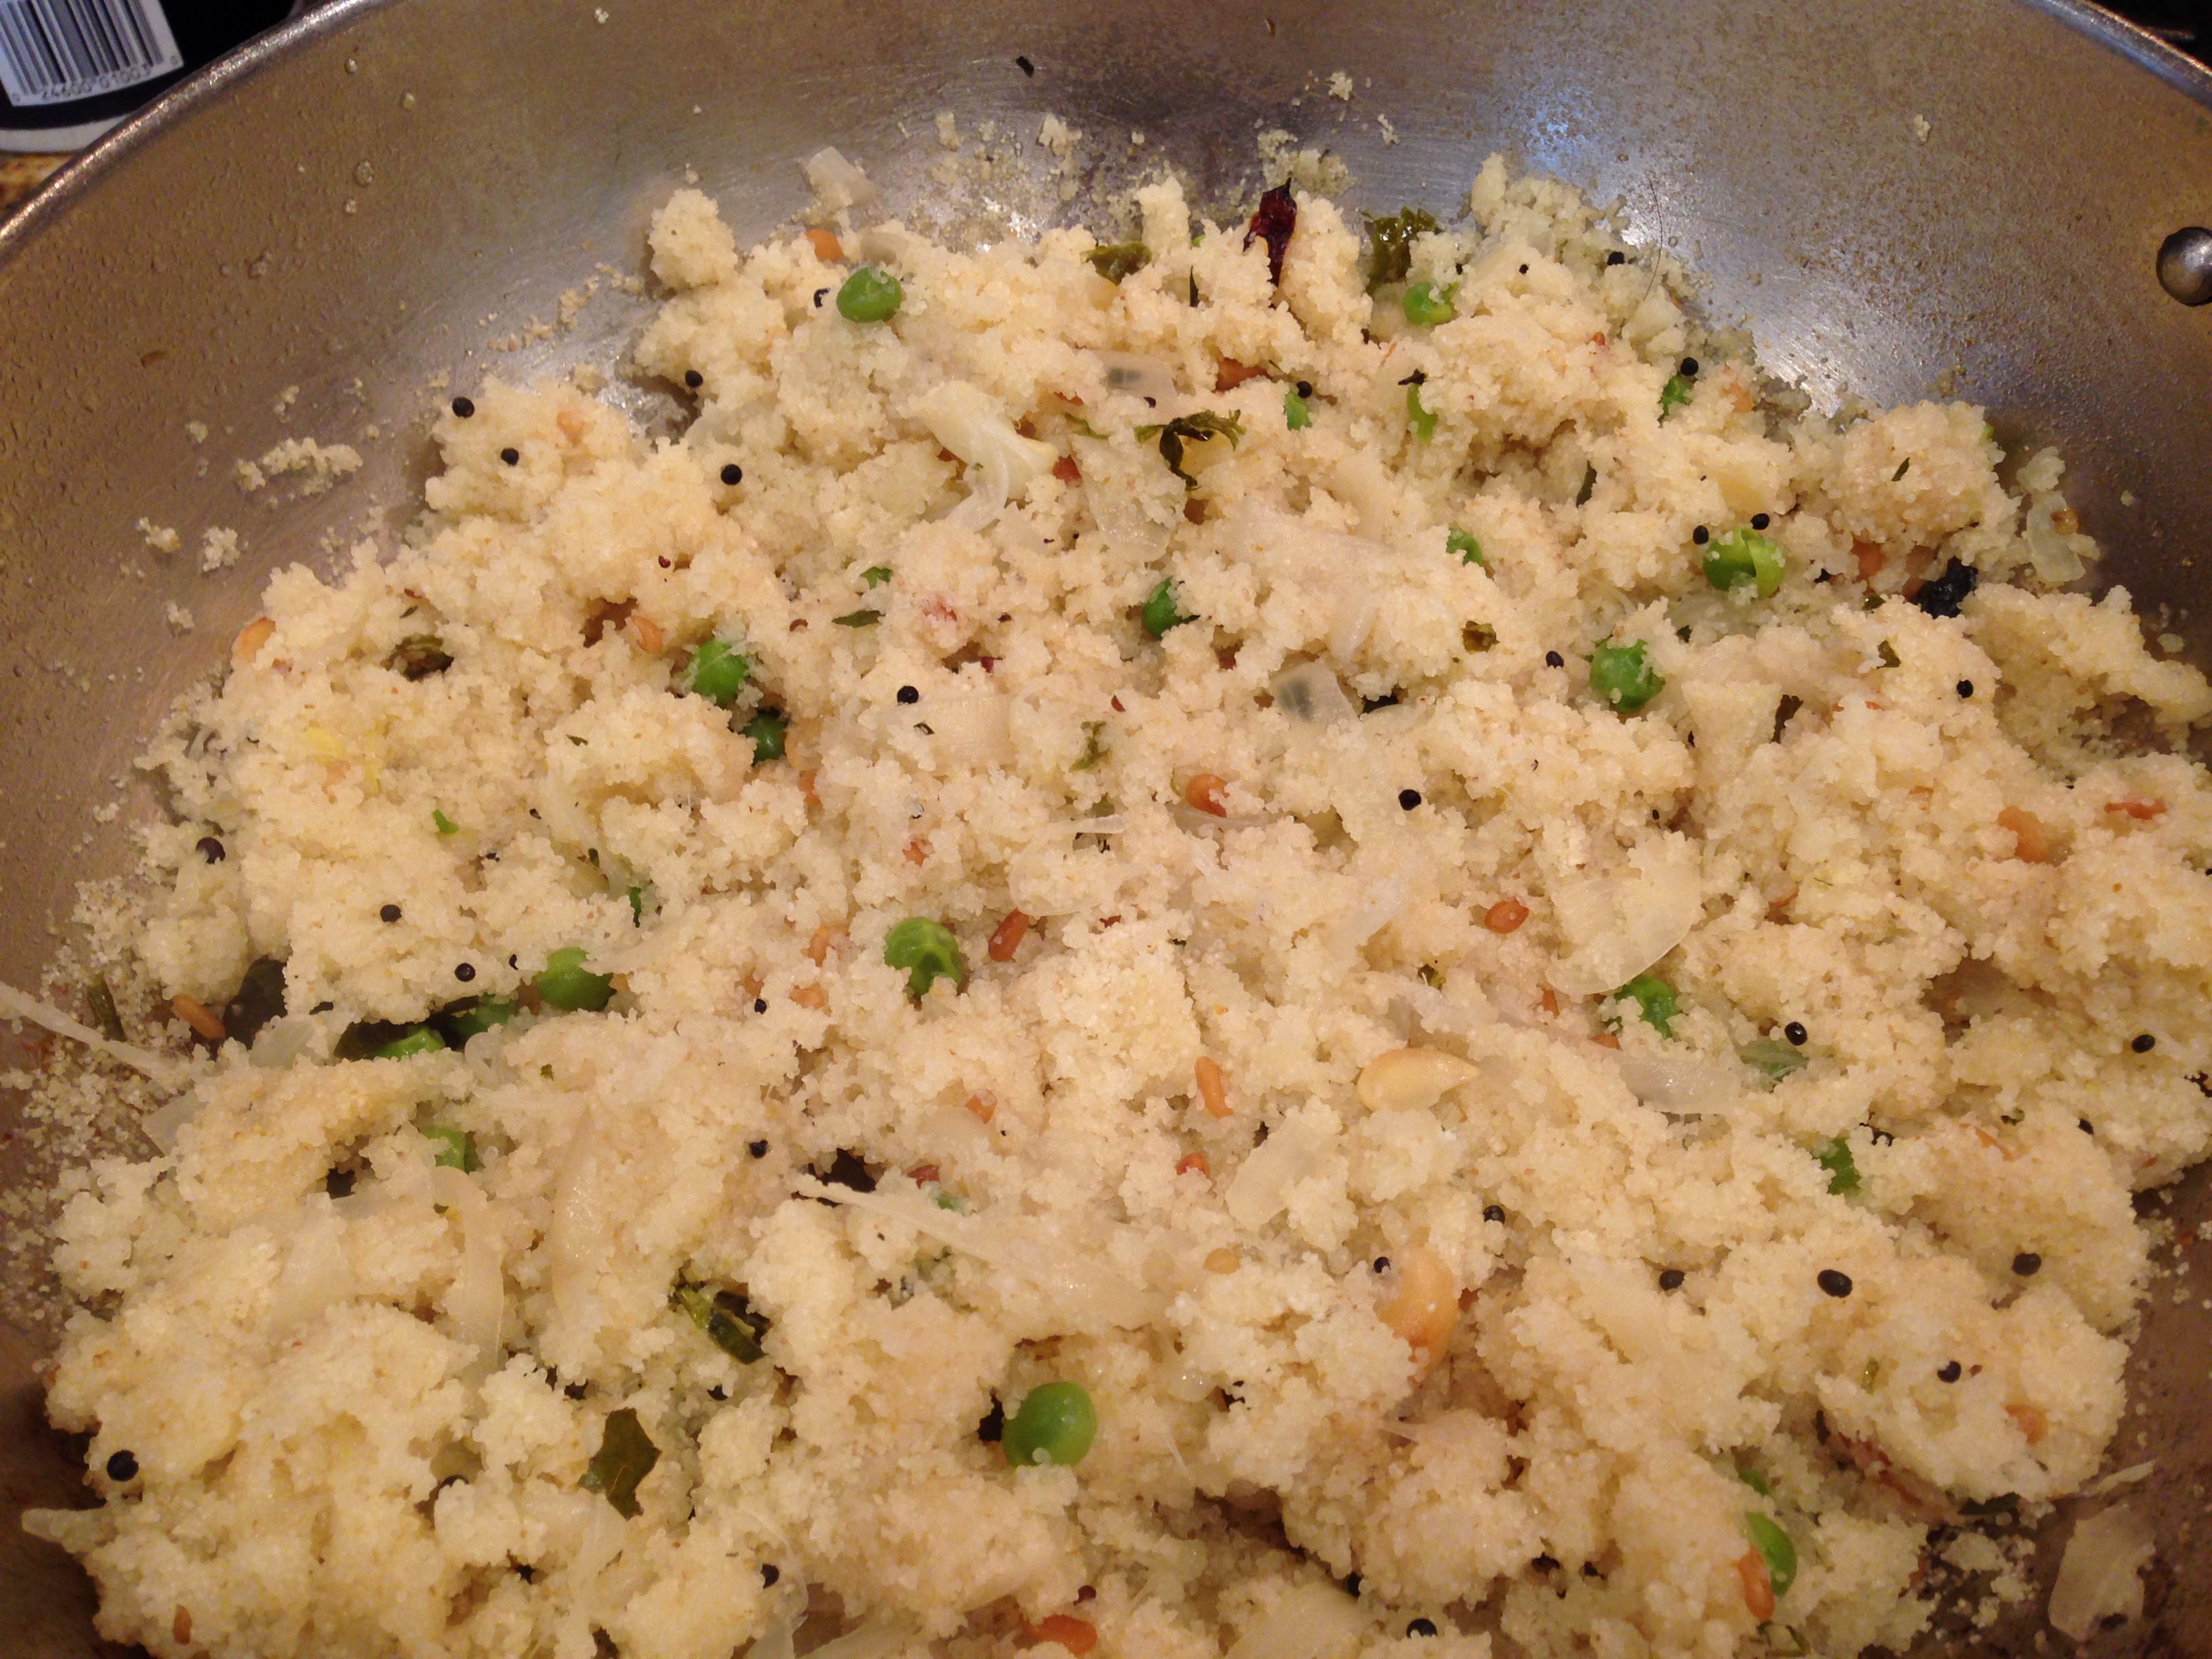
The stuffing is made of rice flakes and peas with loads of green chilies, grated fresh coconut and coriander. It is quick to make, and one of the few recipes, that uses a totally different stuffing from the usual peas, potatoes,cheese or lentil based stuffing. This stuffing is definitely arising from a Jain household that traditionally does not consume any root vegetables. I made this a year back for one such family visiting from India, and it was heartwarming to see their genuine appreciation for this recipe.

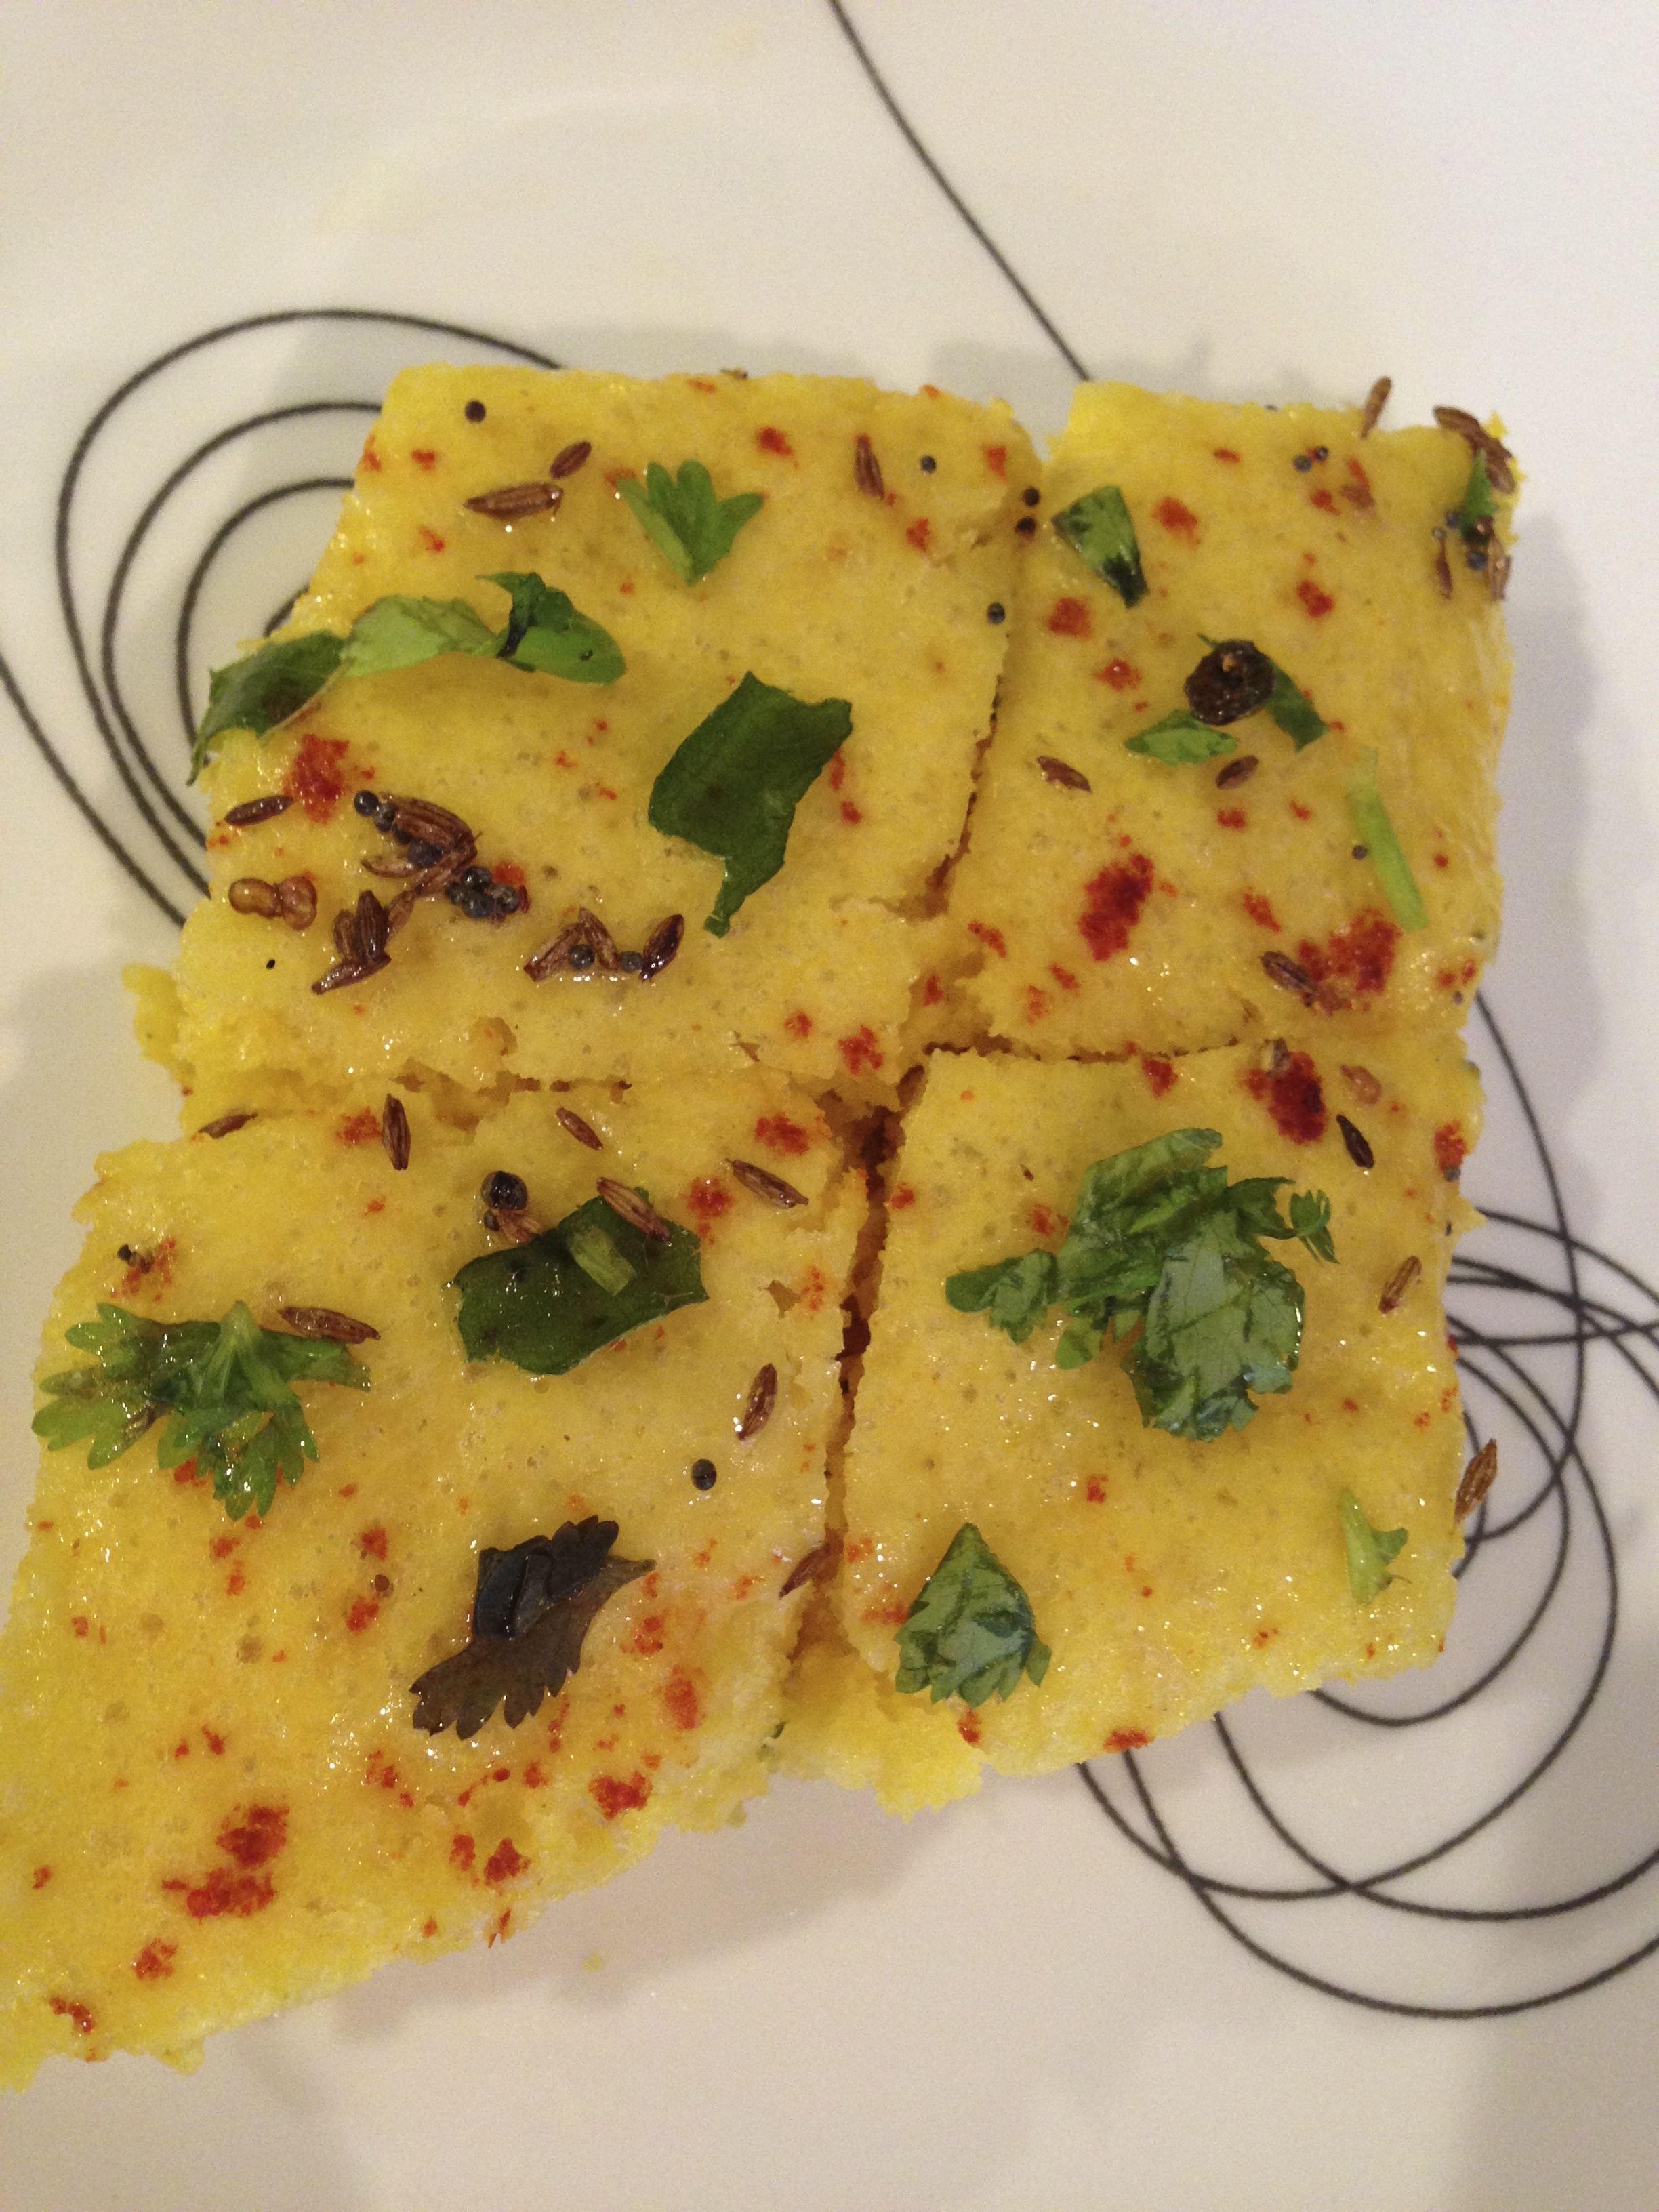
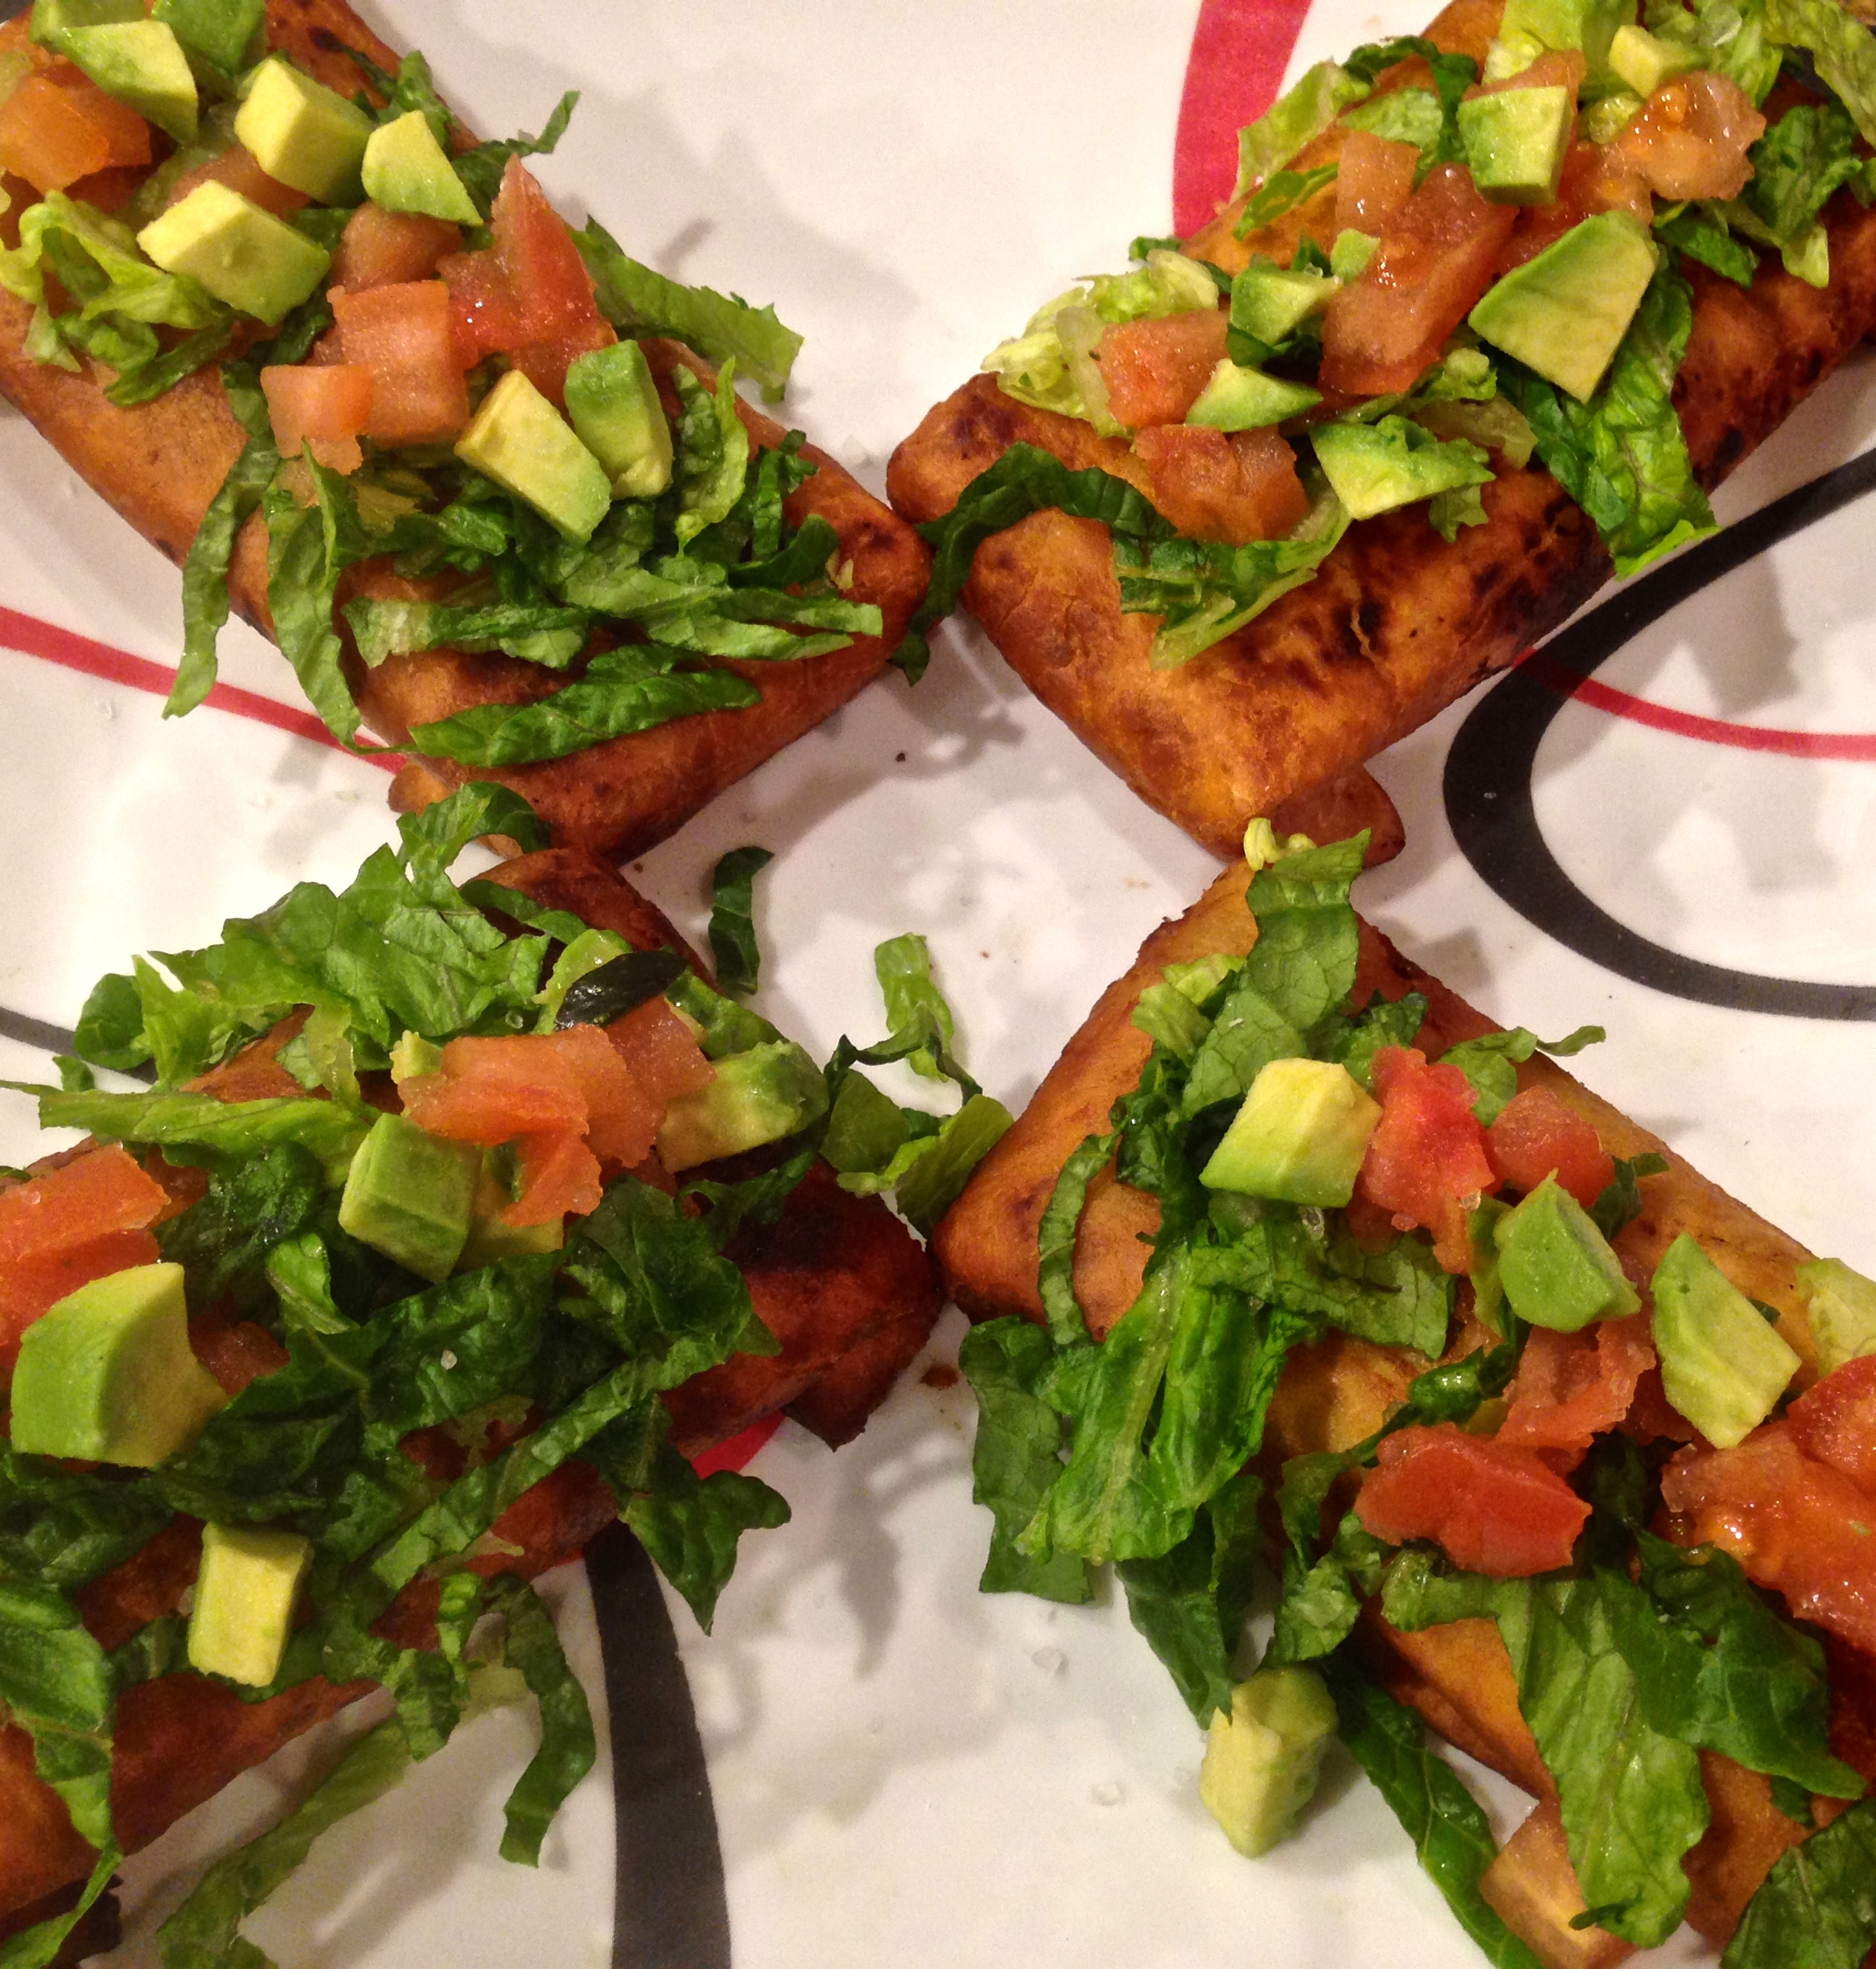
Stuffed Mirchi Peppers will surely catch the attention of all, for its effort, color, texture and taste of lemon and coconut flavoured spicy rice flakes stuffed inside mirchi peppers!!

Happy Republic Day to all my Indian Readers!!

Recipe makes 9-12 Stuffed Mirchi Peppers

Cooking time : 30 min

Prep time: 45 min

Ingredients[shopeat_button]

For the stuffing

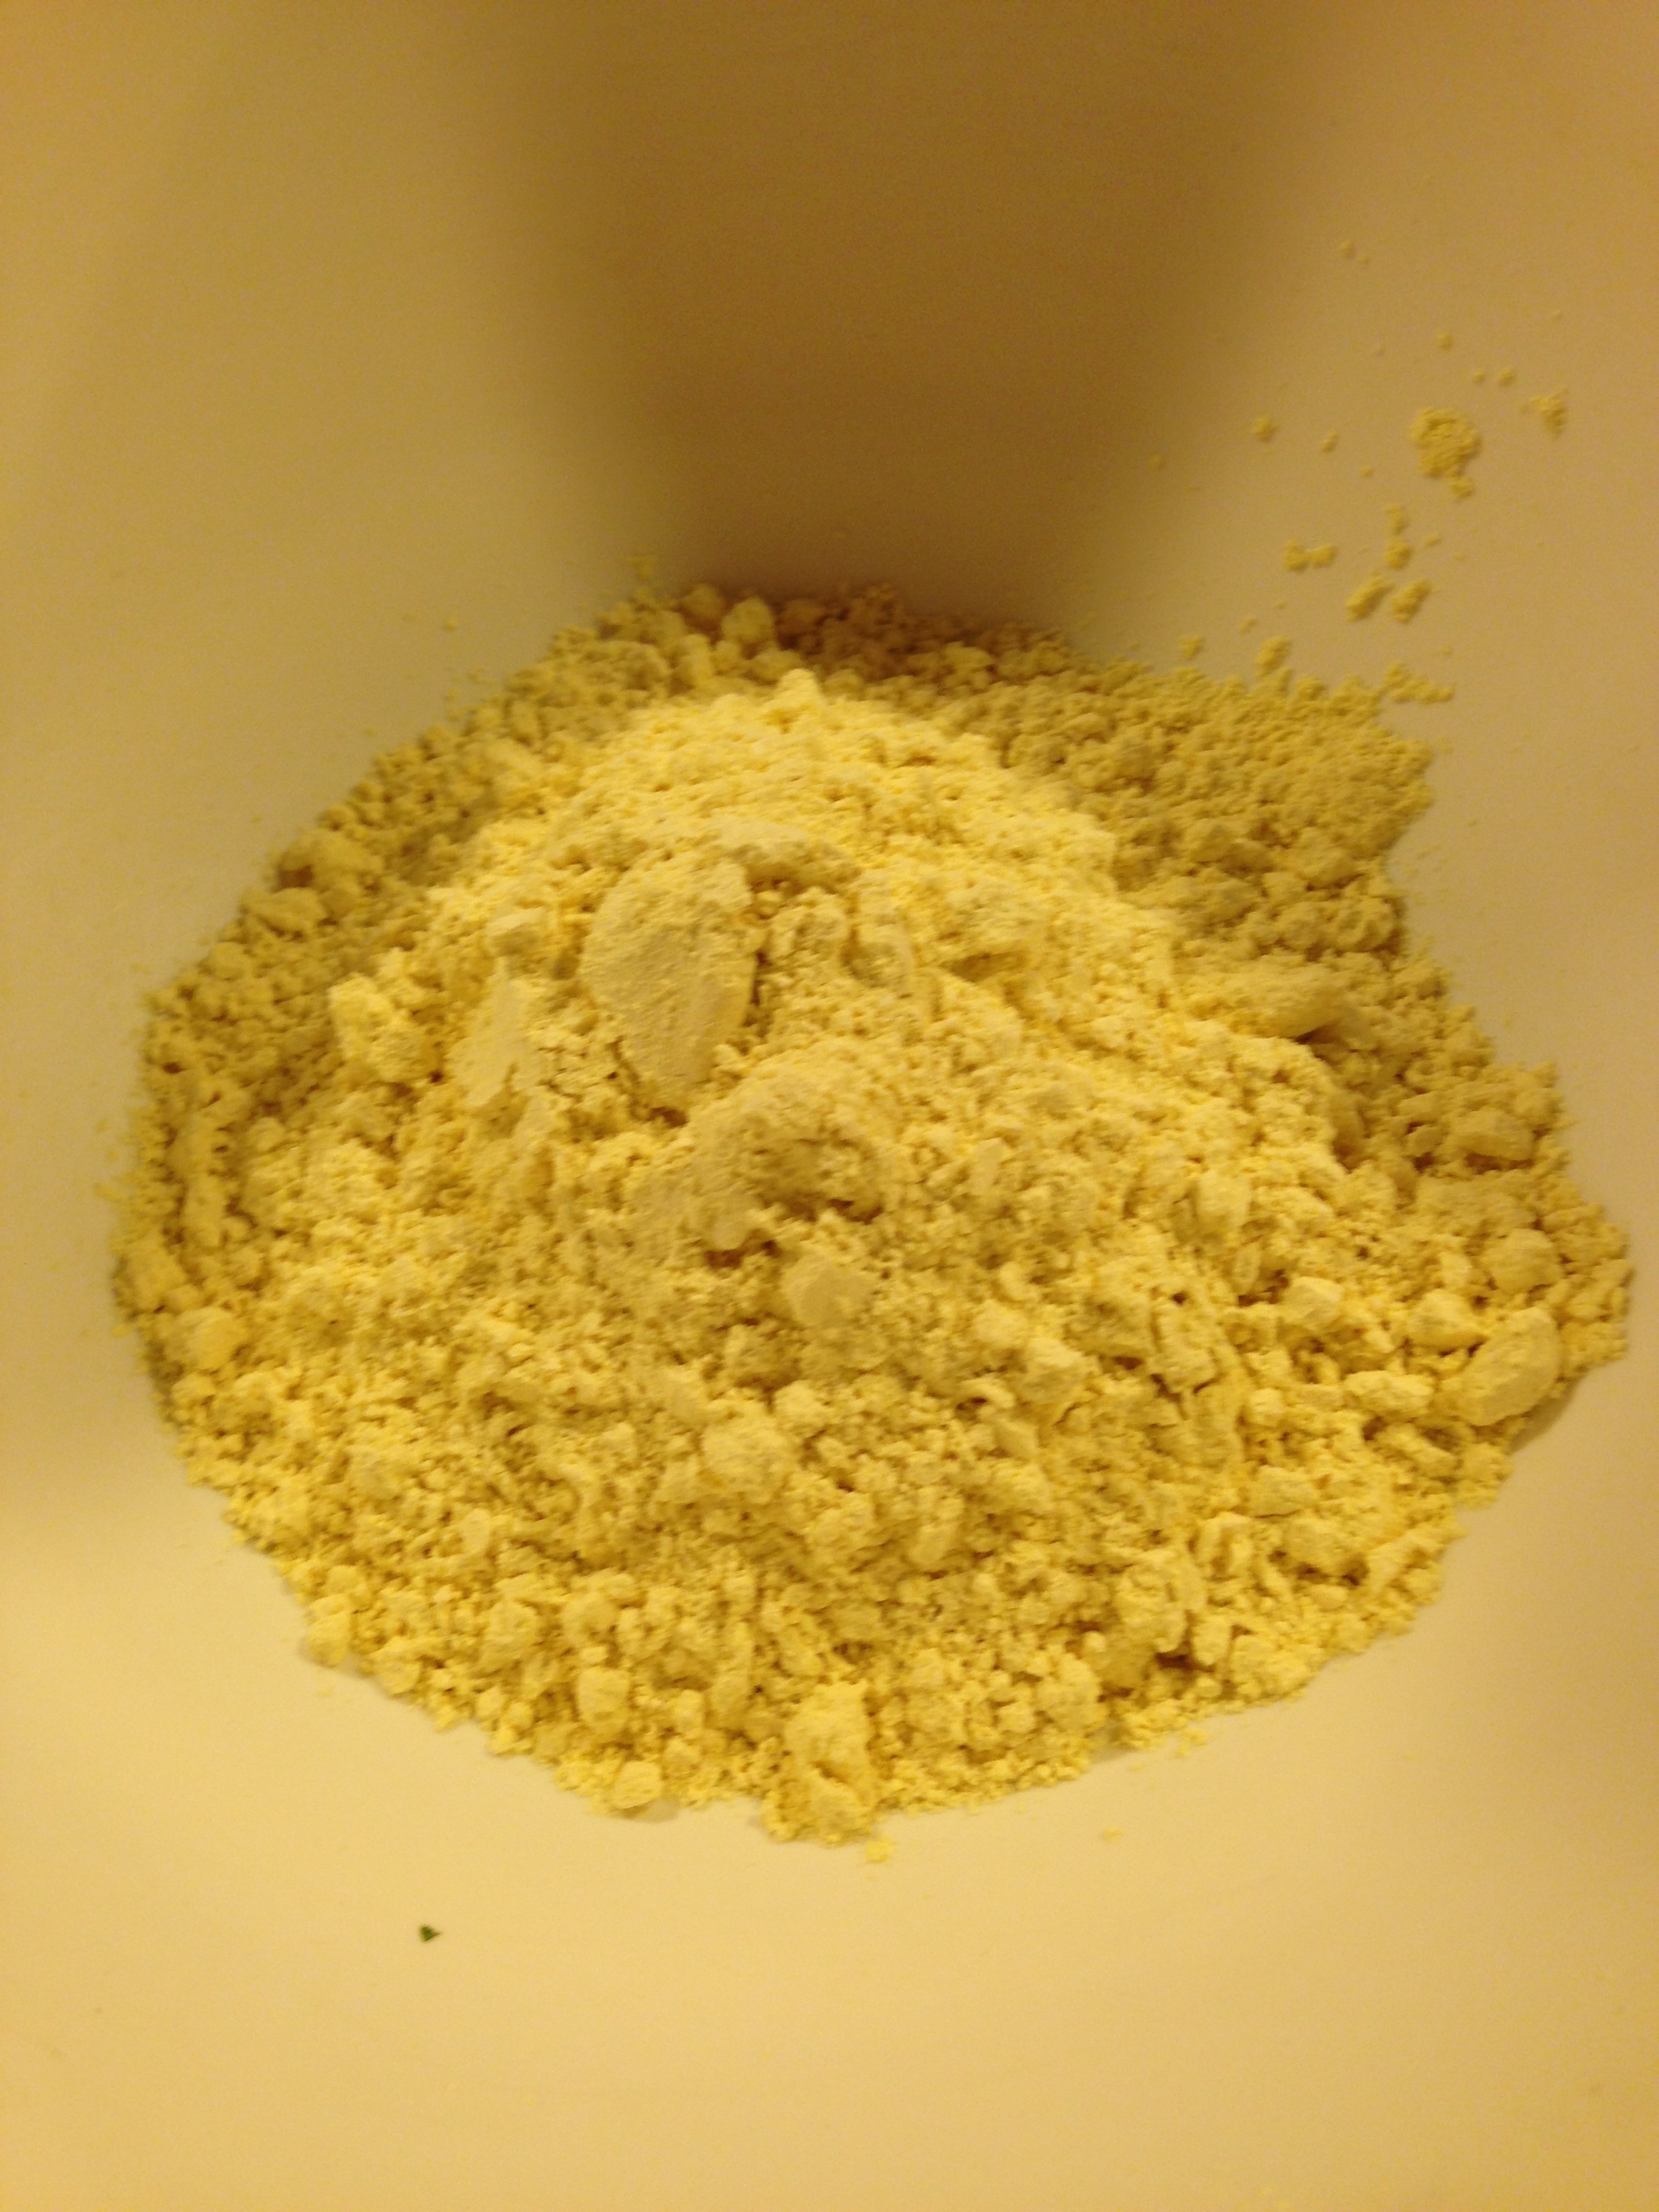
  • 1 cup poha rice flakes
  • 1 1/2  tbsp lemon juice
  • 3 tsp finely chopped hot chillies ( about 8-9 green kashmiri chillies)
  • 2 1/2 tbsp sugar
  • 1/2 cup green peas
  • 2 tbsp chopped coriander
  • 3 tbsp fresh grated coconut(optional)
  • 1/4 tsp black pepper powder
  • salt to taste
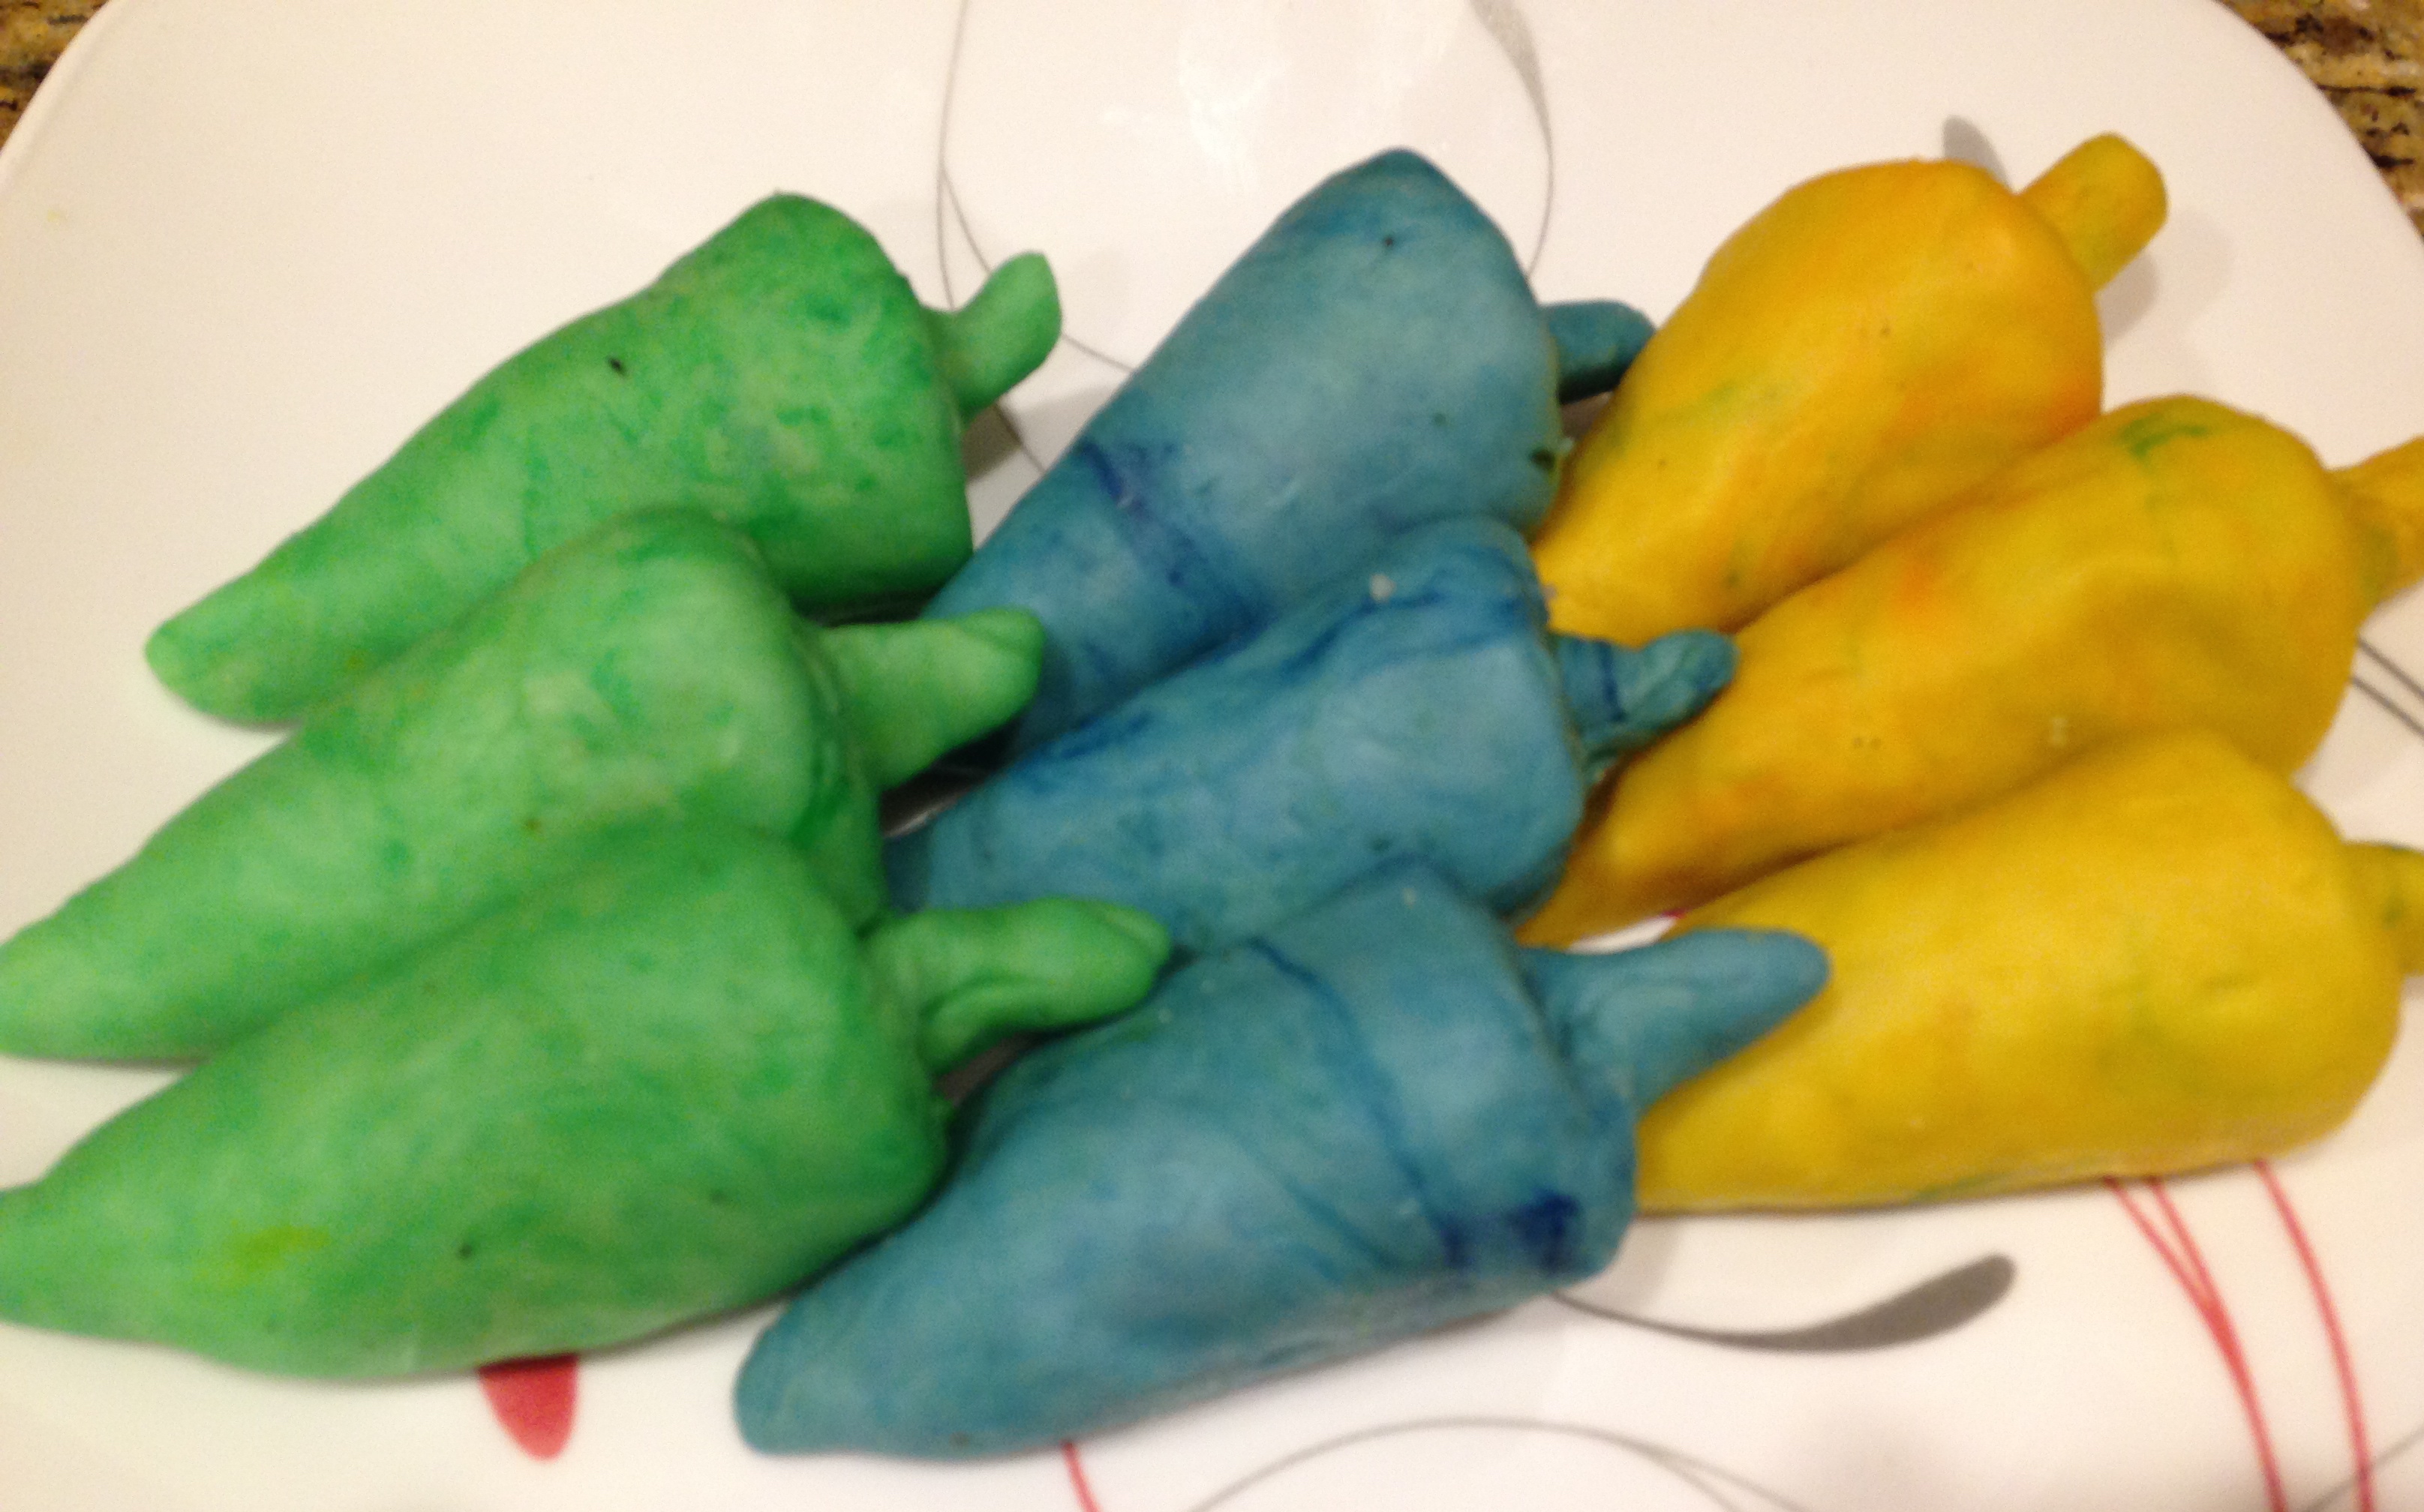
  • food color ( blue/yellow/green)
  • 4 tbsp spinach puree as an alternative for all green colored mirchi peppers

For the cover

  • 1 cup maida or all purpose flour
  • 2 tbsp oil ( heated for 30 sec in microwave)
  • Salt to taste
  • Water to bind about 3/4 cup
  • Food color ( blue/green/yellow) (optional)
  • Alternatively puree of spinach 3-4 tbsp to give it a green color(optional) Reduce the water level needed to bind the dough, if using puree.
  • Can be made without puree or color too.
  • Oil for deep frying

For Garnish/Accompaniment

  • Chat Masala ( MDH brand)
  • Tomato Ketchup/Chutney


Method
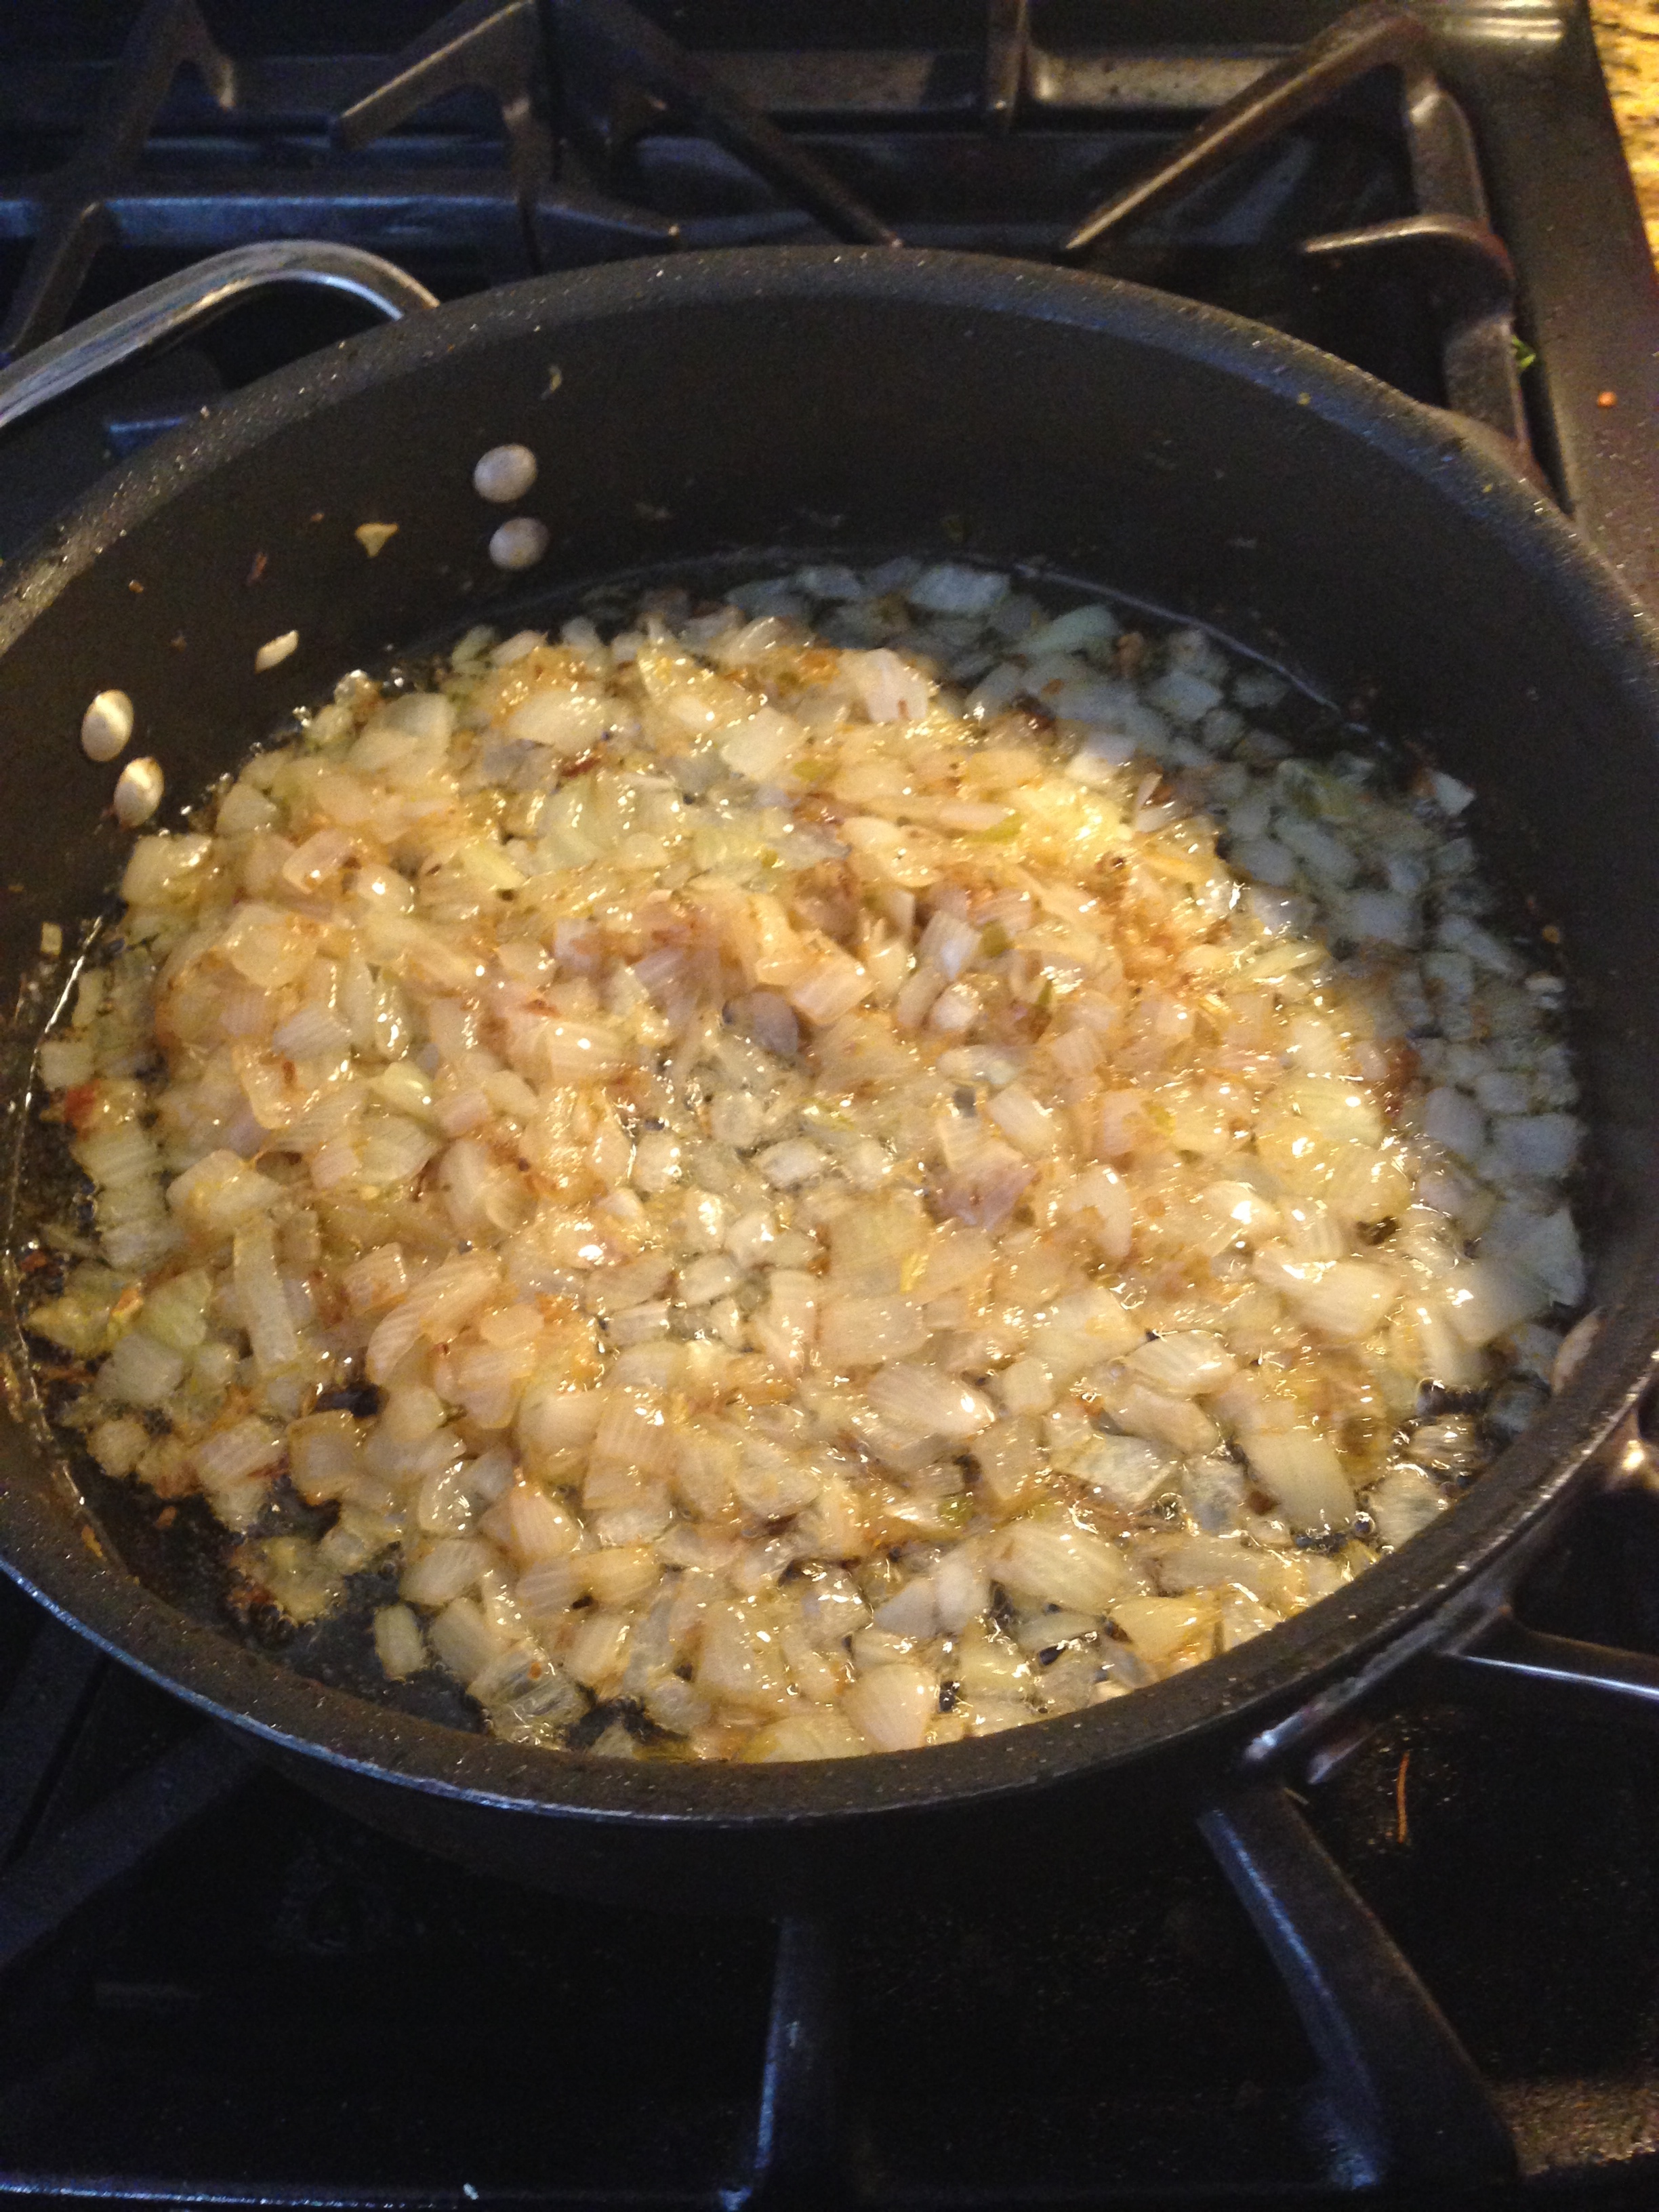
  • Microwave frozen peas in a bowl of water  for a minute and half.
  • Drain the excess water from the peas.
  • Wash the rice flakes very gently in water, three times, and drain all the water.

IMG_2228

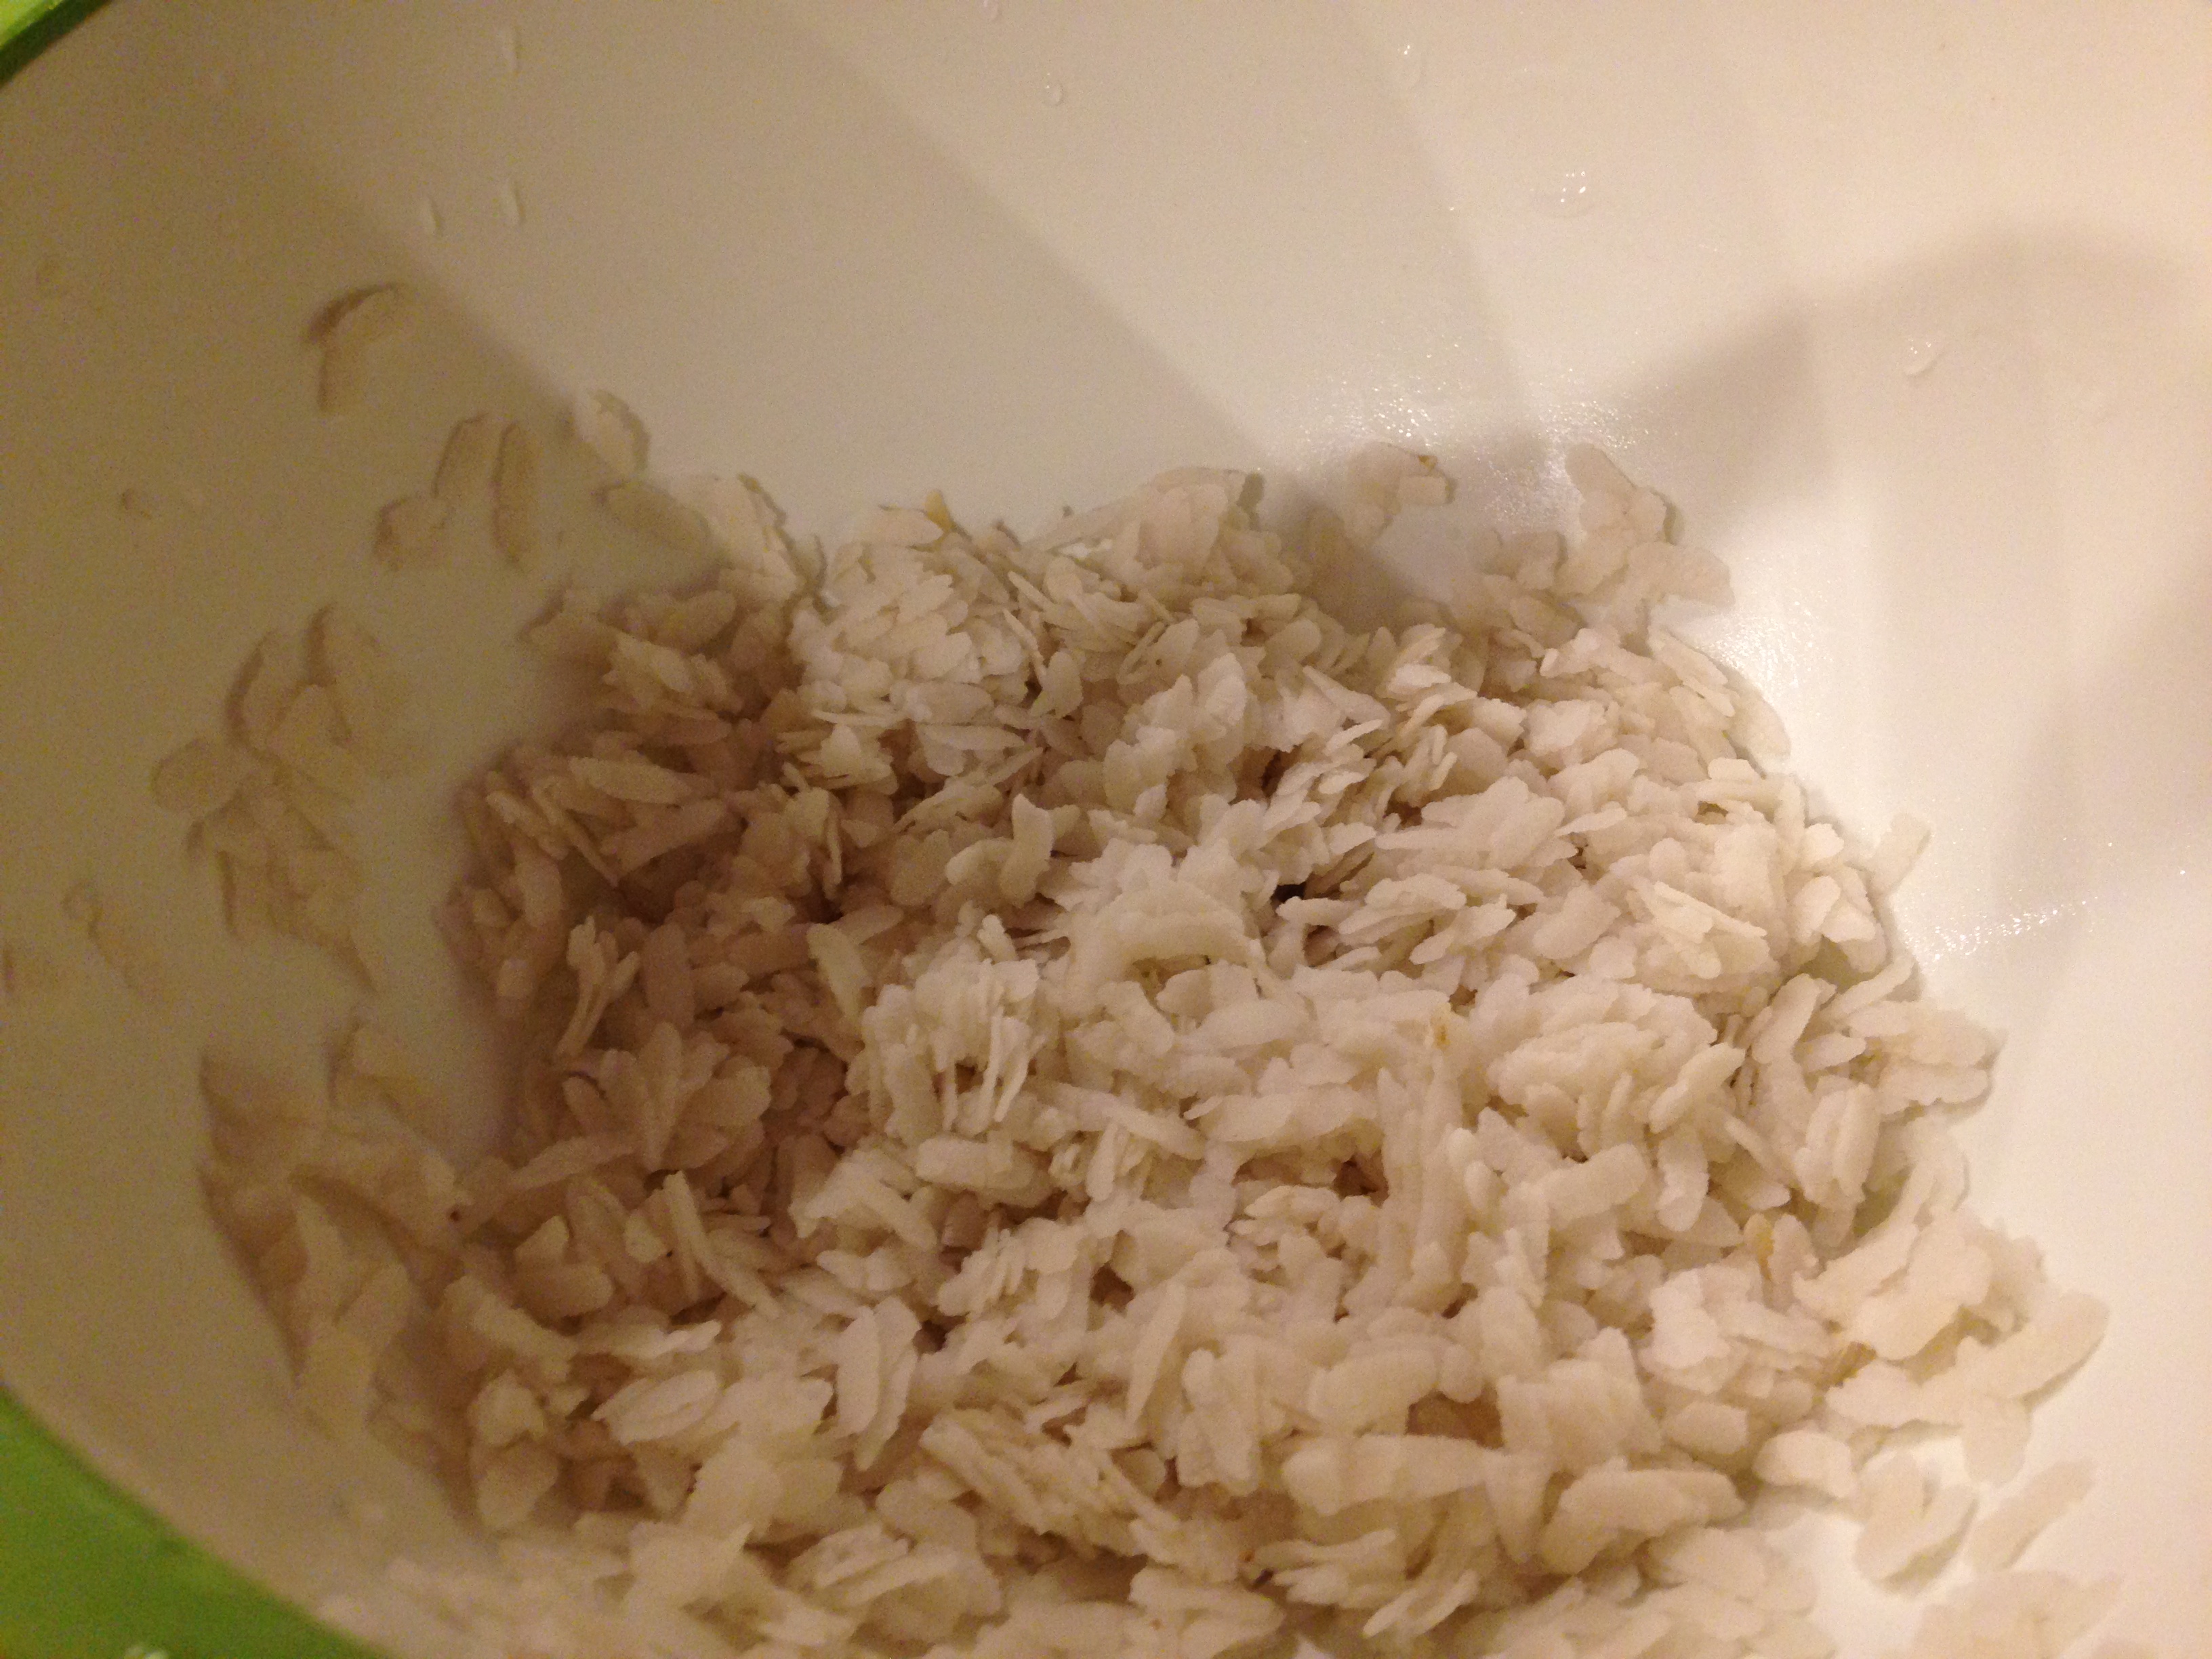
  • Let it rest for 20 min.
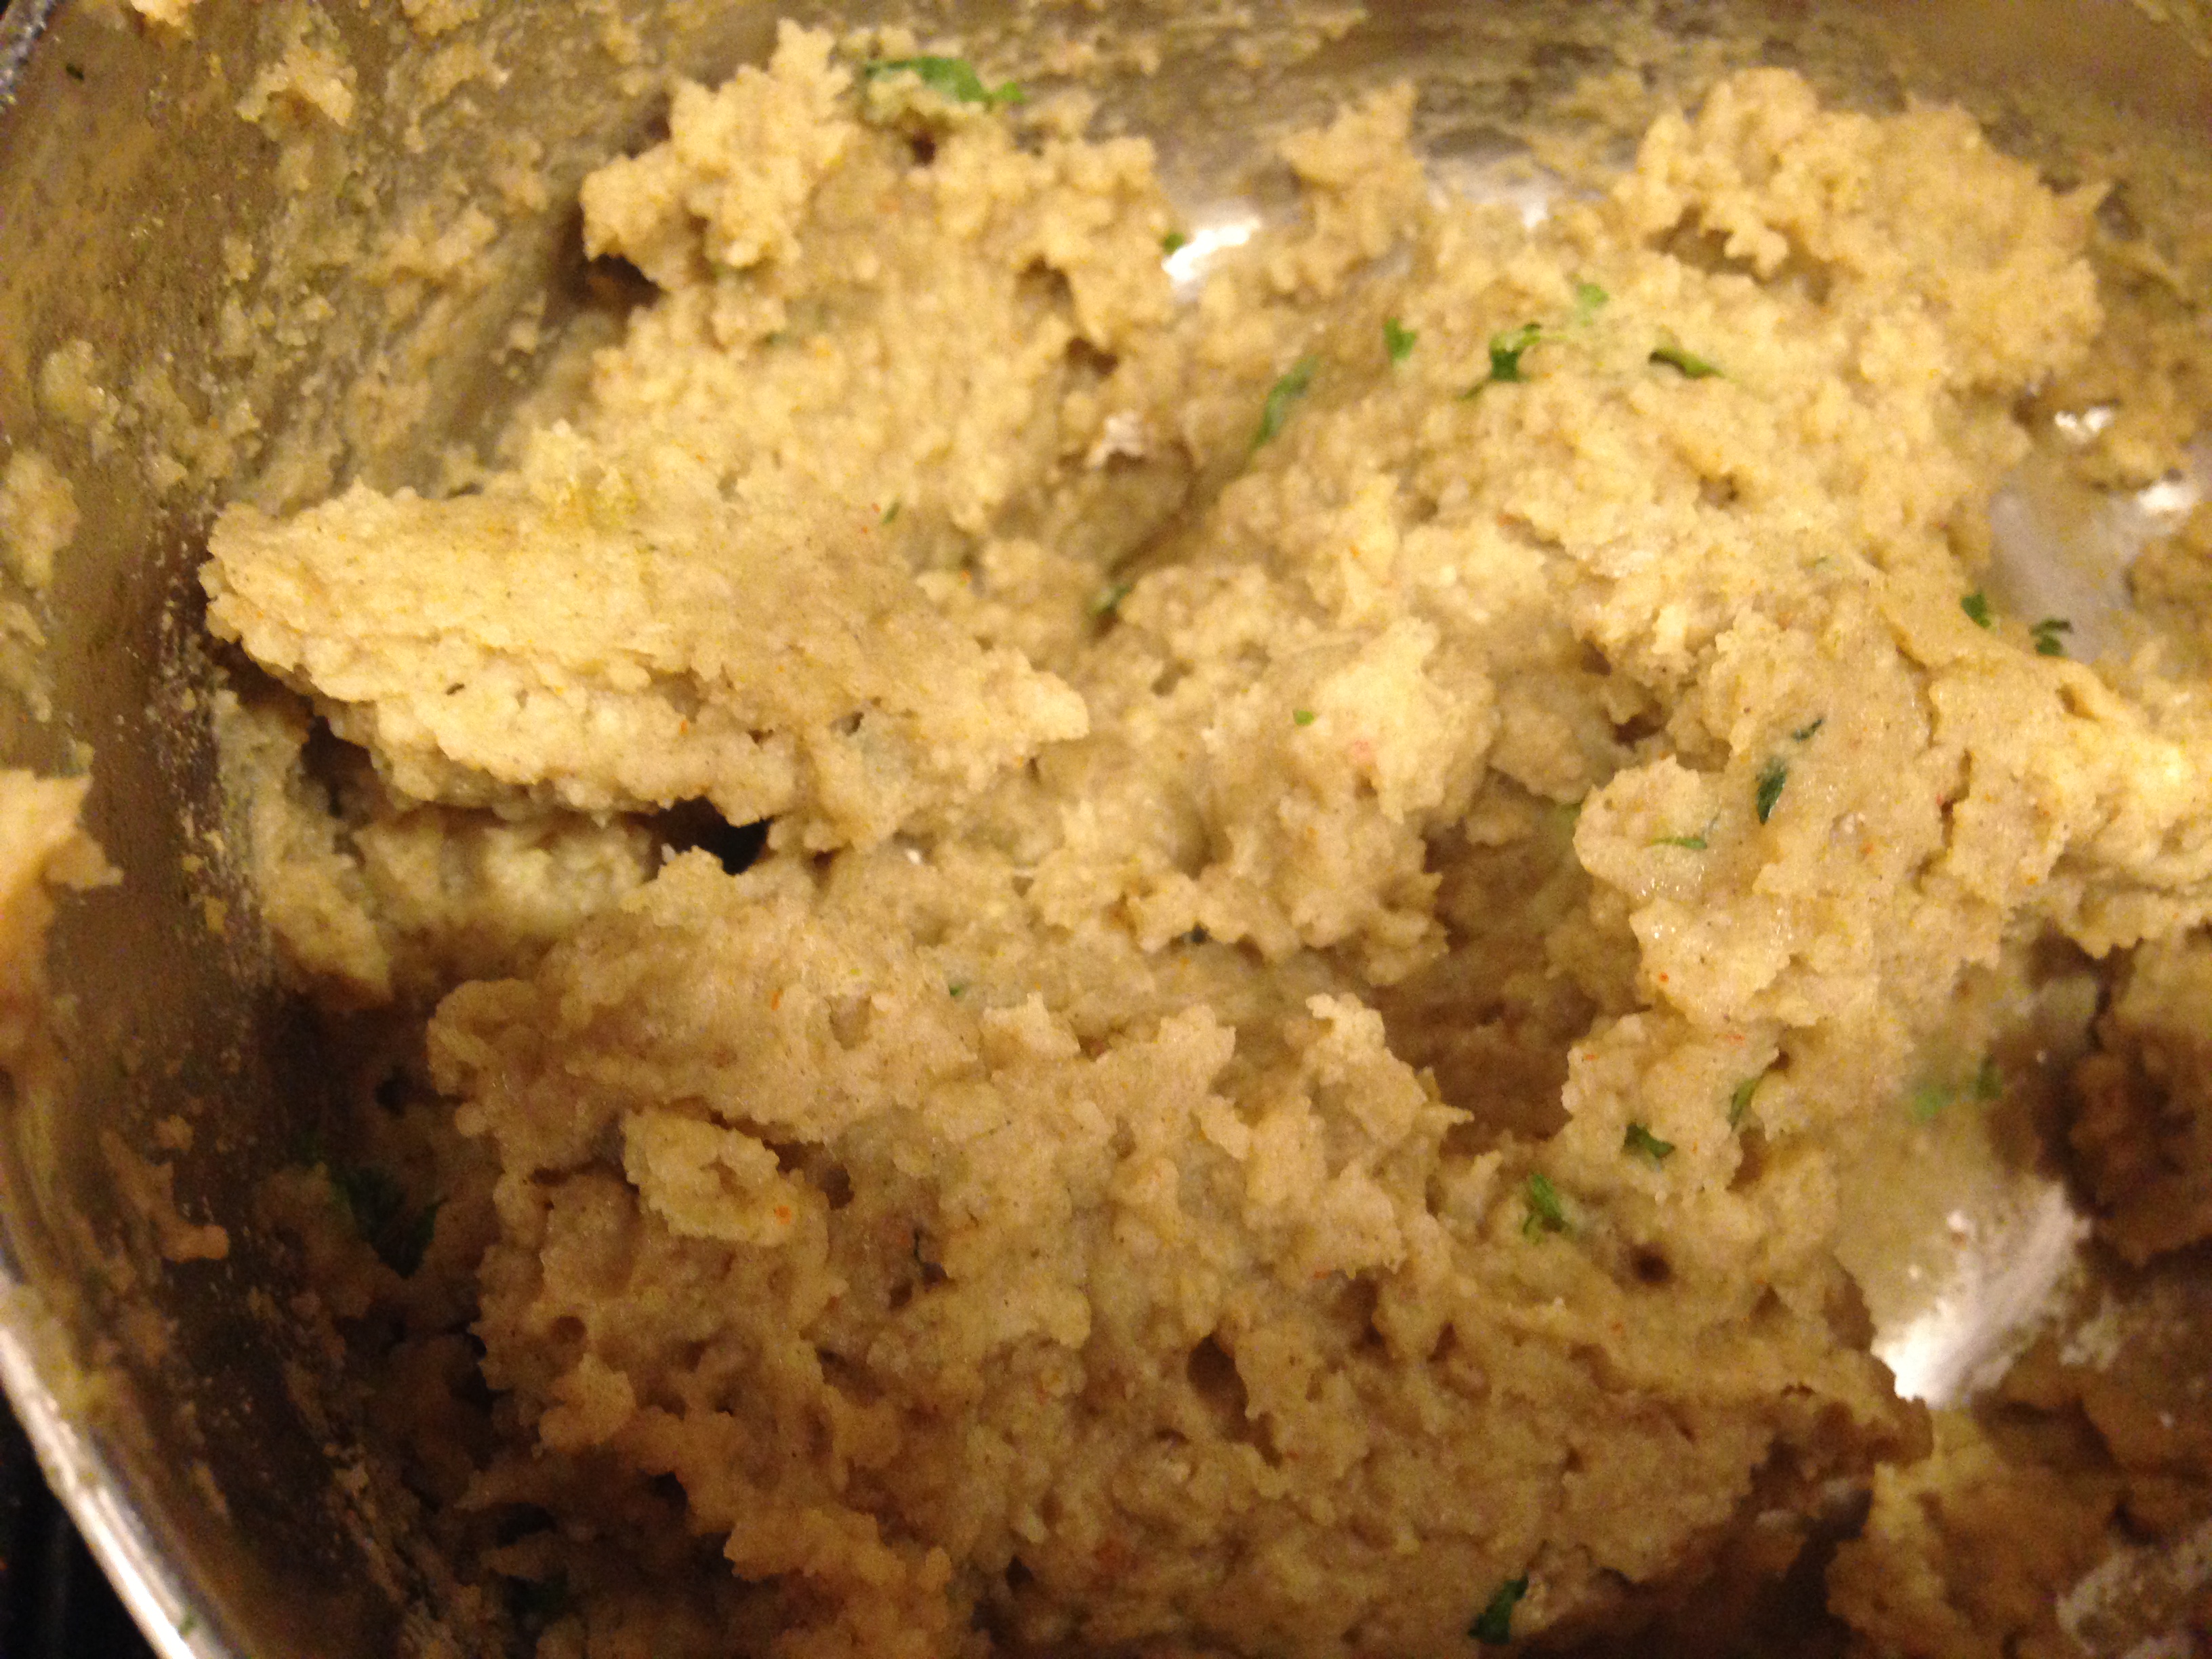
  • To the rice flakes, add peas, sugar, green chillies, black pepper, lemon, coriander, fresh coconut and salt as needed.
  • Mix everything gently, so that the rice flakes do not break.

IMG_2235


Binding of the dough

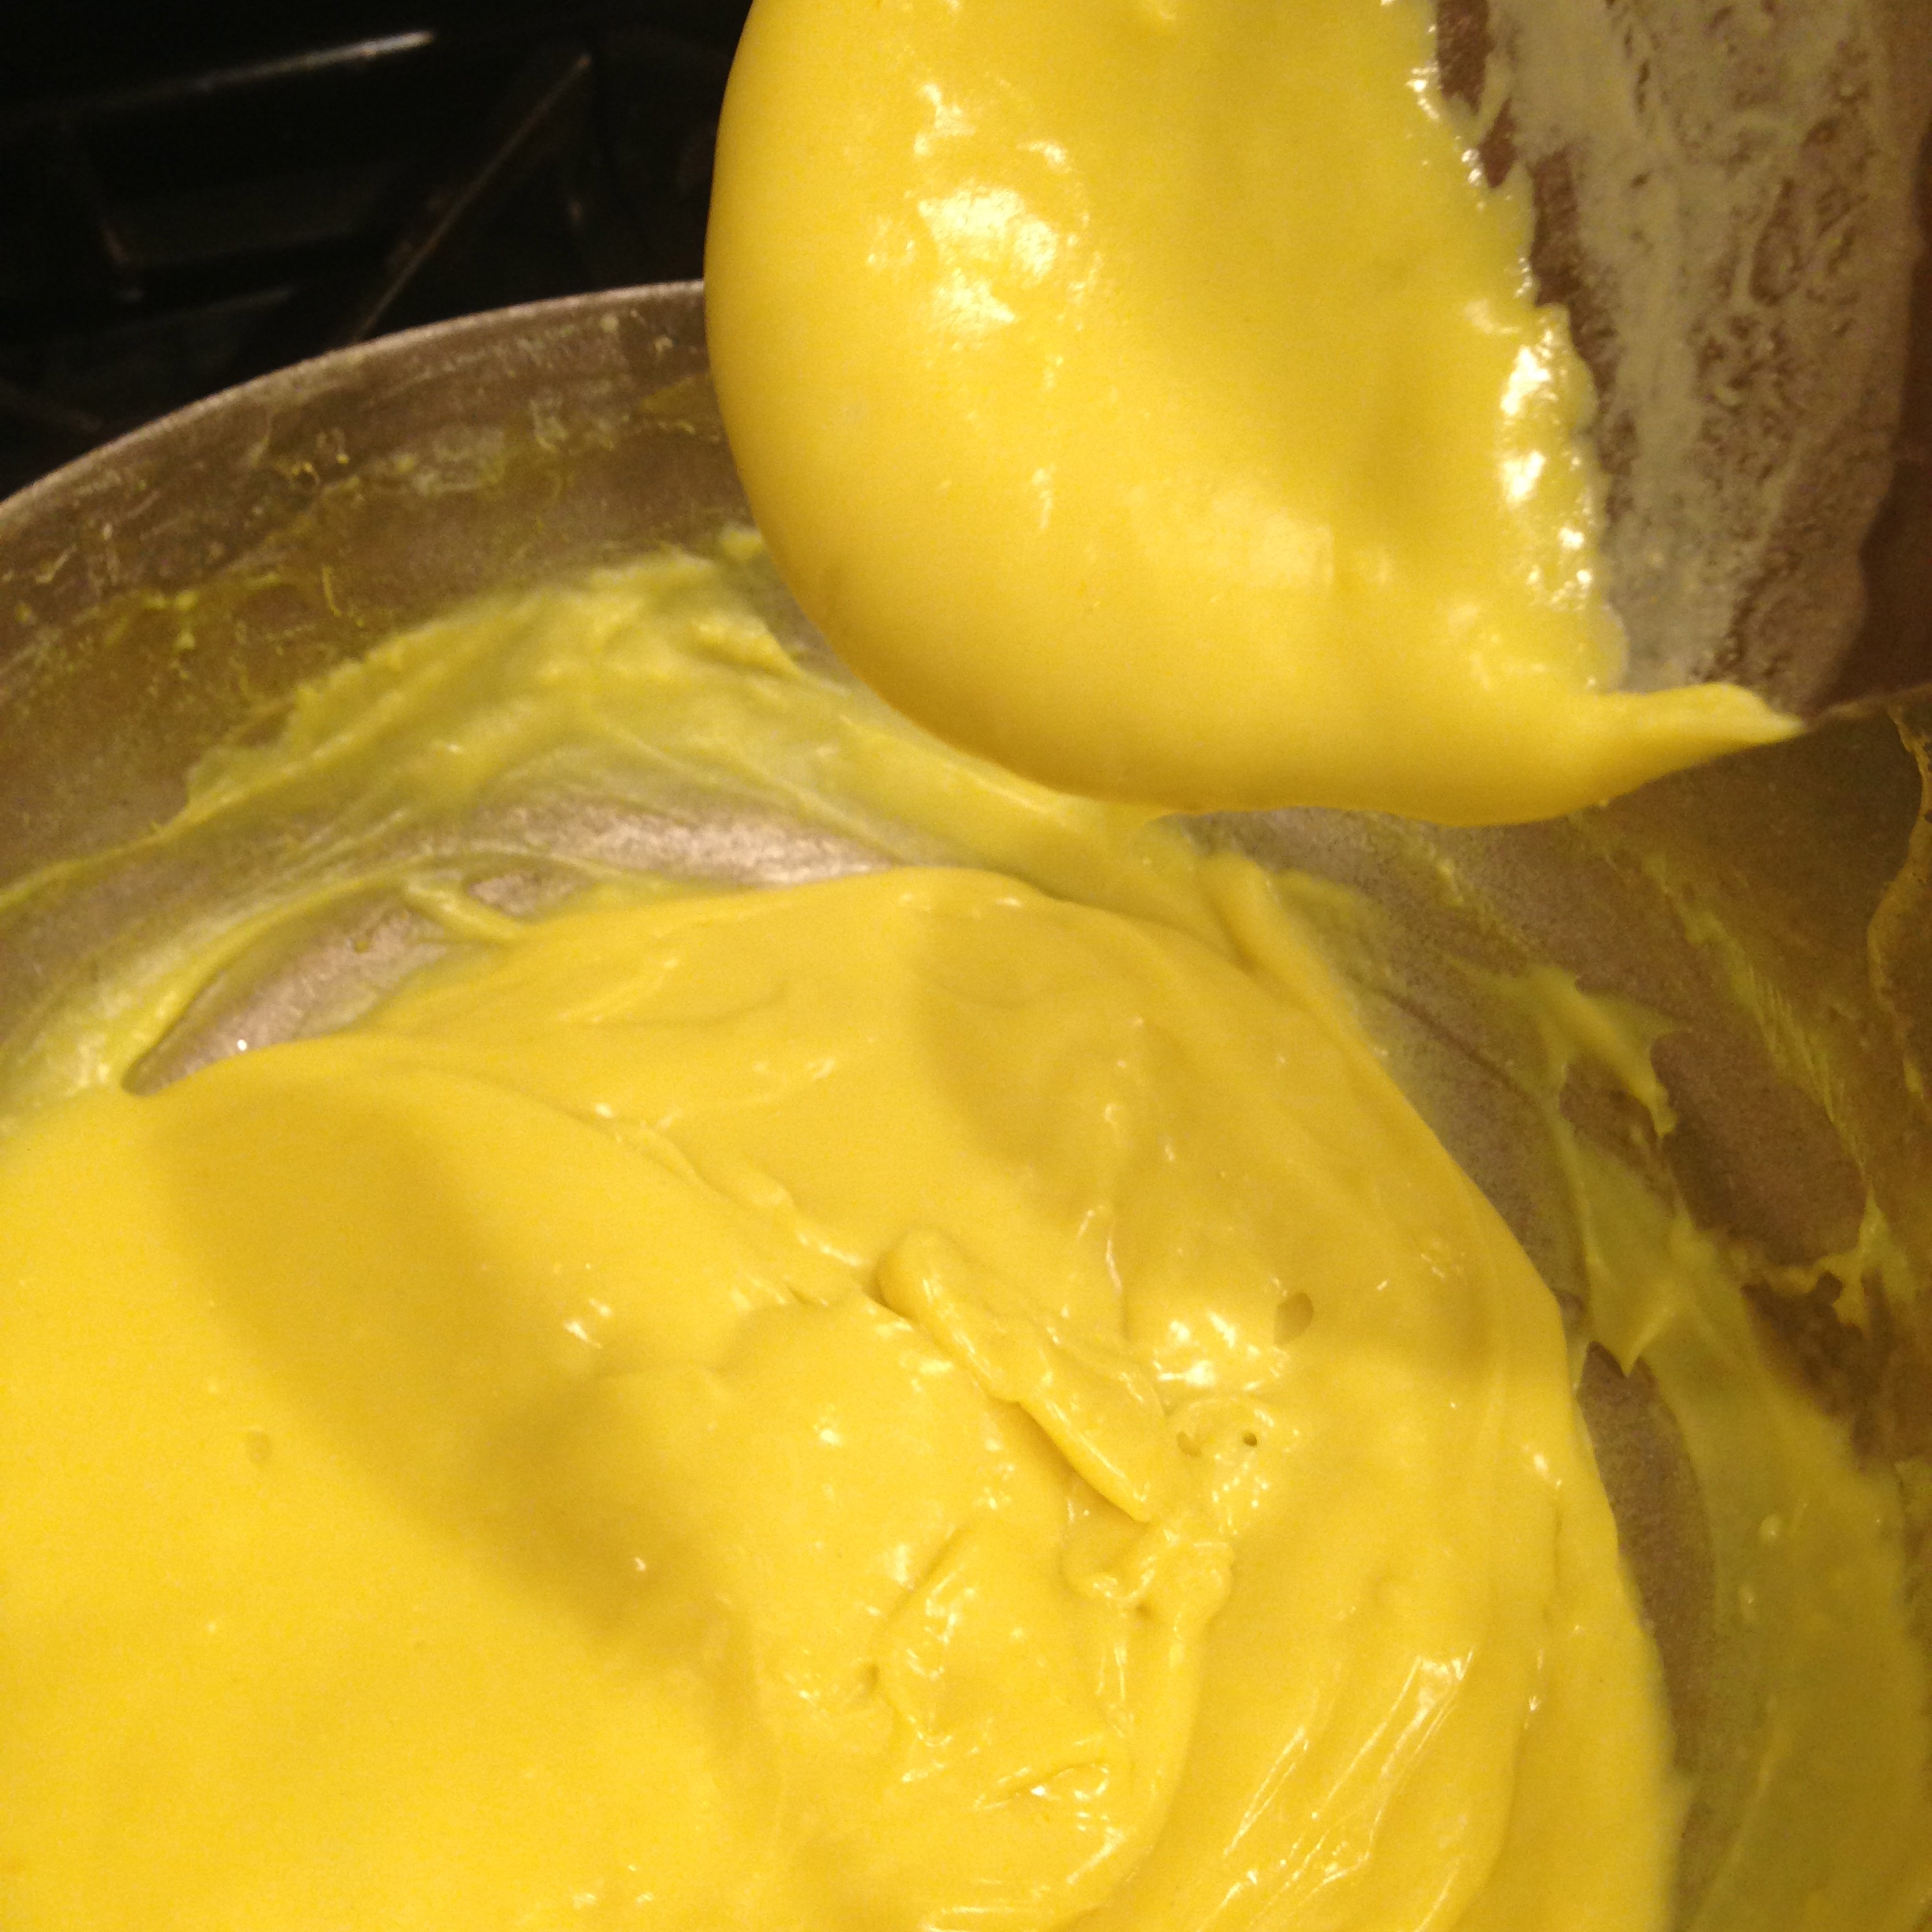
  • In a broad pan, mix the flour, oil, salt and about 4 tbsp water
  • Make three equal parts of the flour.
  • If using food color, put 5-6 drops of blue, yellow and green food colors, on each part of the flour. Using about 1/2 tbsp of water for each pile,

IMG_2232

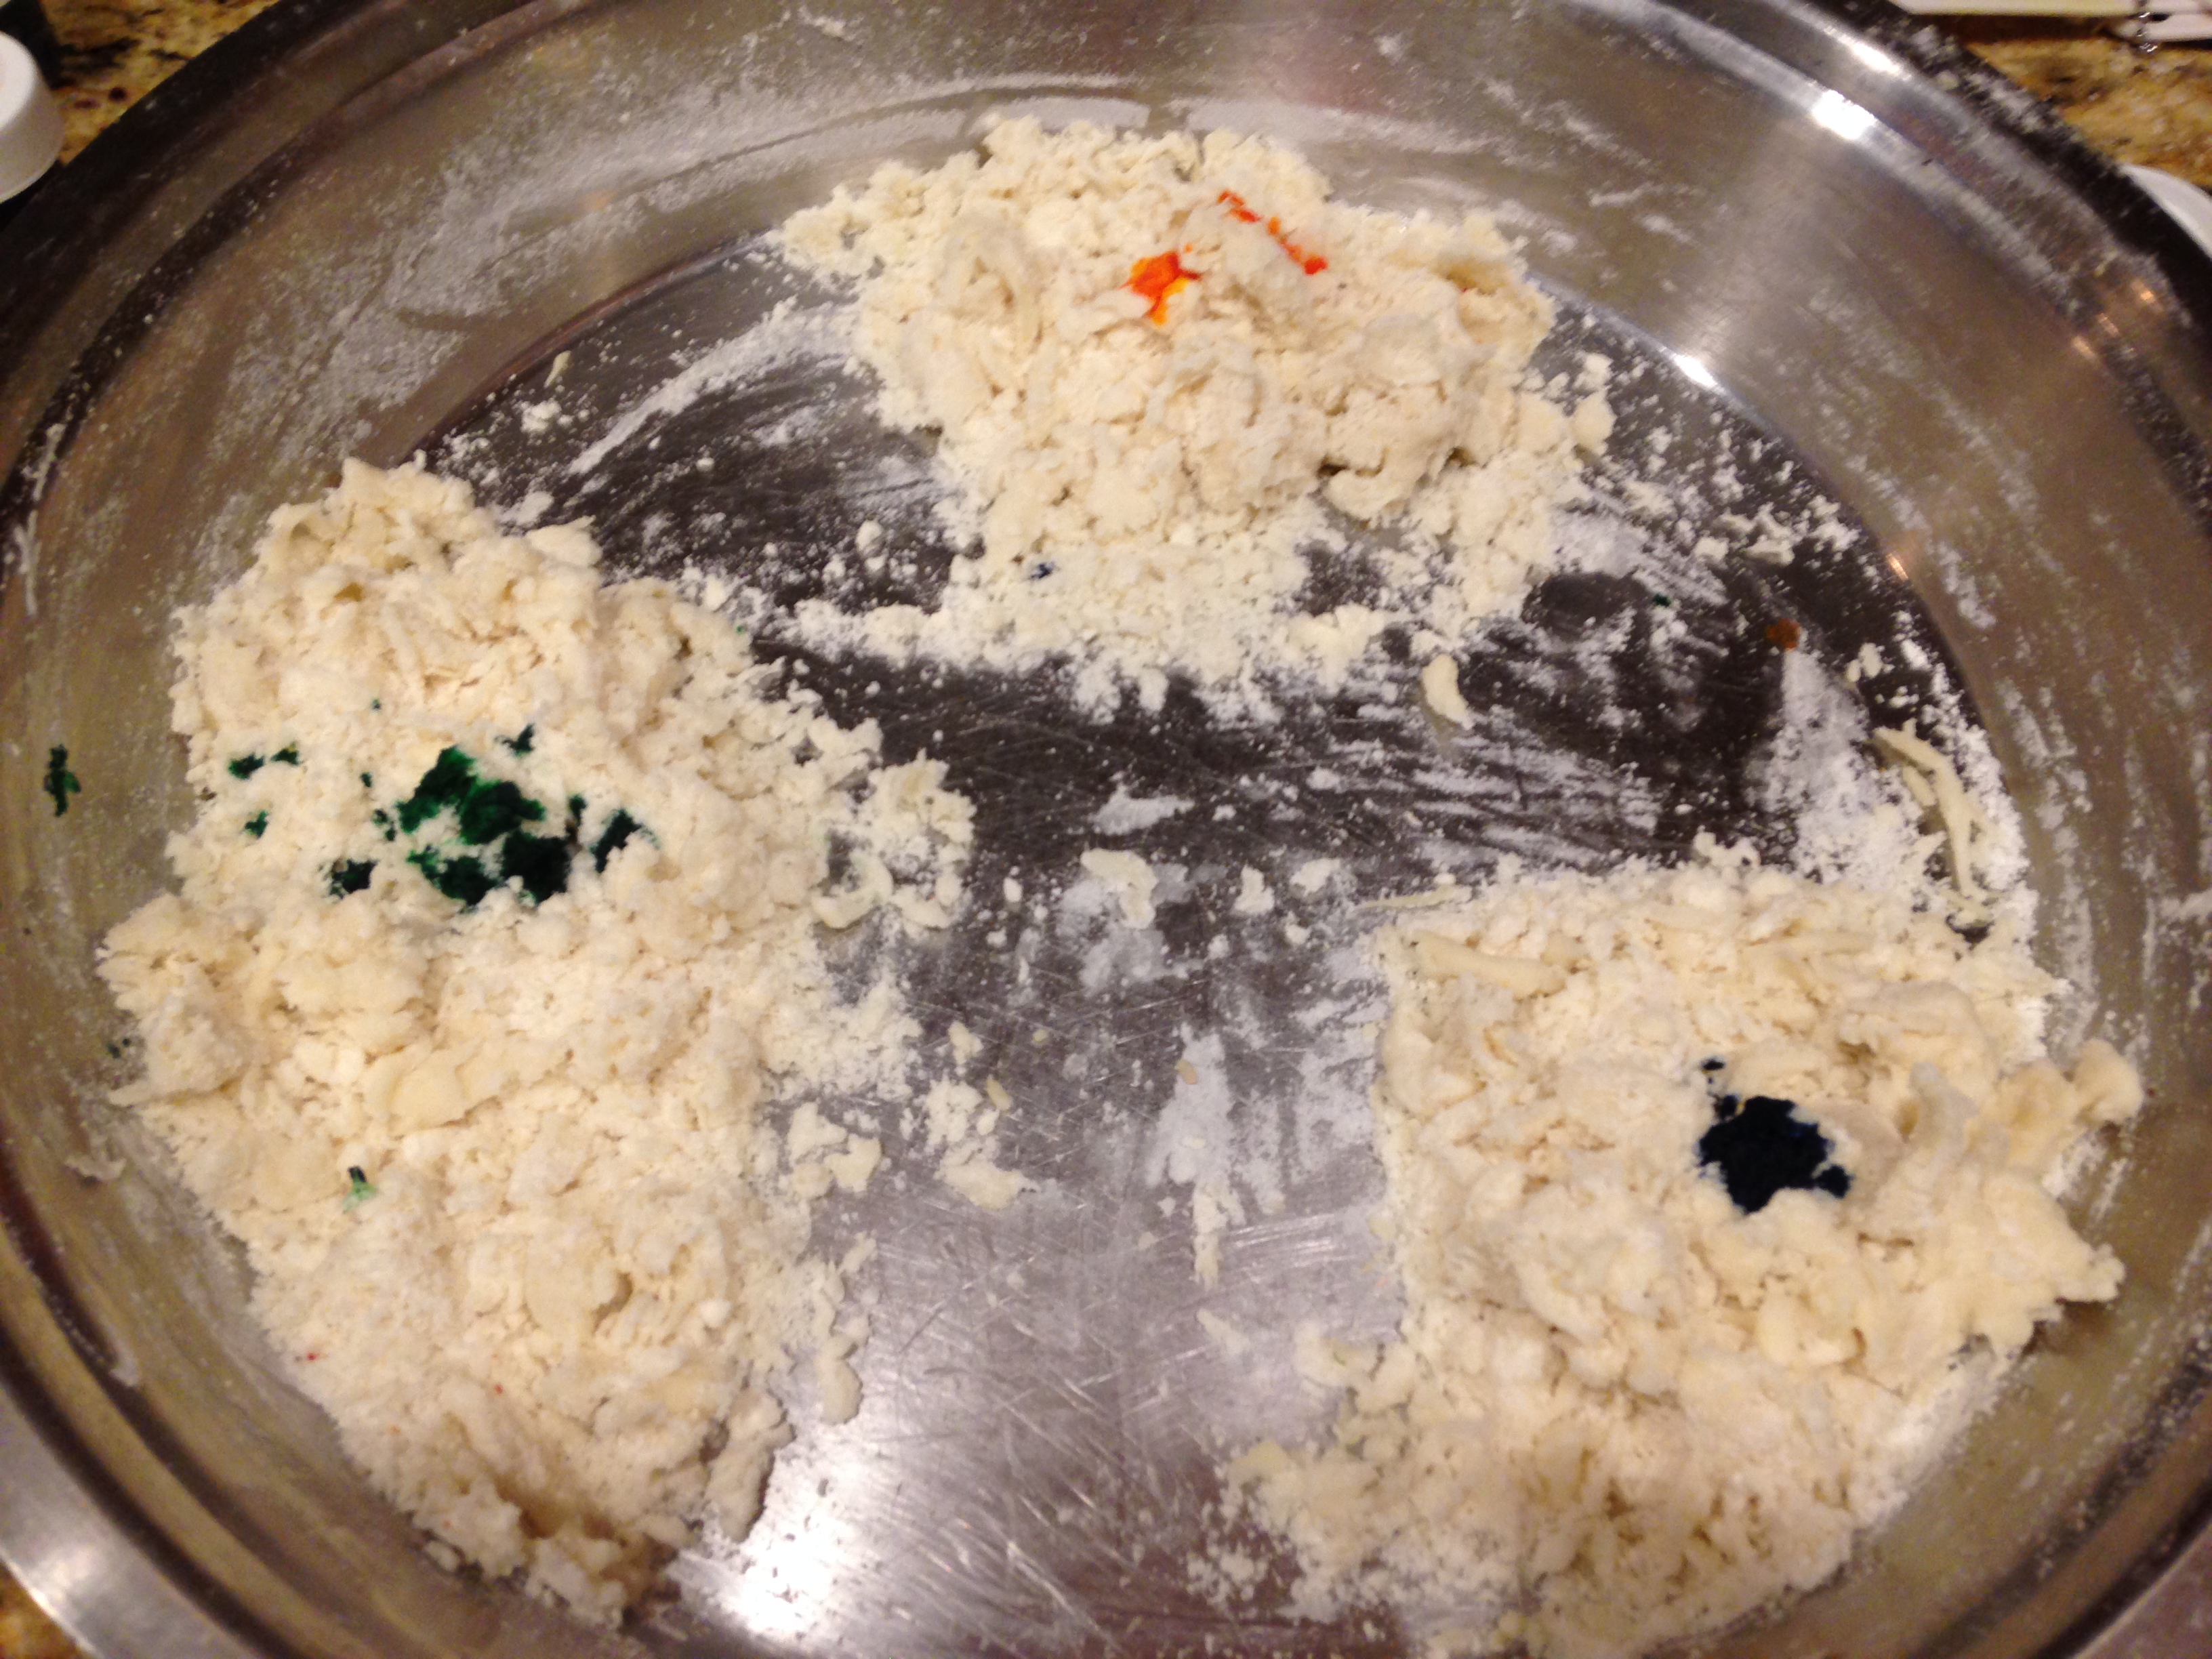
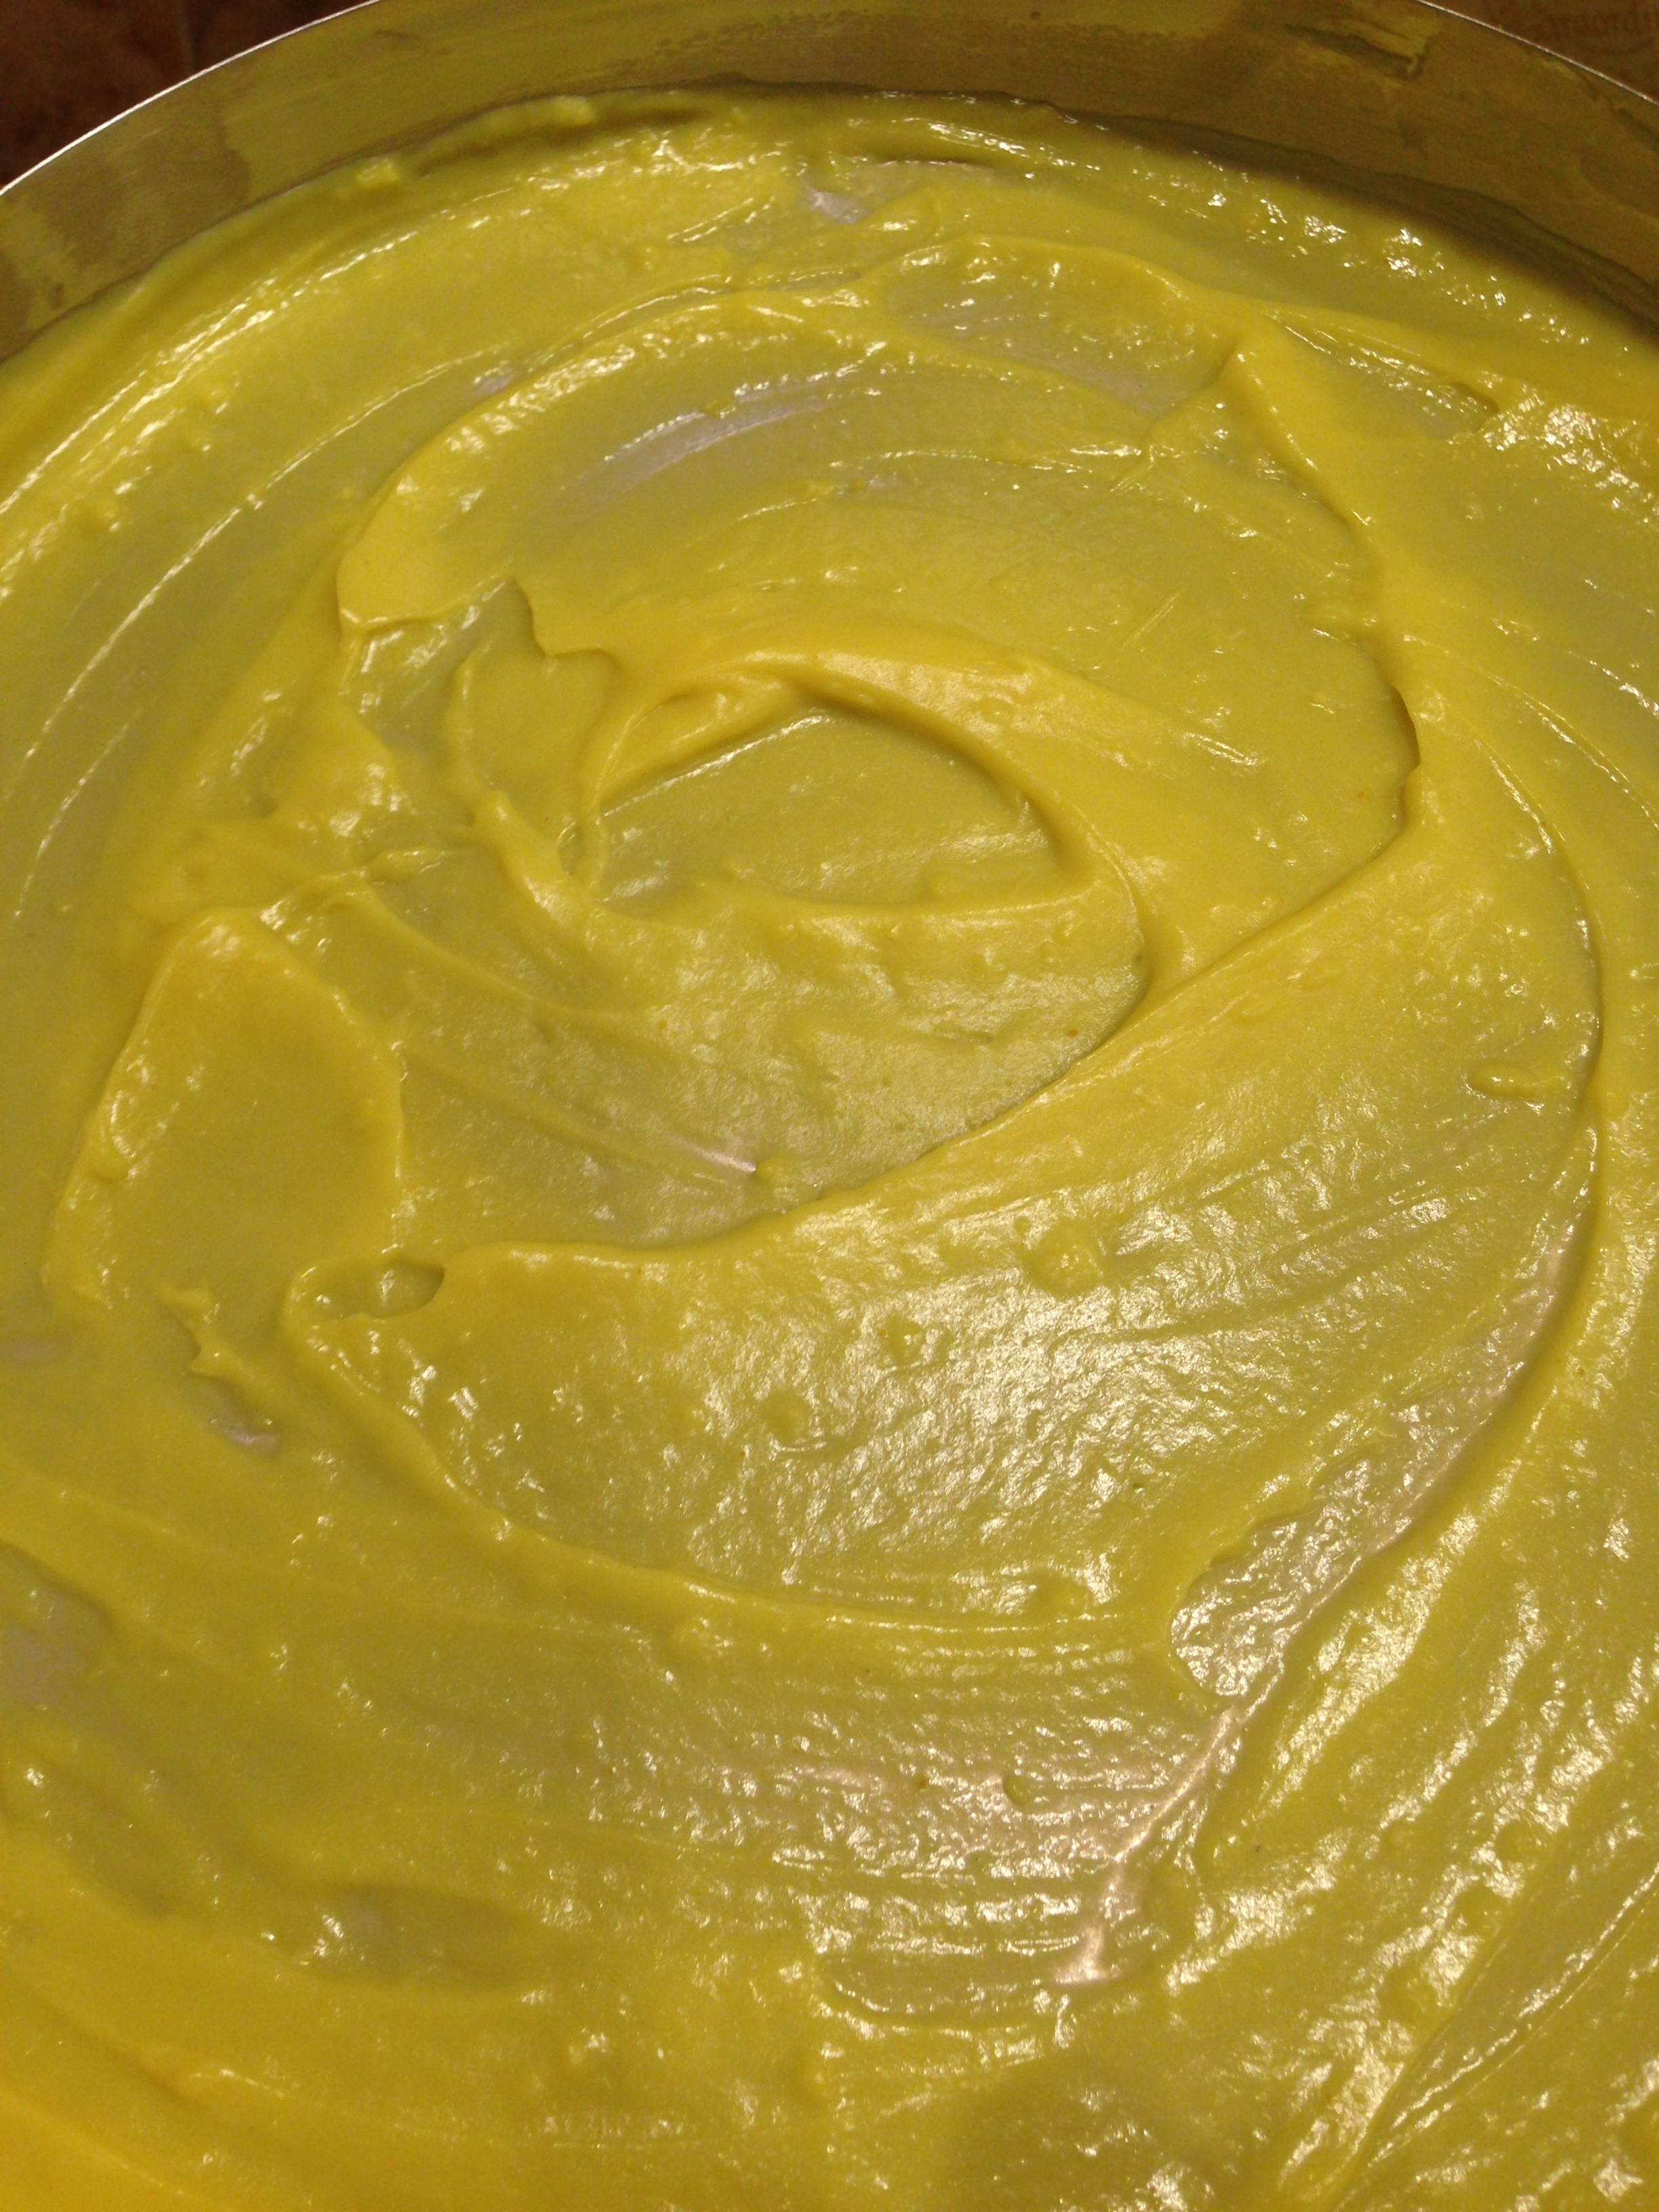
  • Knead the color and flour into a smooth dough.Keep kneading until the color cover the entire flour. If needed, add extra color as needed. Do this for all the parts of the flour.

IMG_2233

  •  If using puree of spinach, add that instead of the color. And add about 2 tbsp water and knead into a soft dough.
  • If not using color or puree, knead into a dough using about 2 tbsp of water
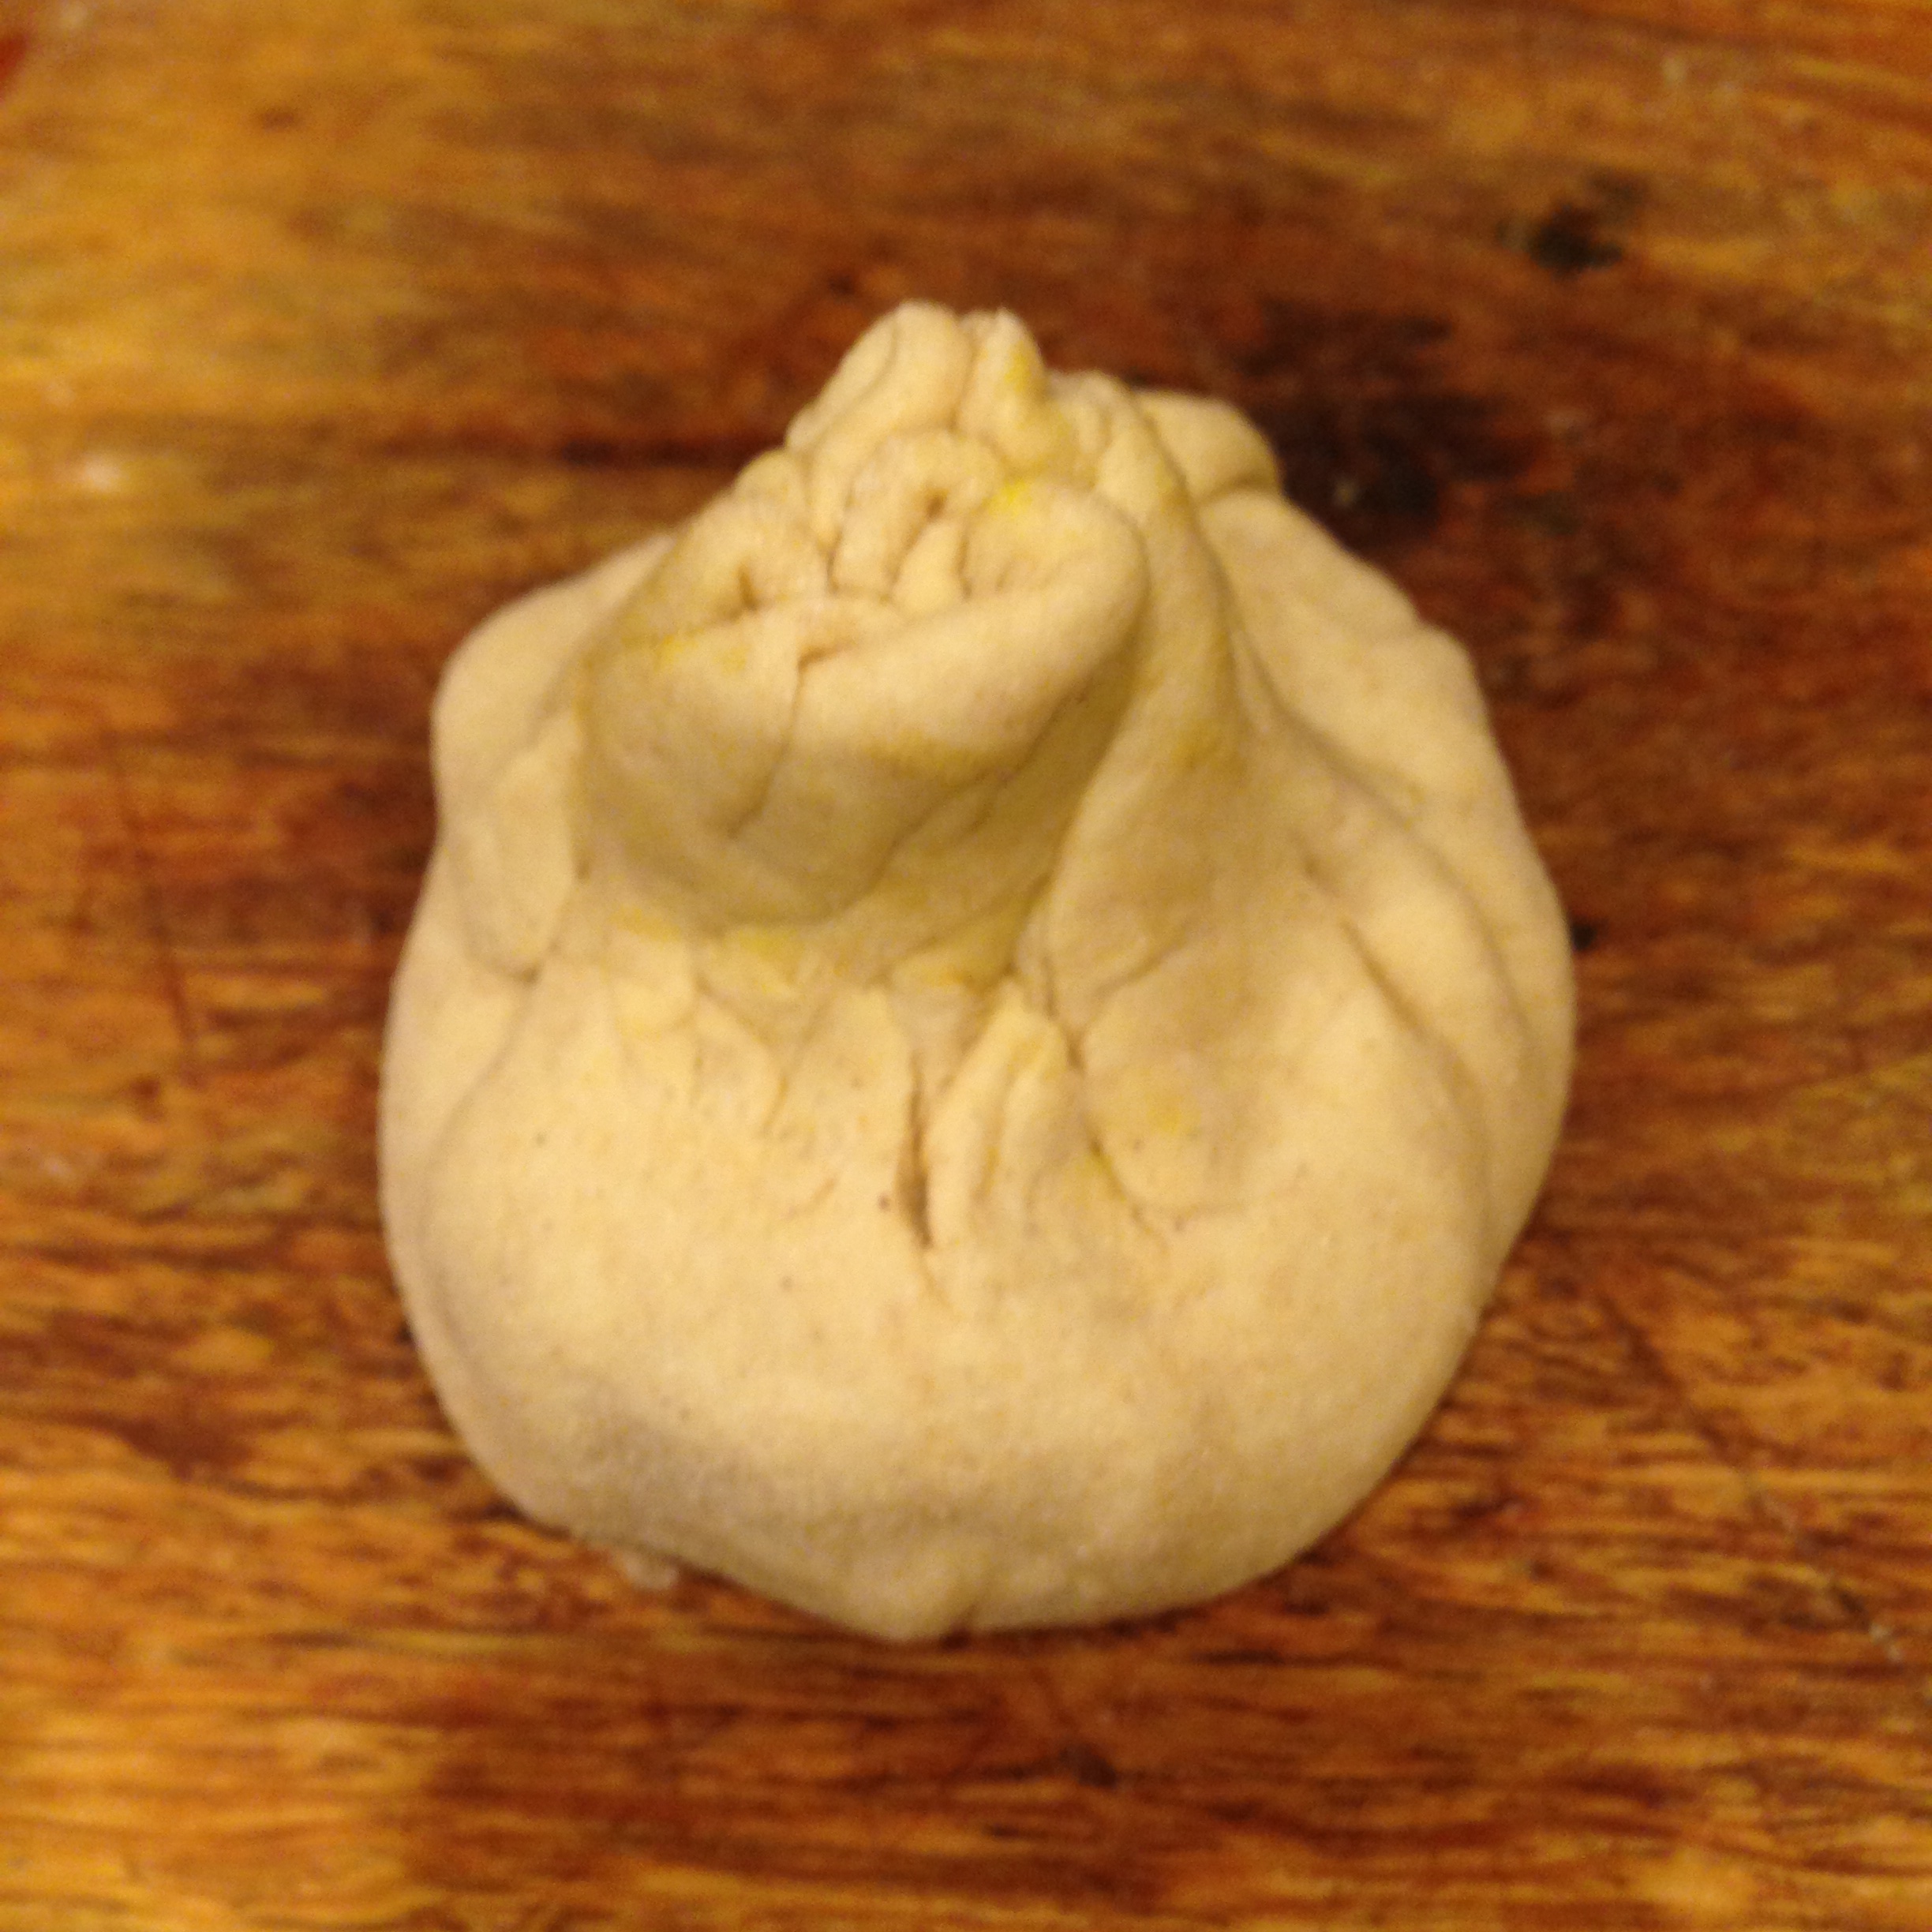
  • Cover the dough with wet towel or paper towel  so that it does not dry out.

Rolling/Frying the Mirchi Peppers

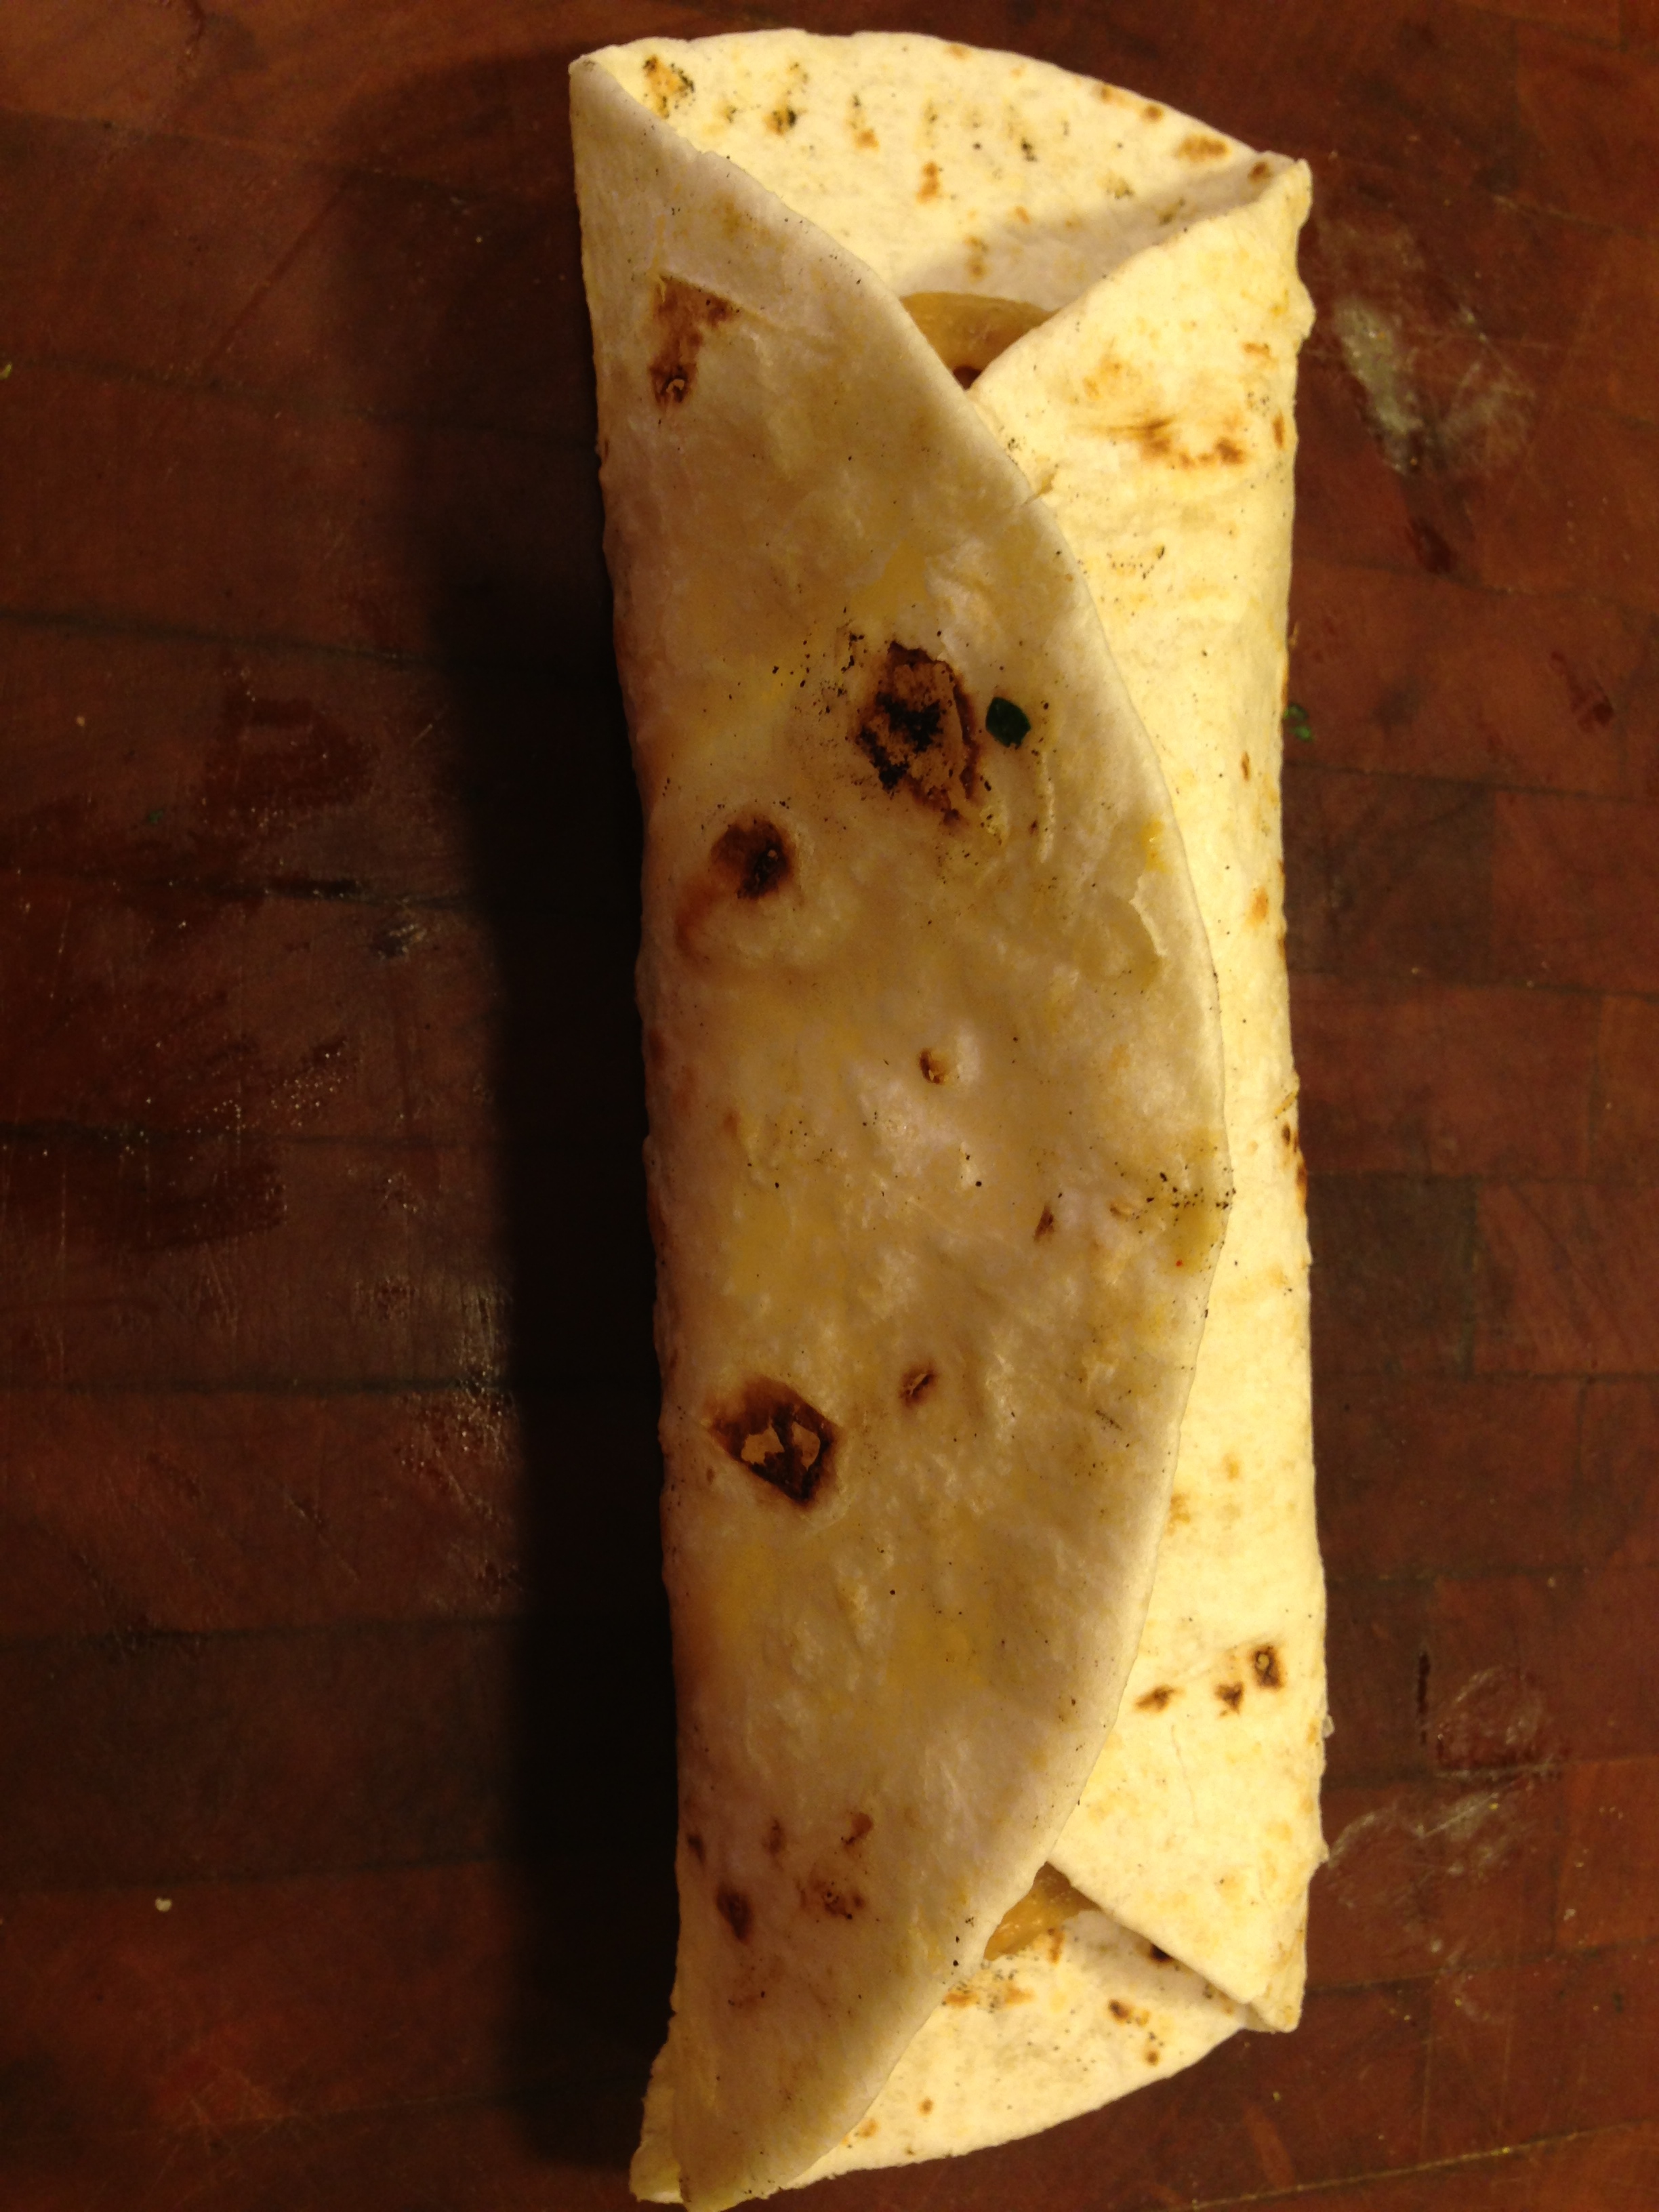
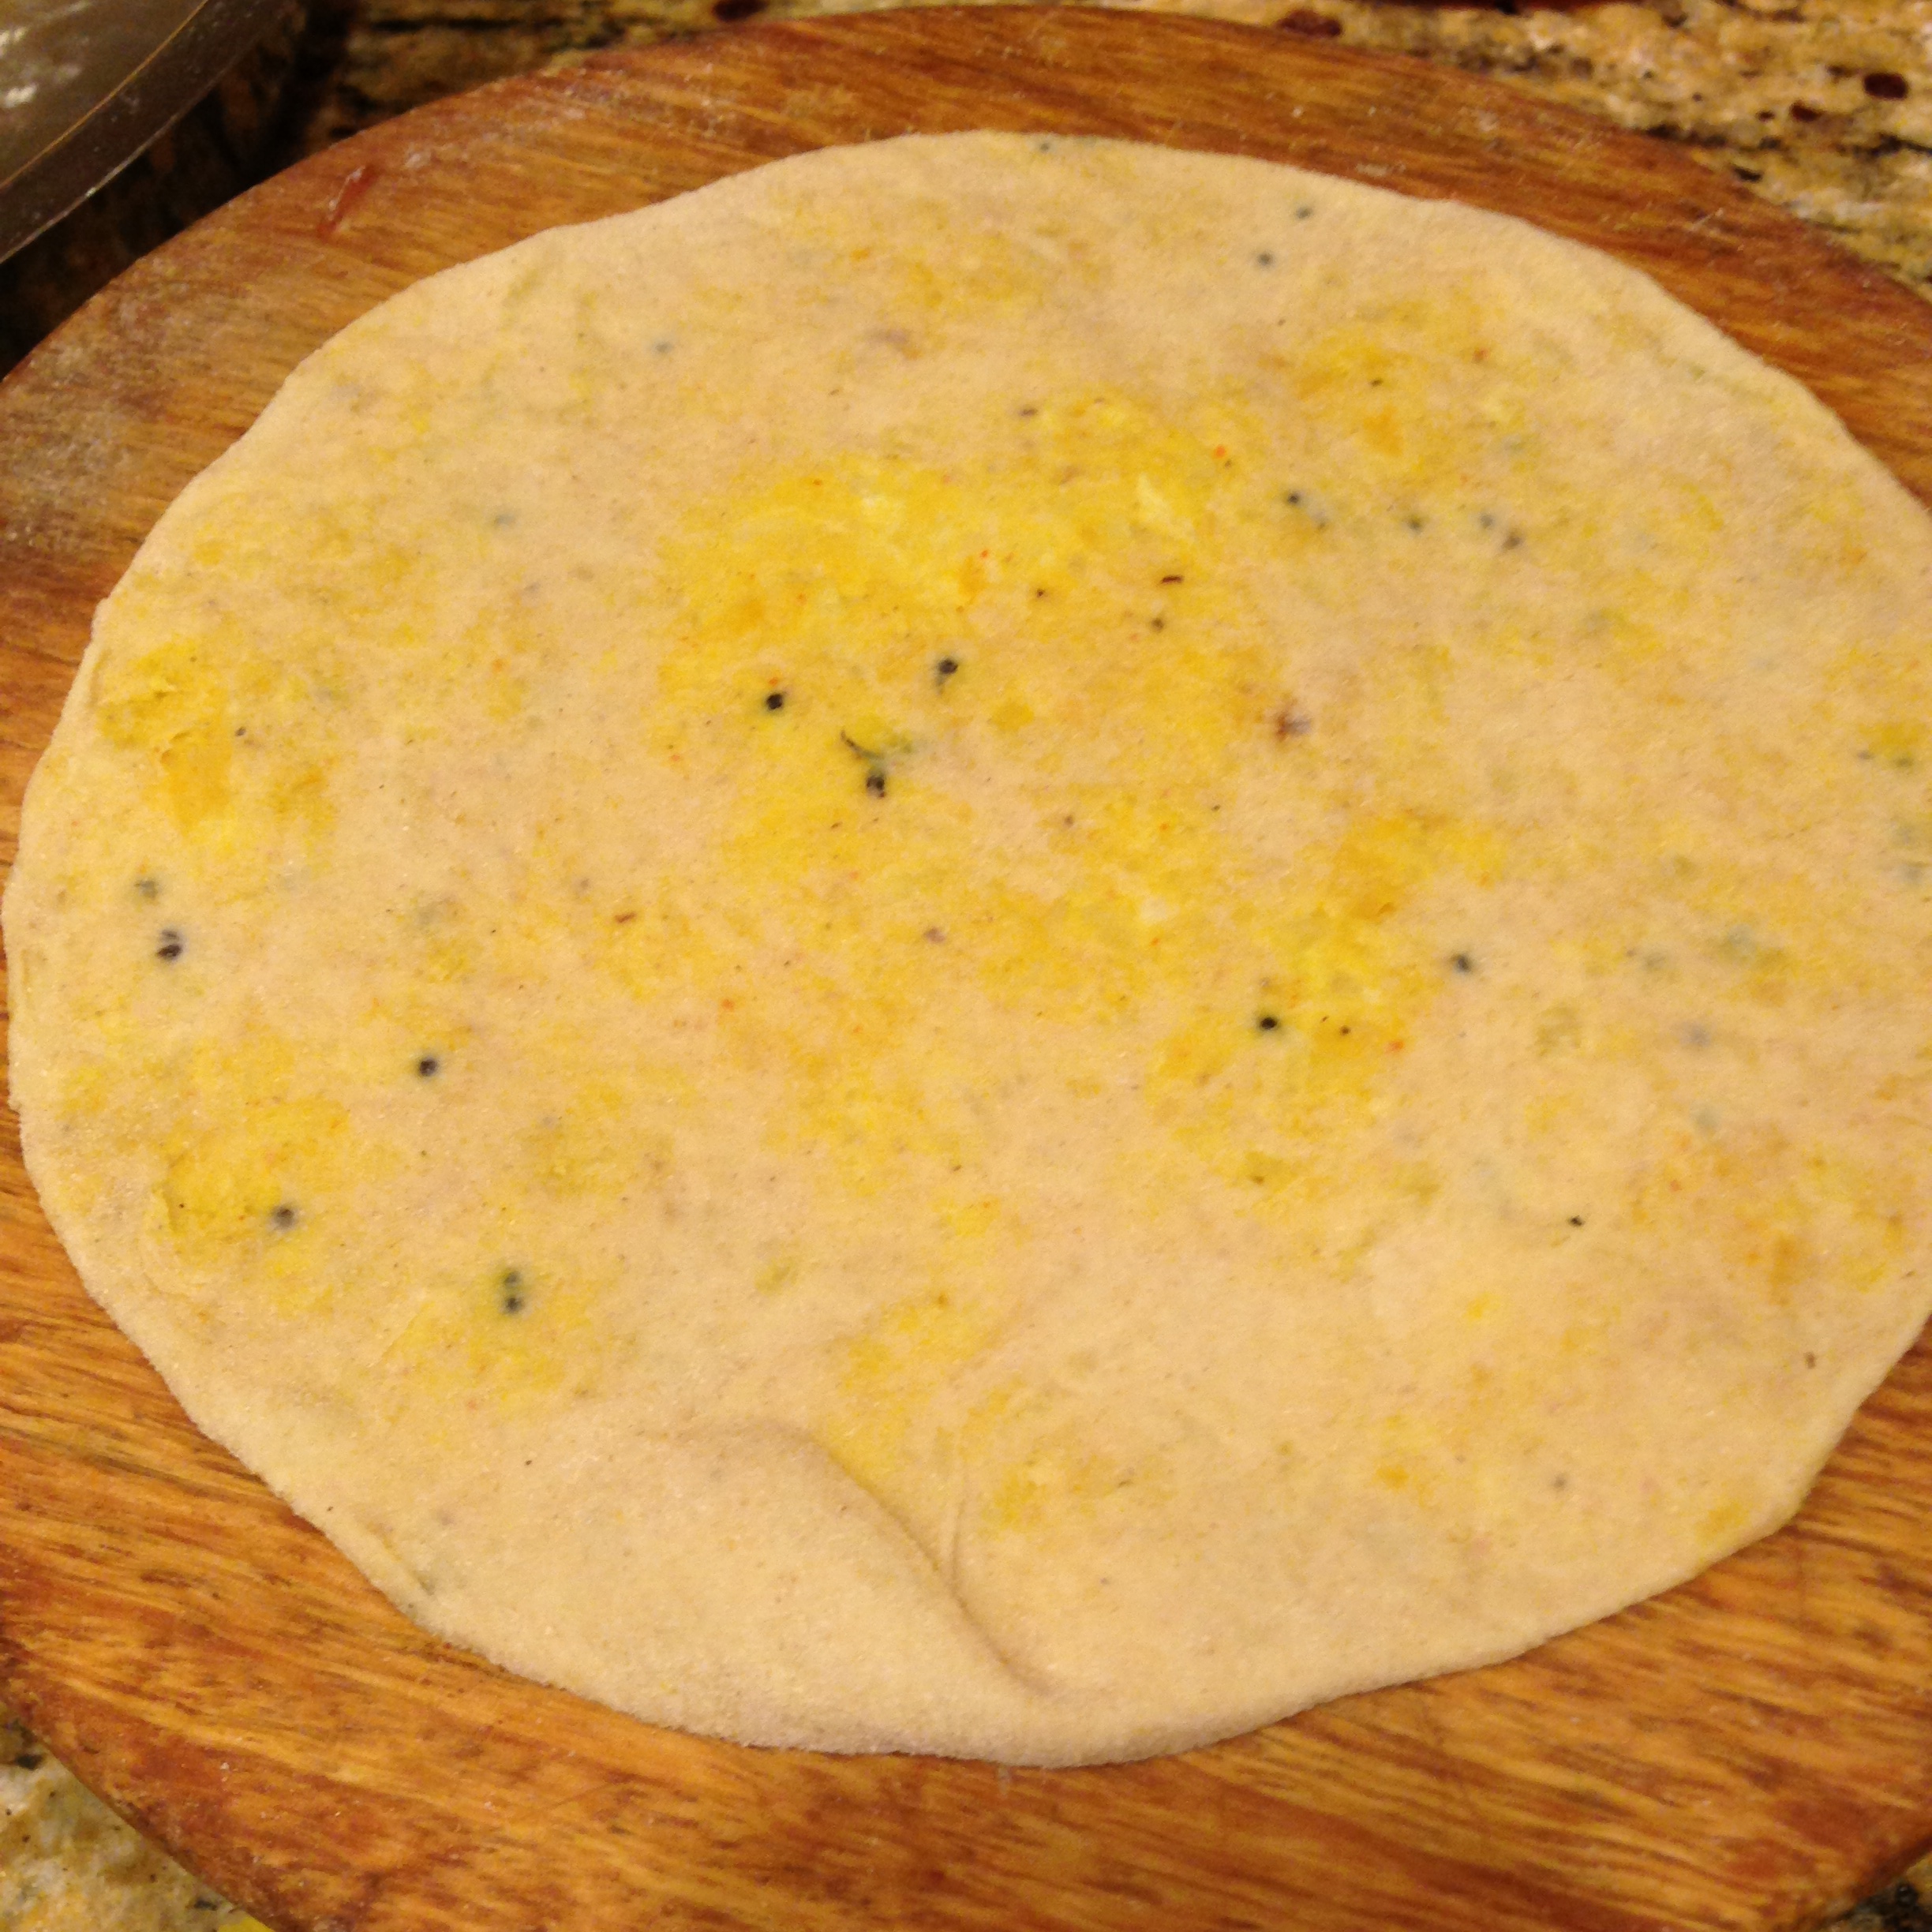
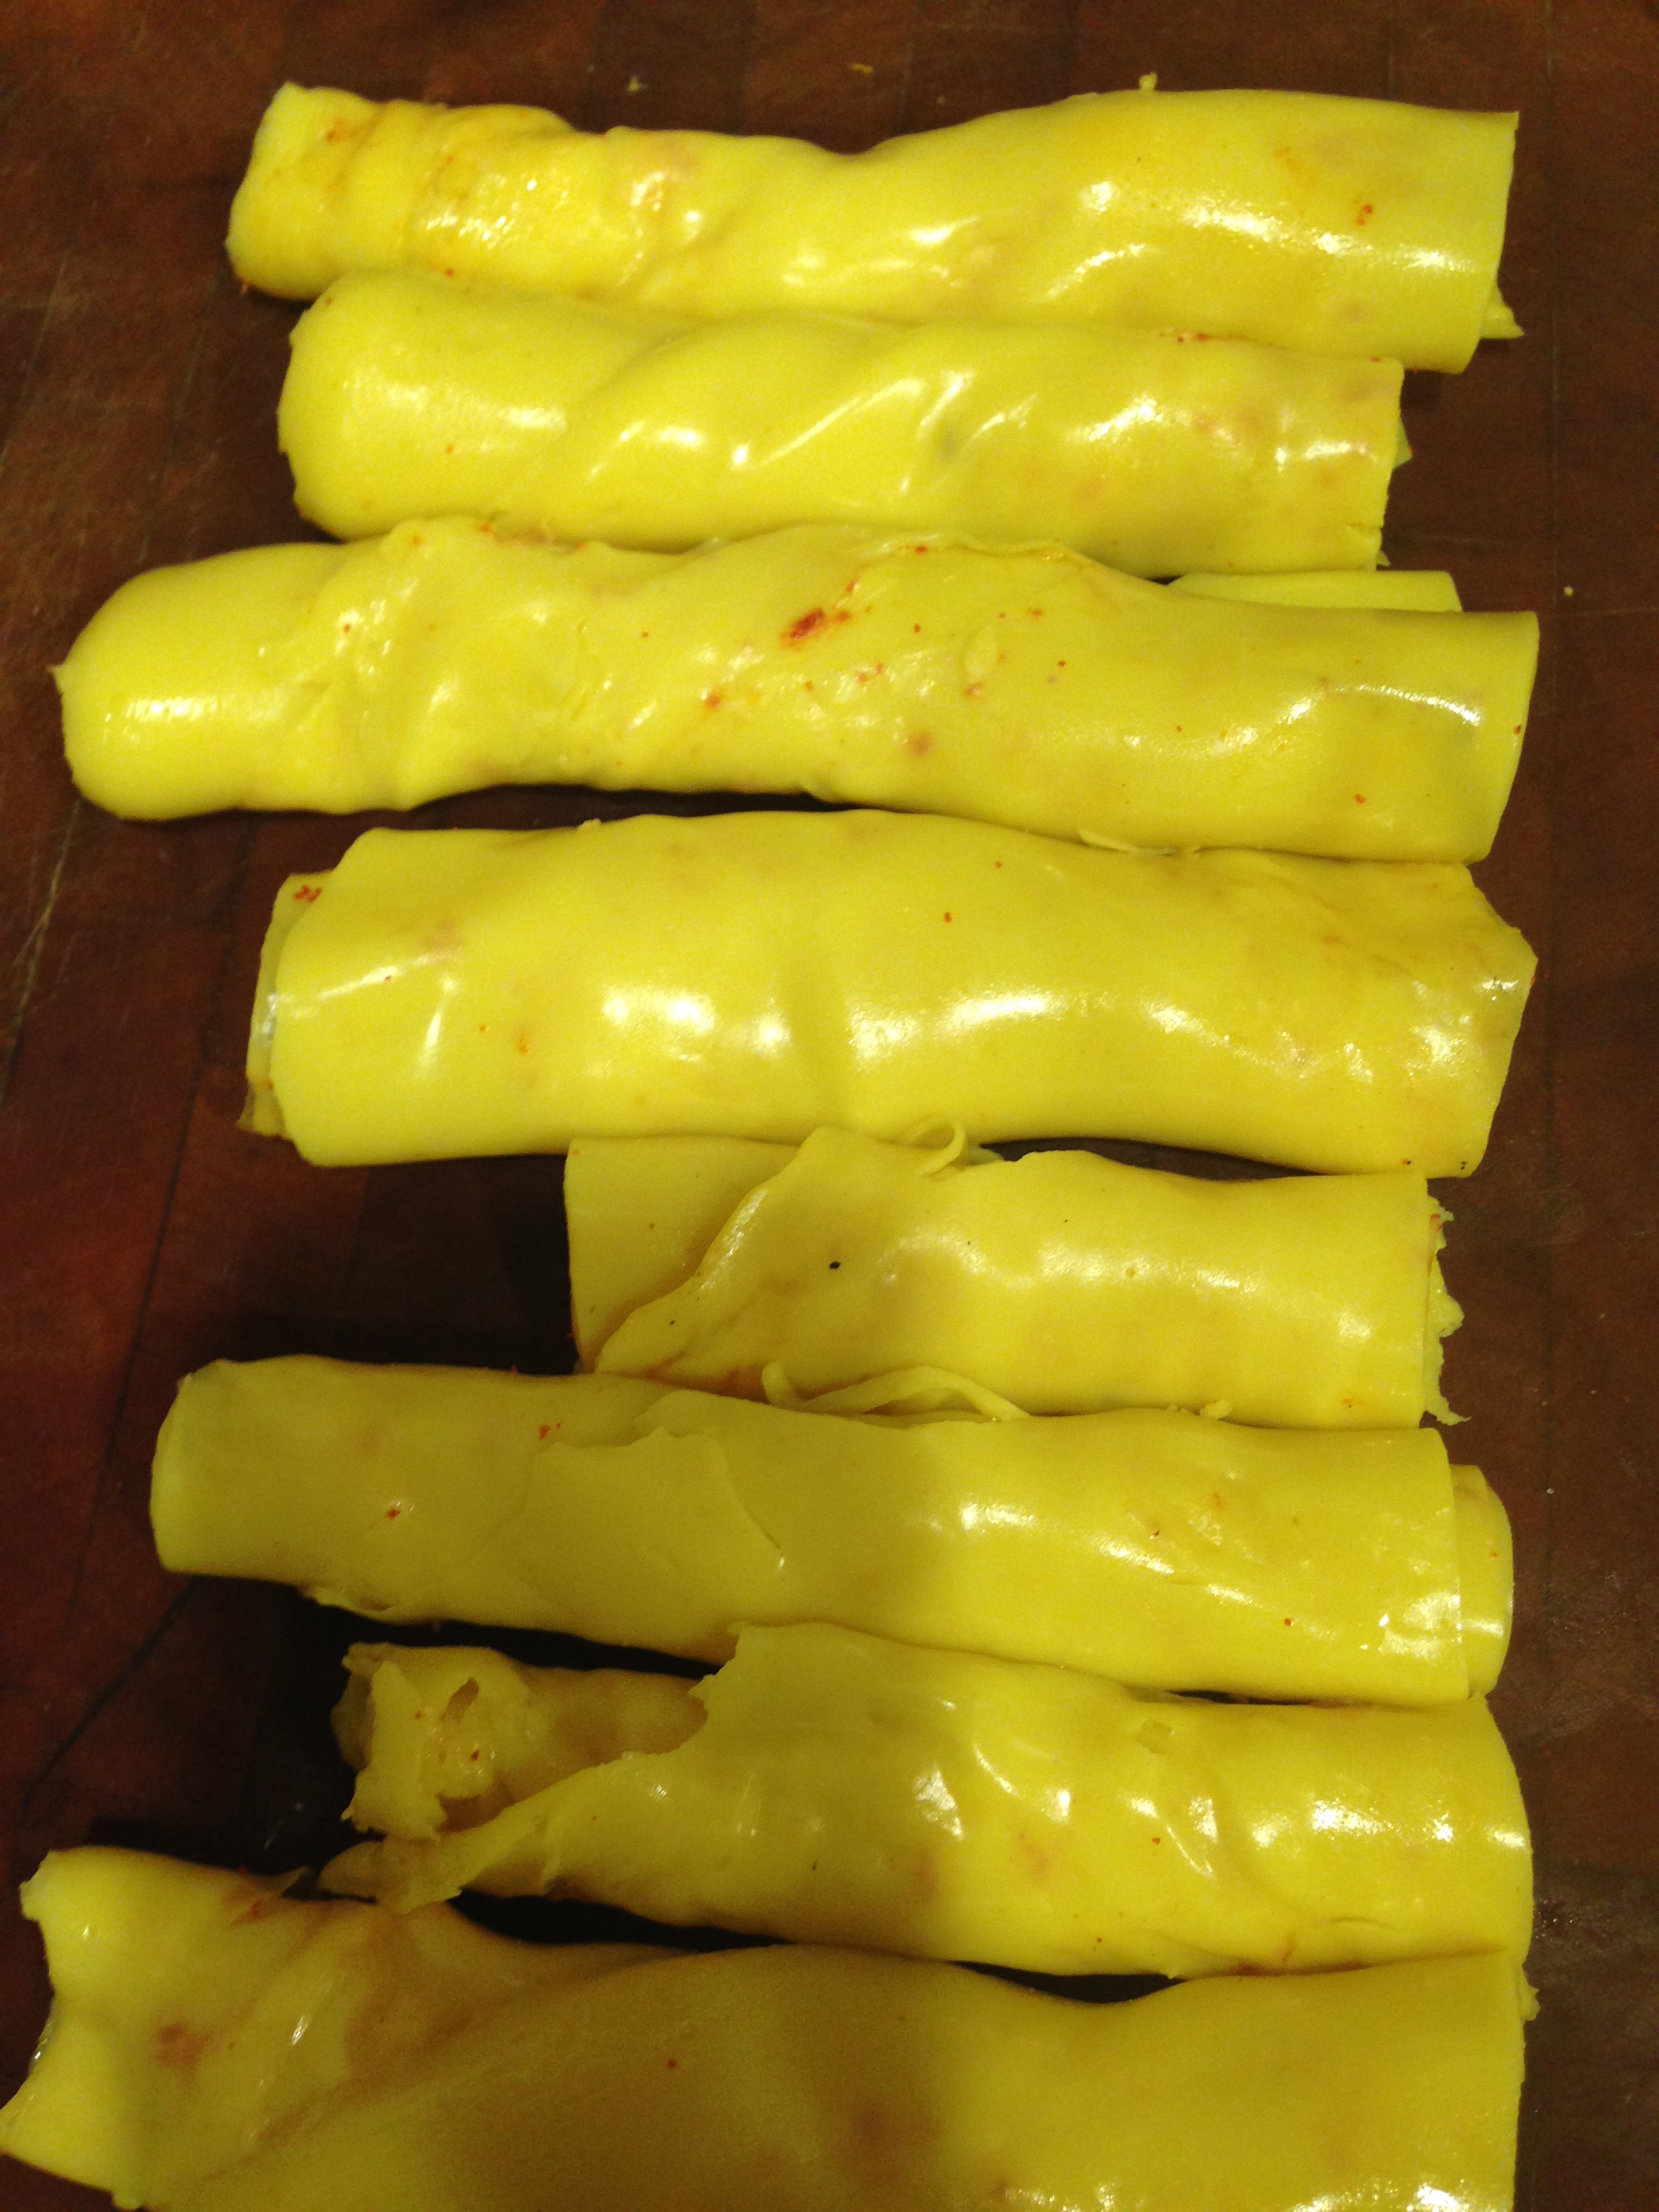
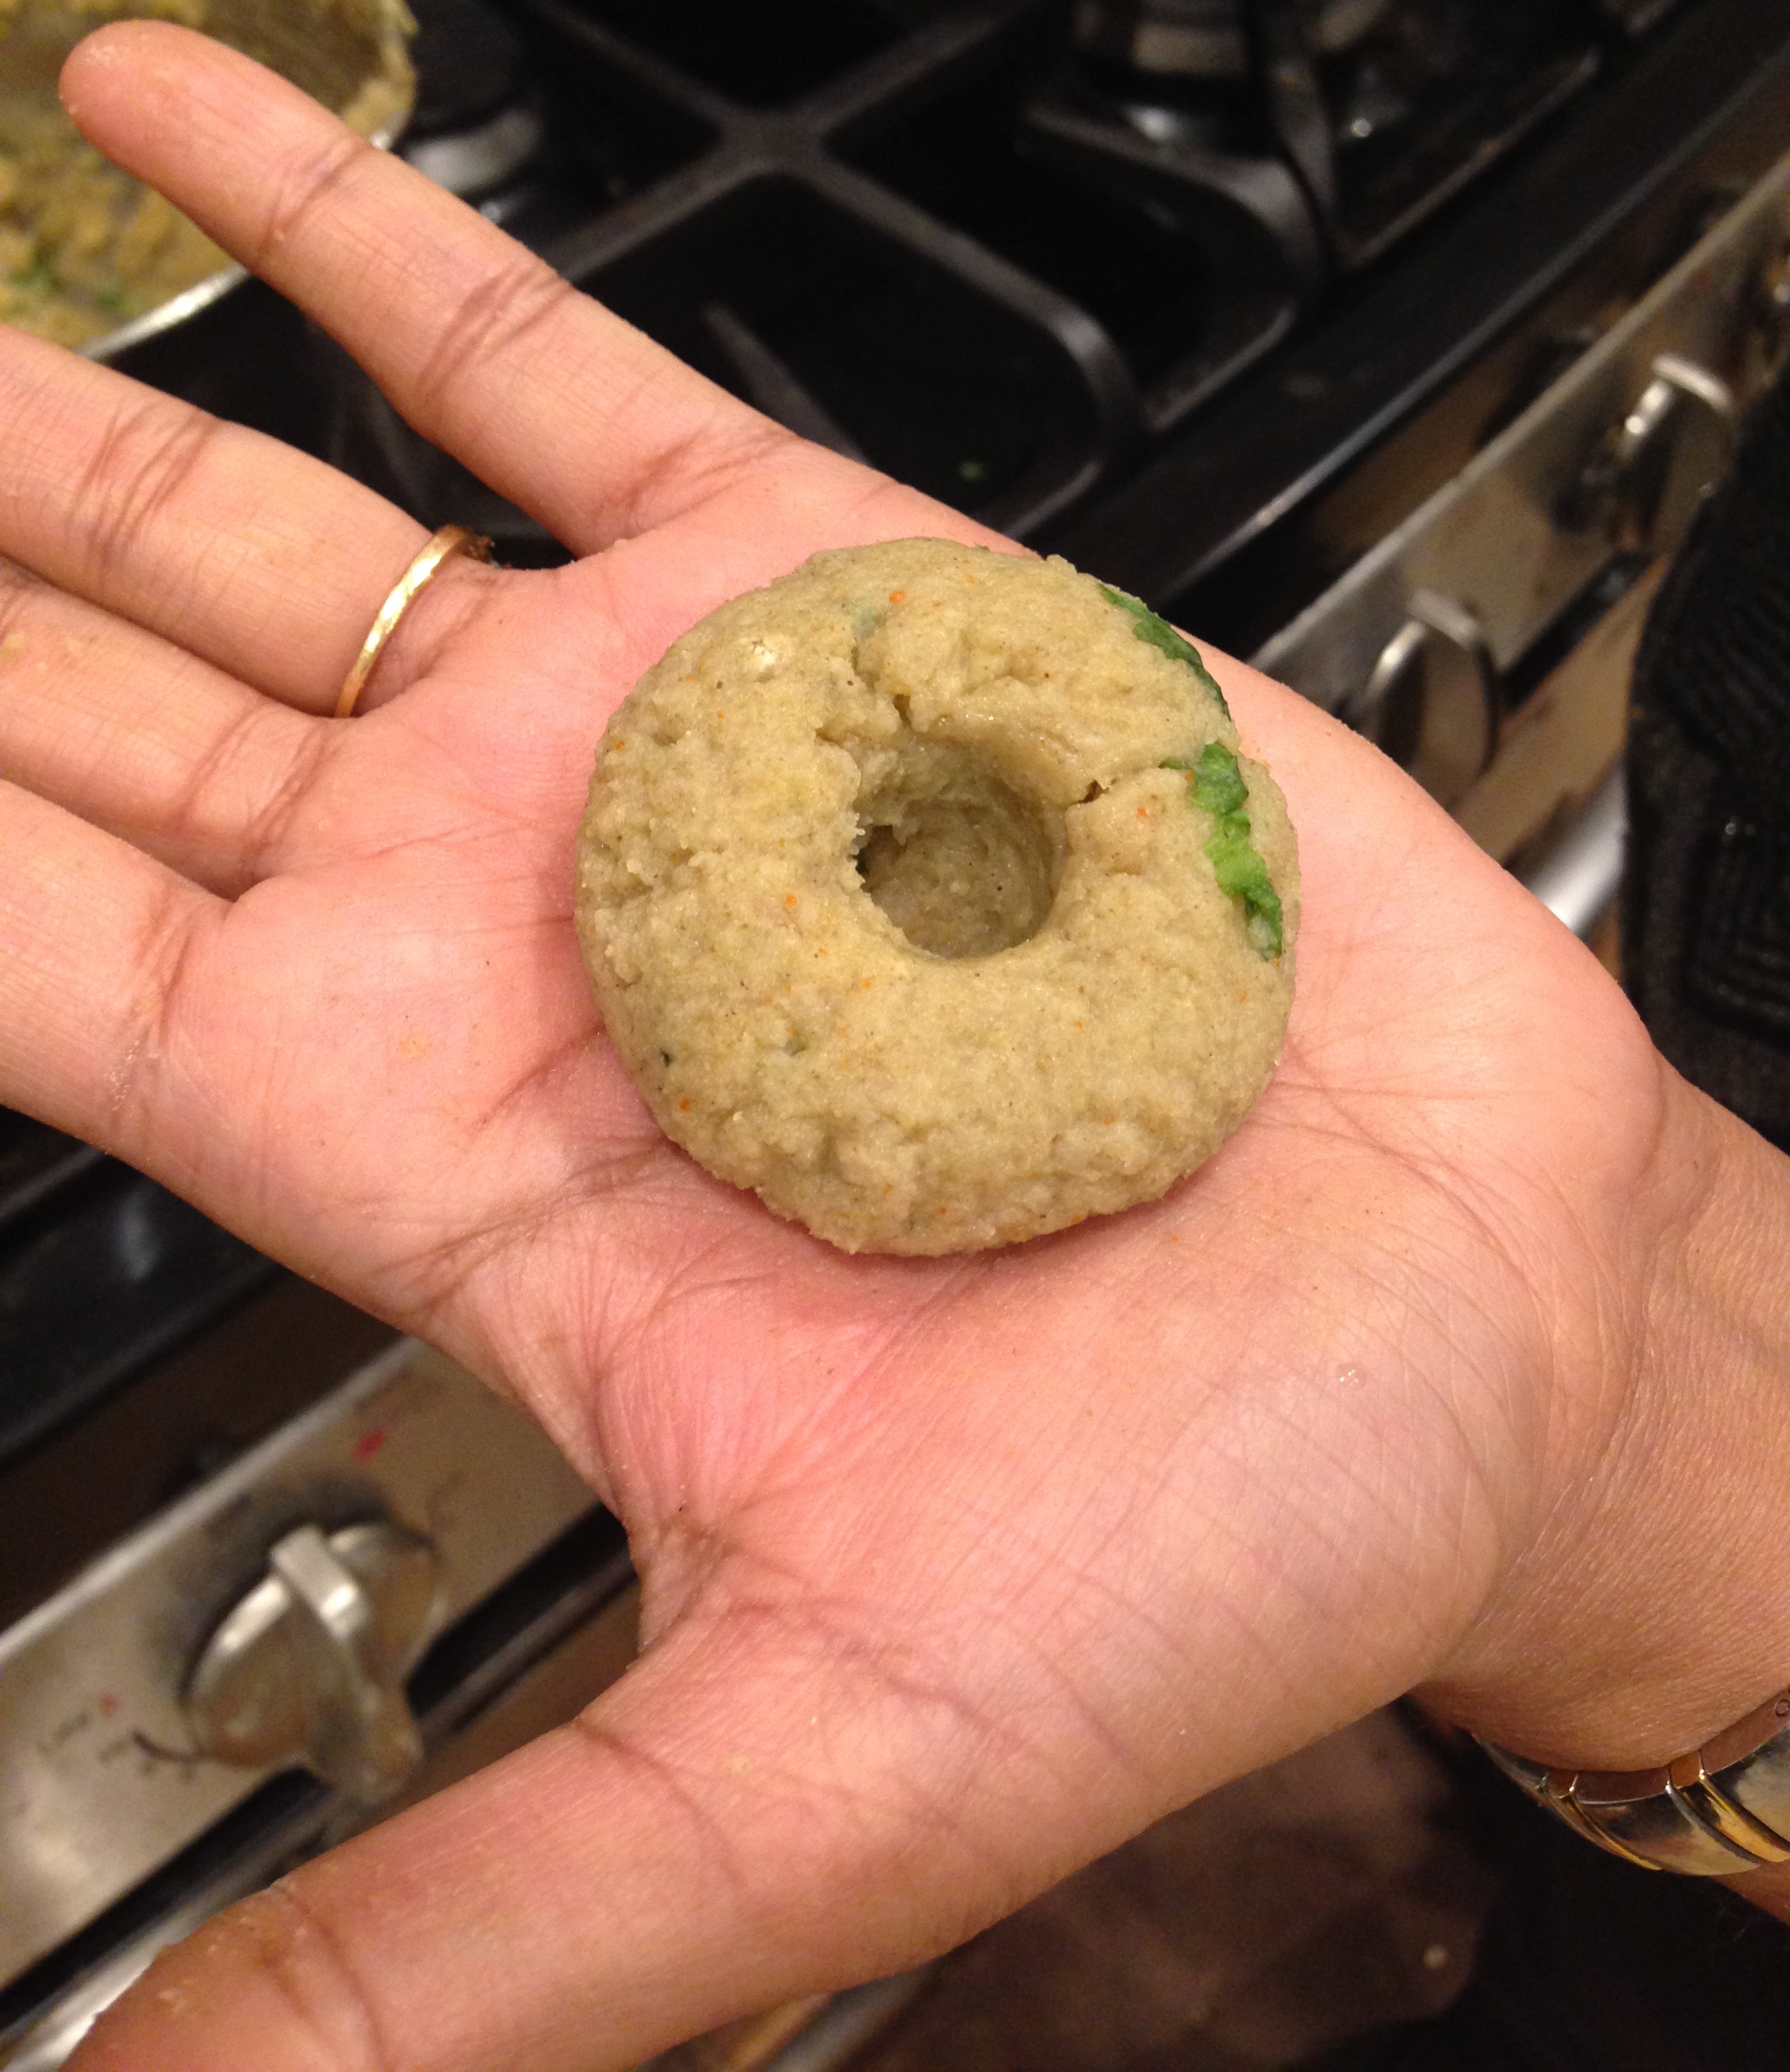
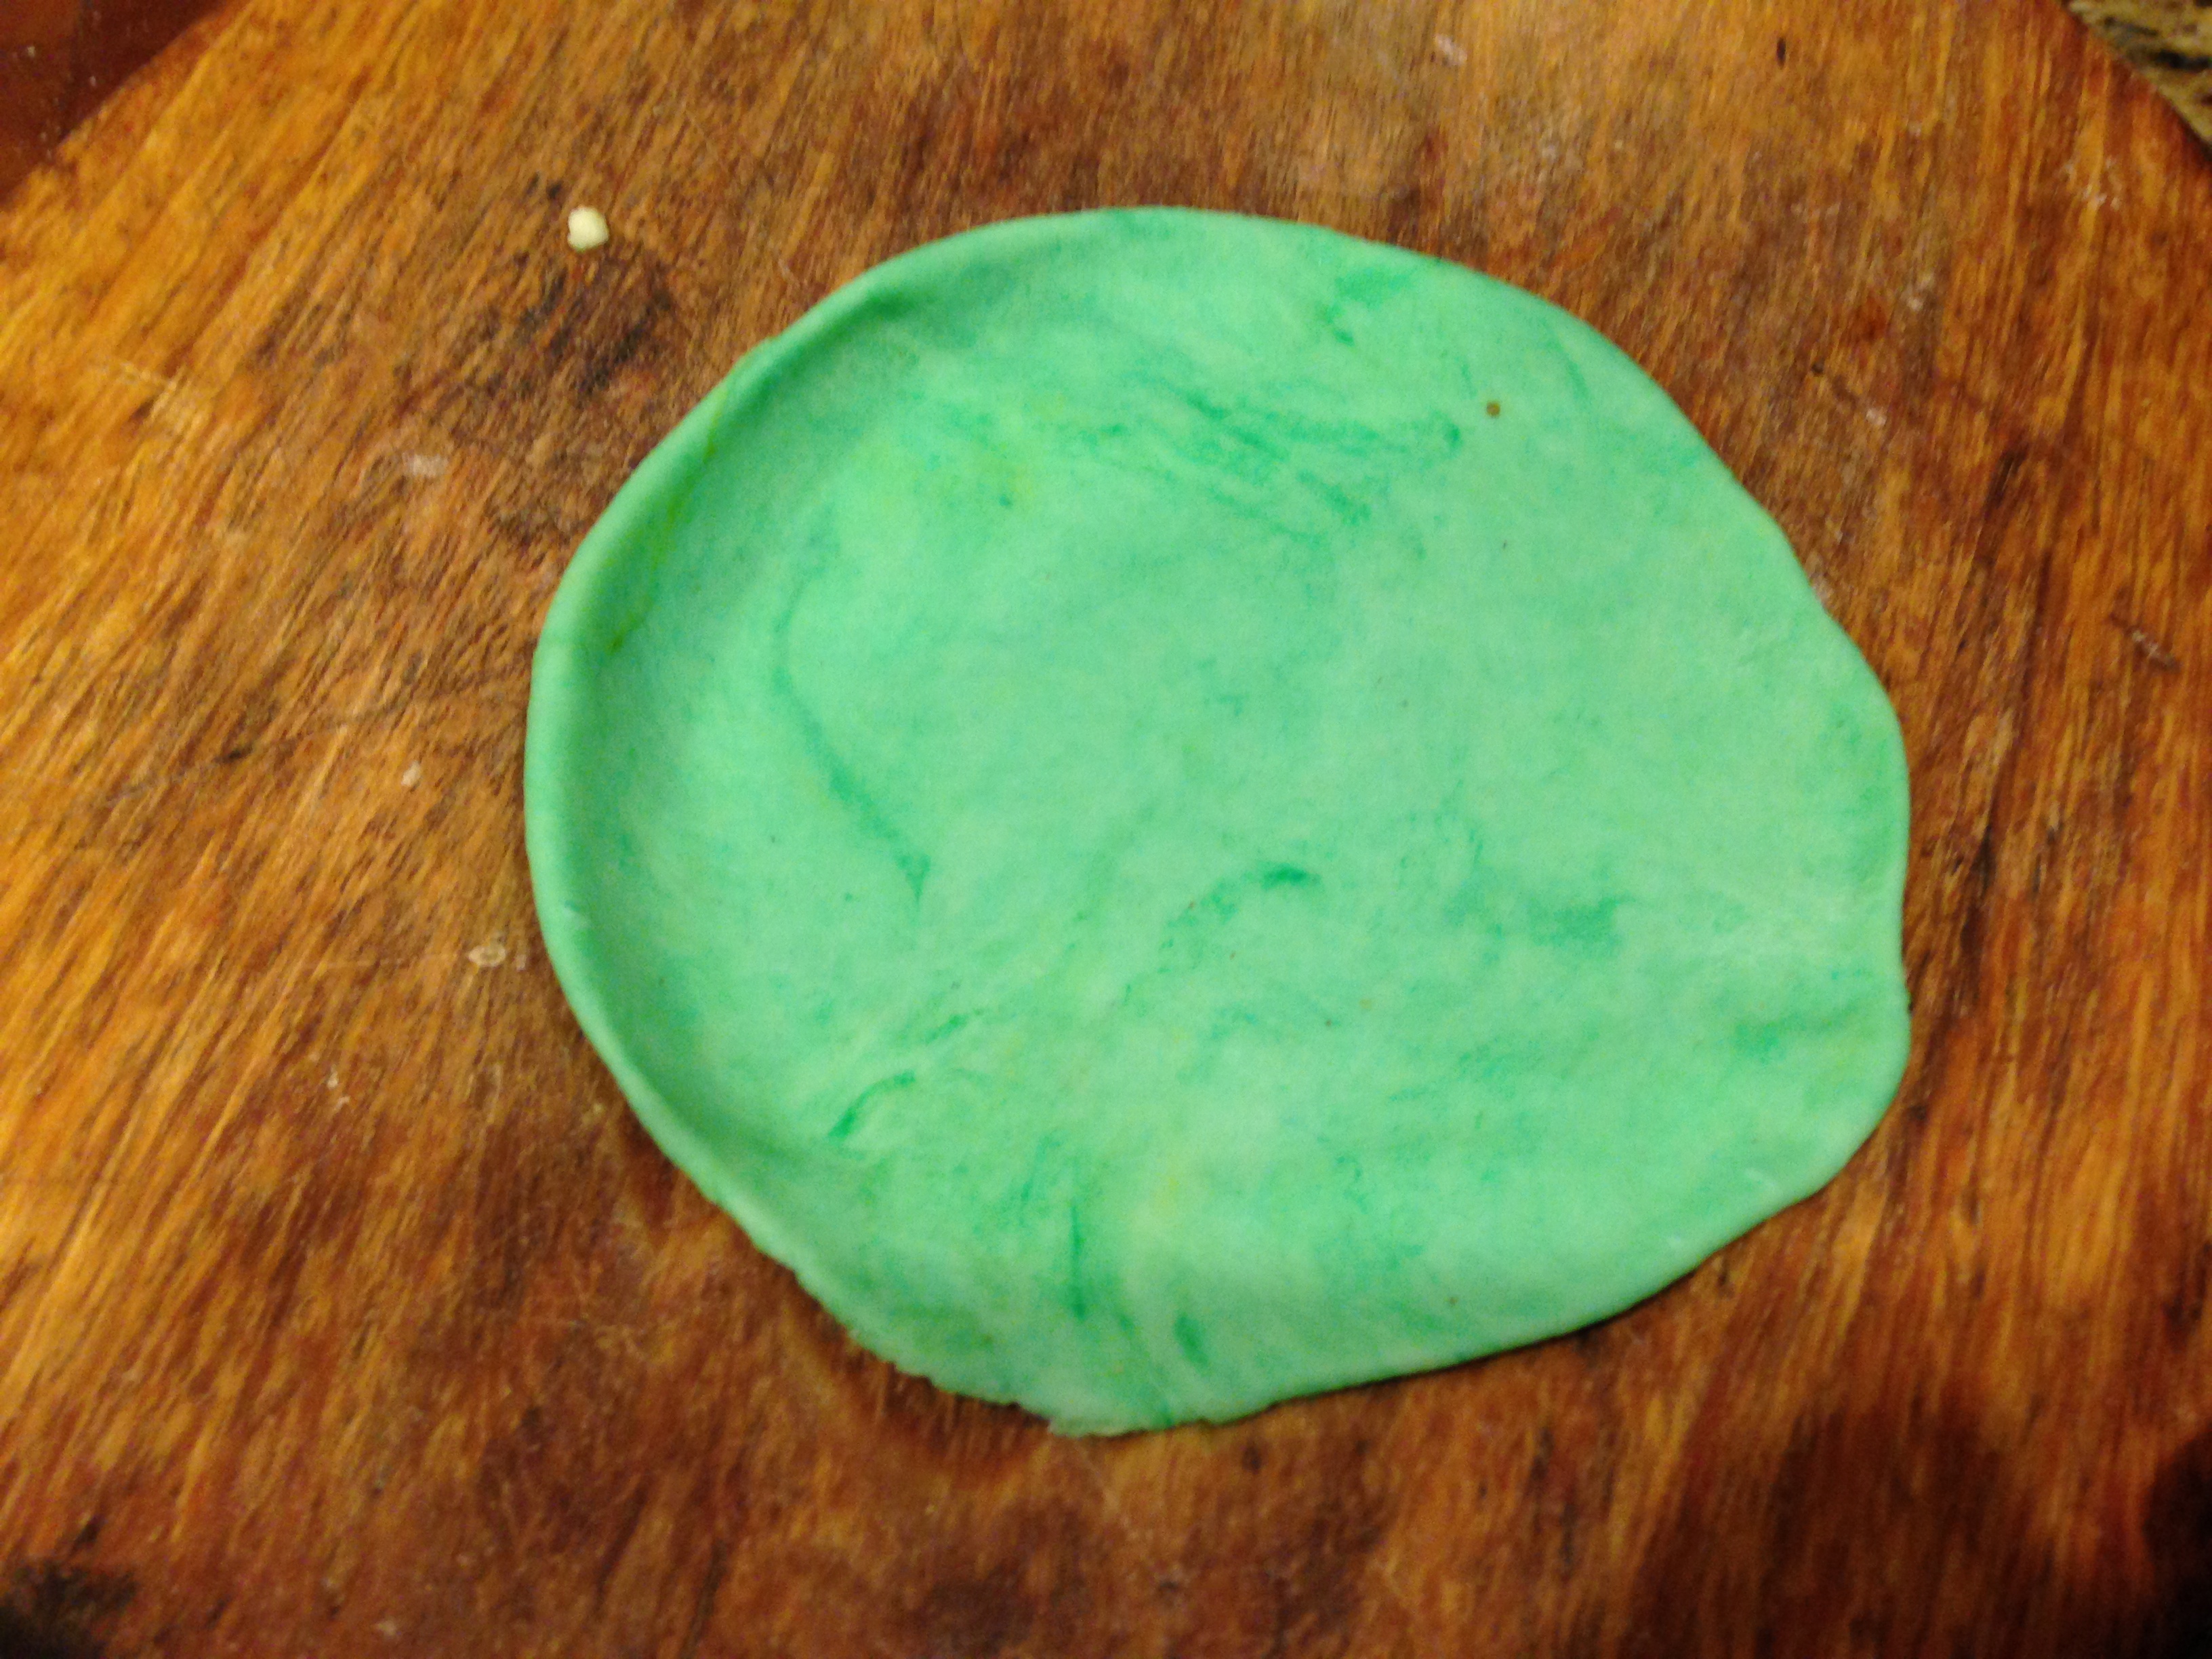
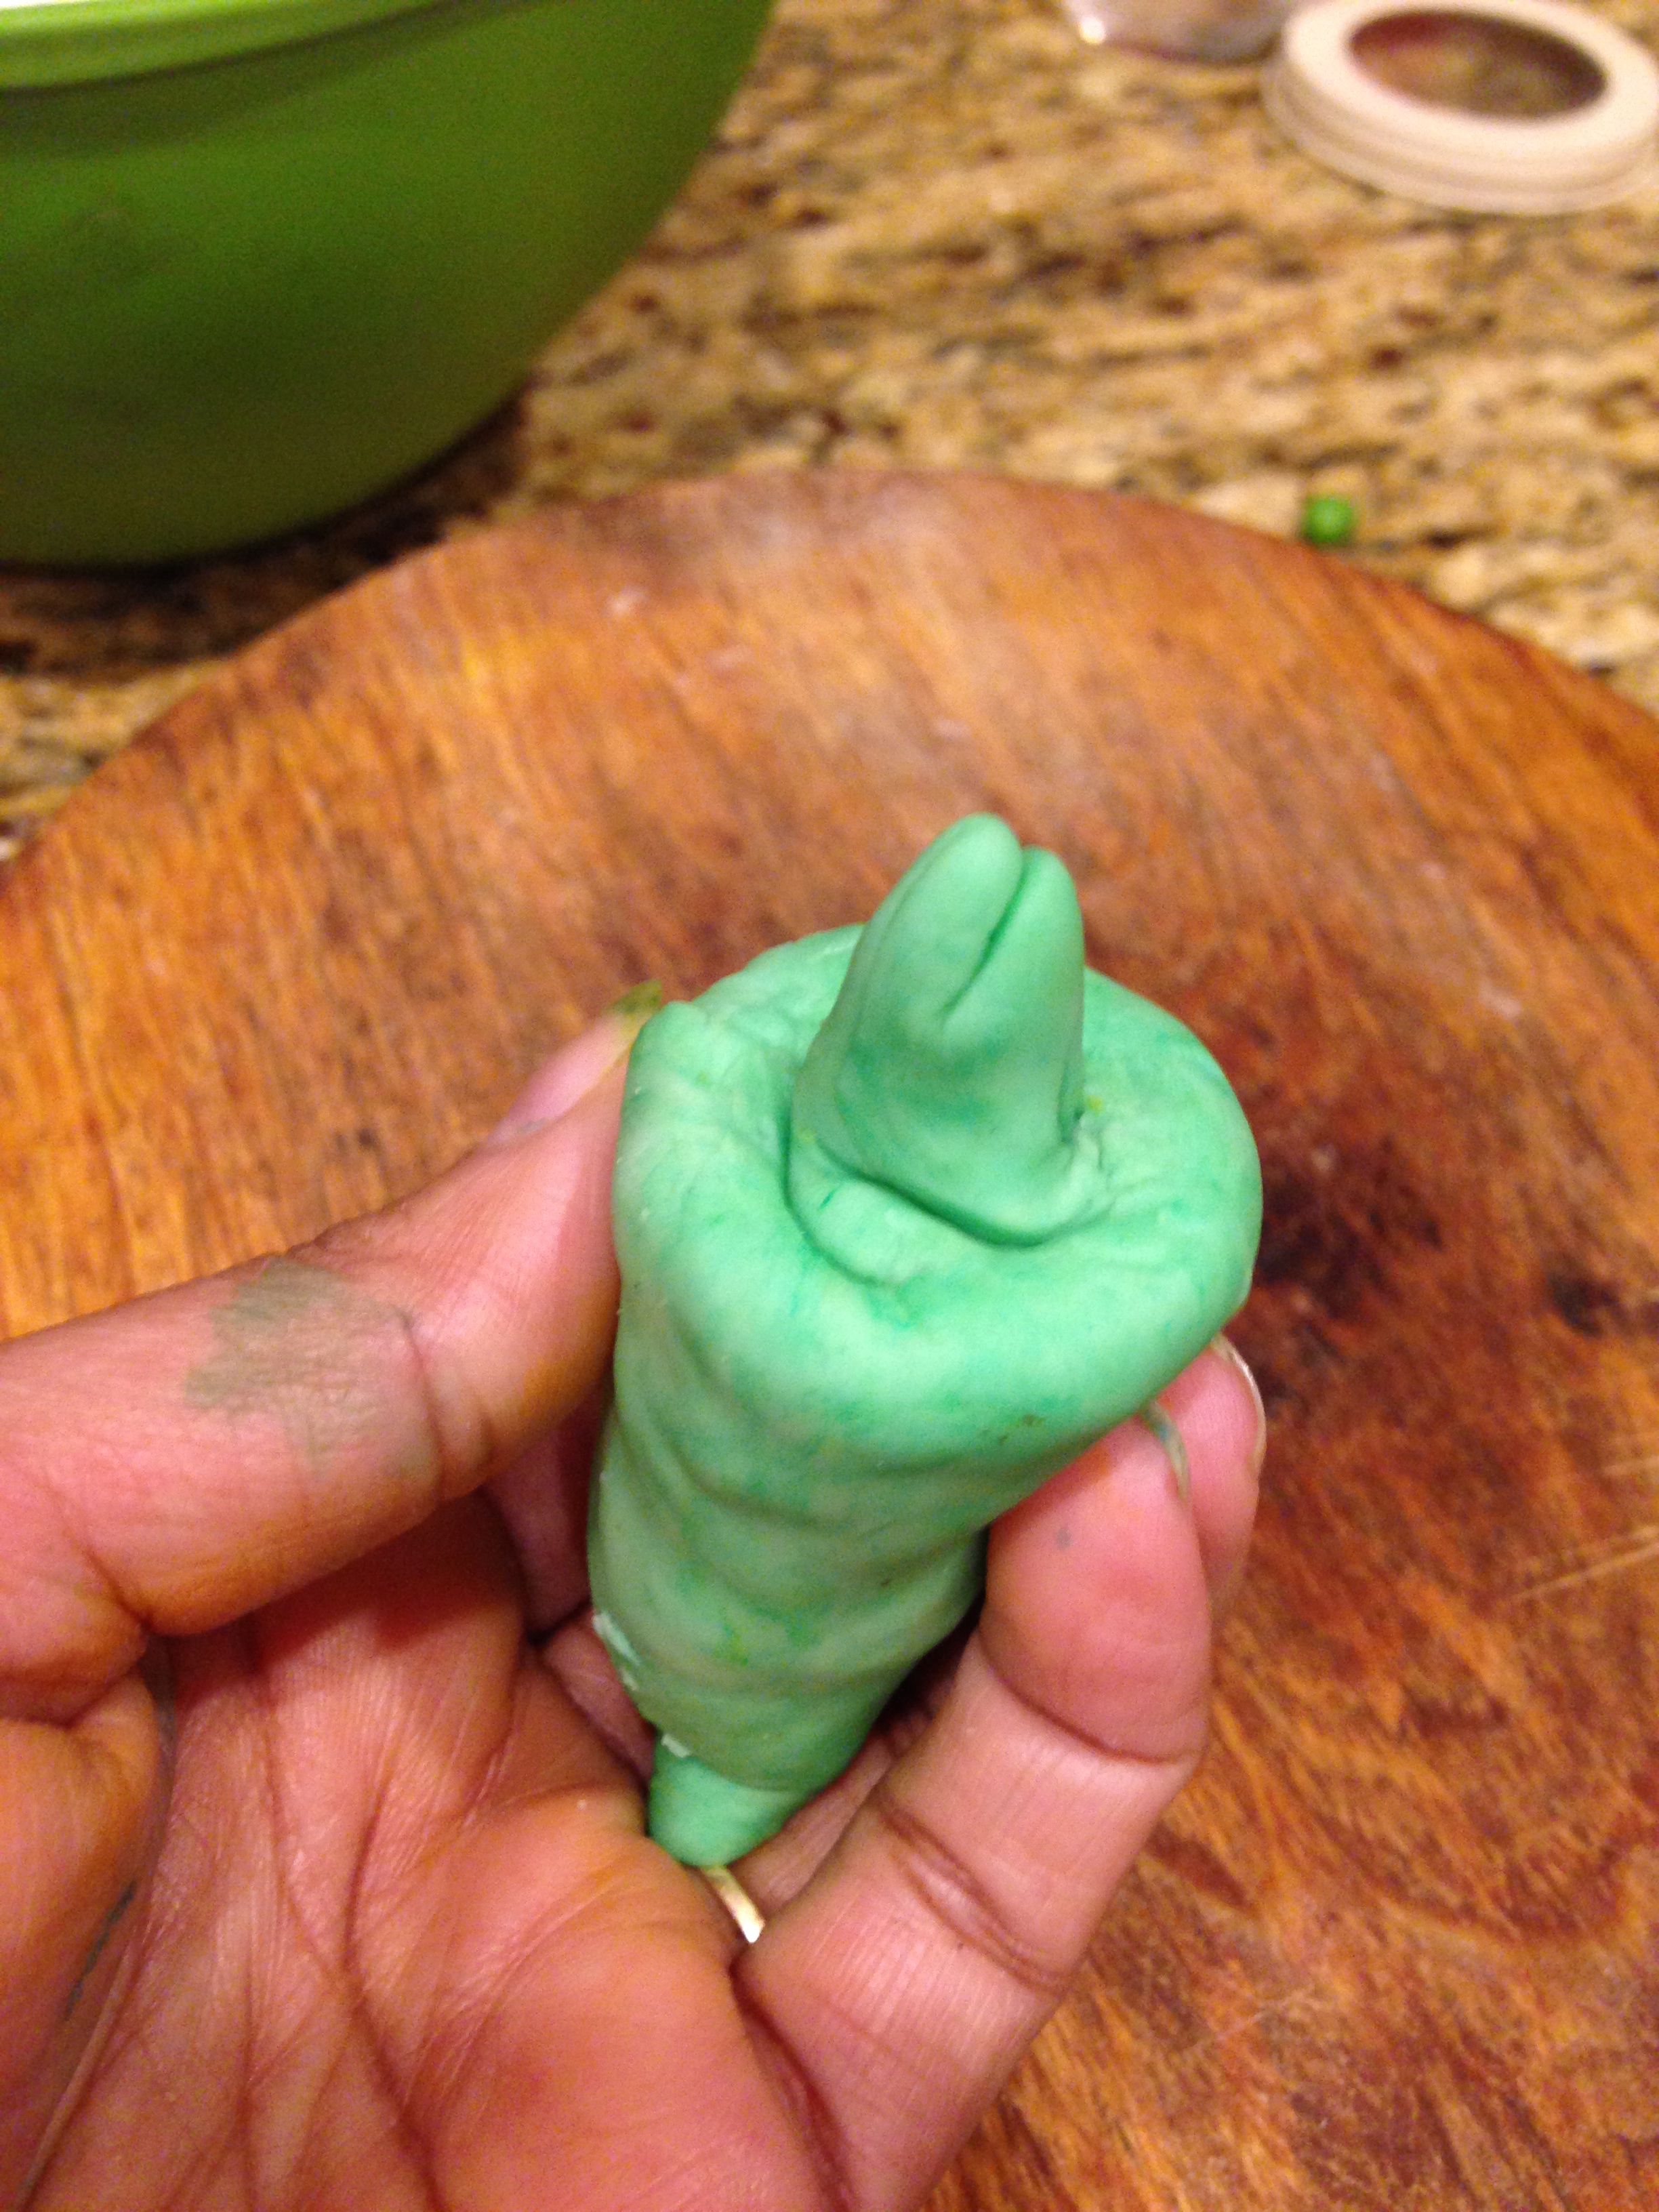
  • Take about a quarter size dough and roll it into a 6-7 inch wide circle.

IMG_2236

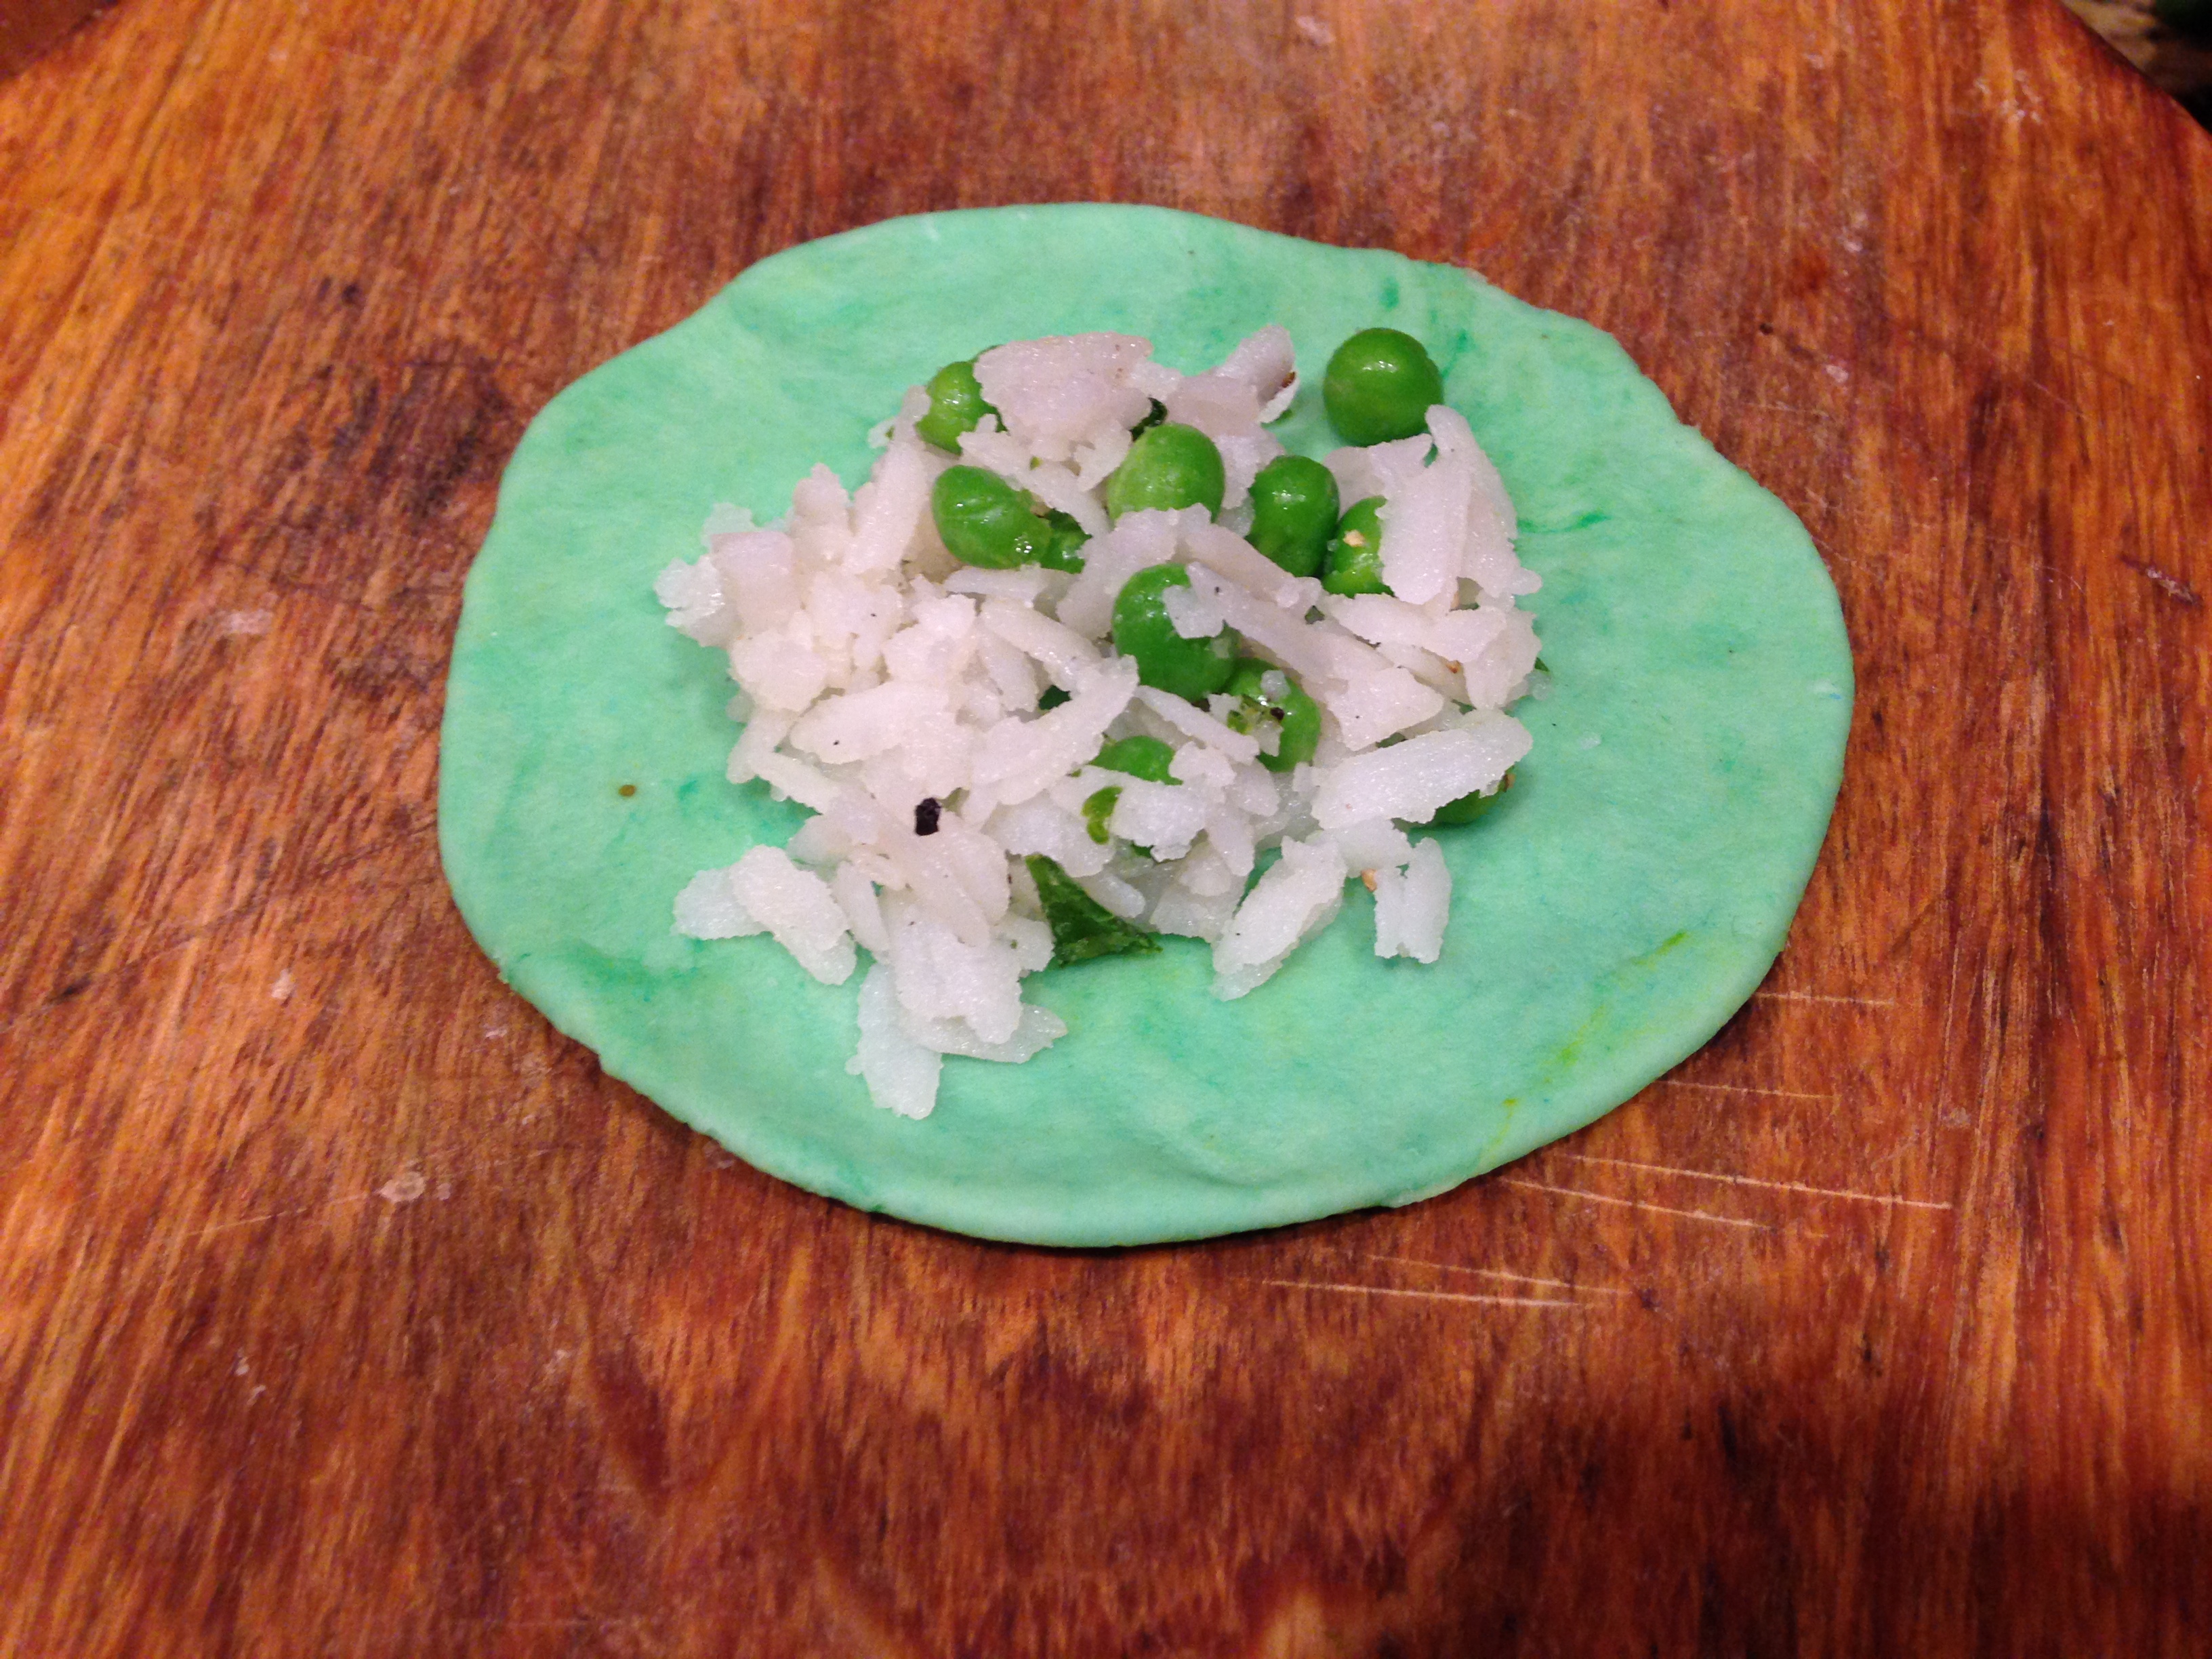
  • Drop a tbsp of rice flakes onto the centre of  the rolled circle.

IMG_2237

  • Close the edges of the circle into a V shape flaps, leaving the top open.

IMG_2238

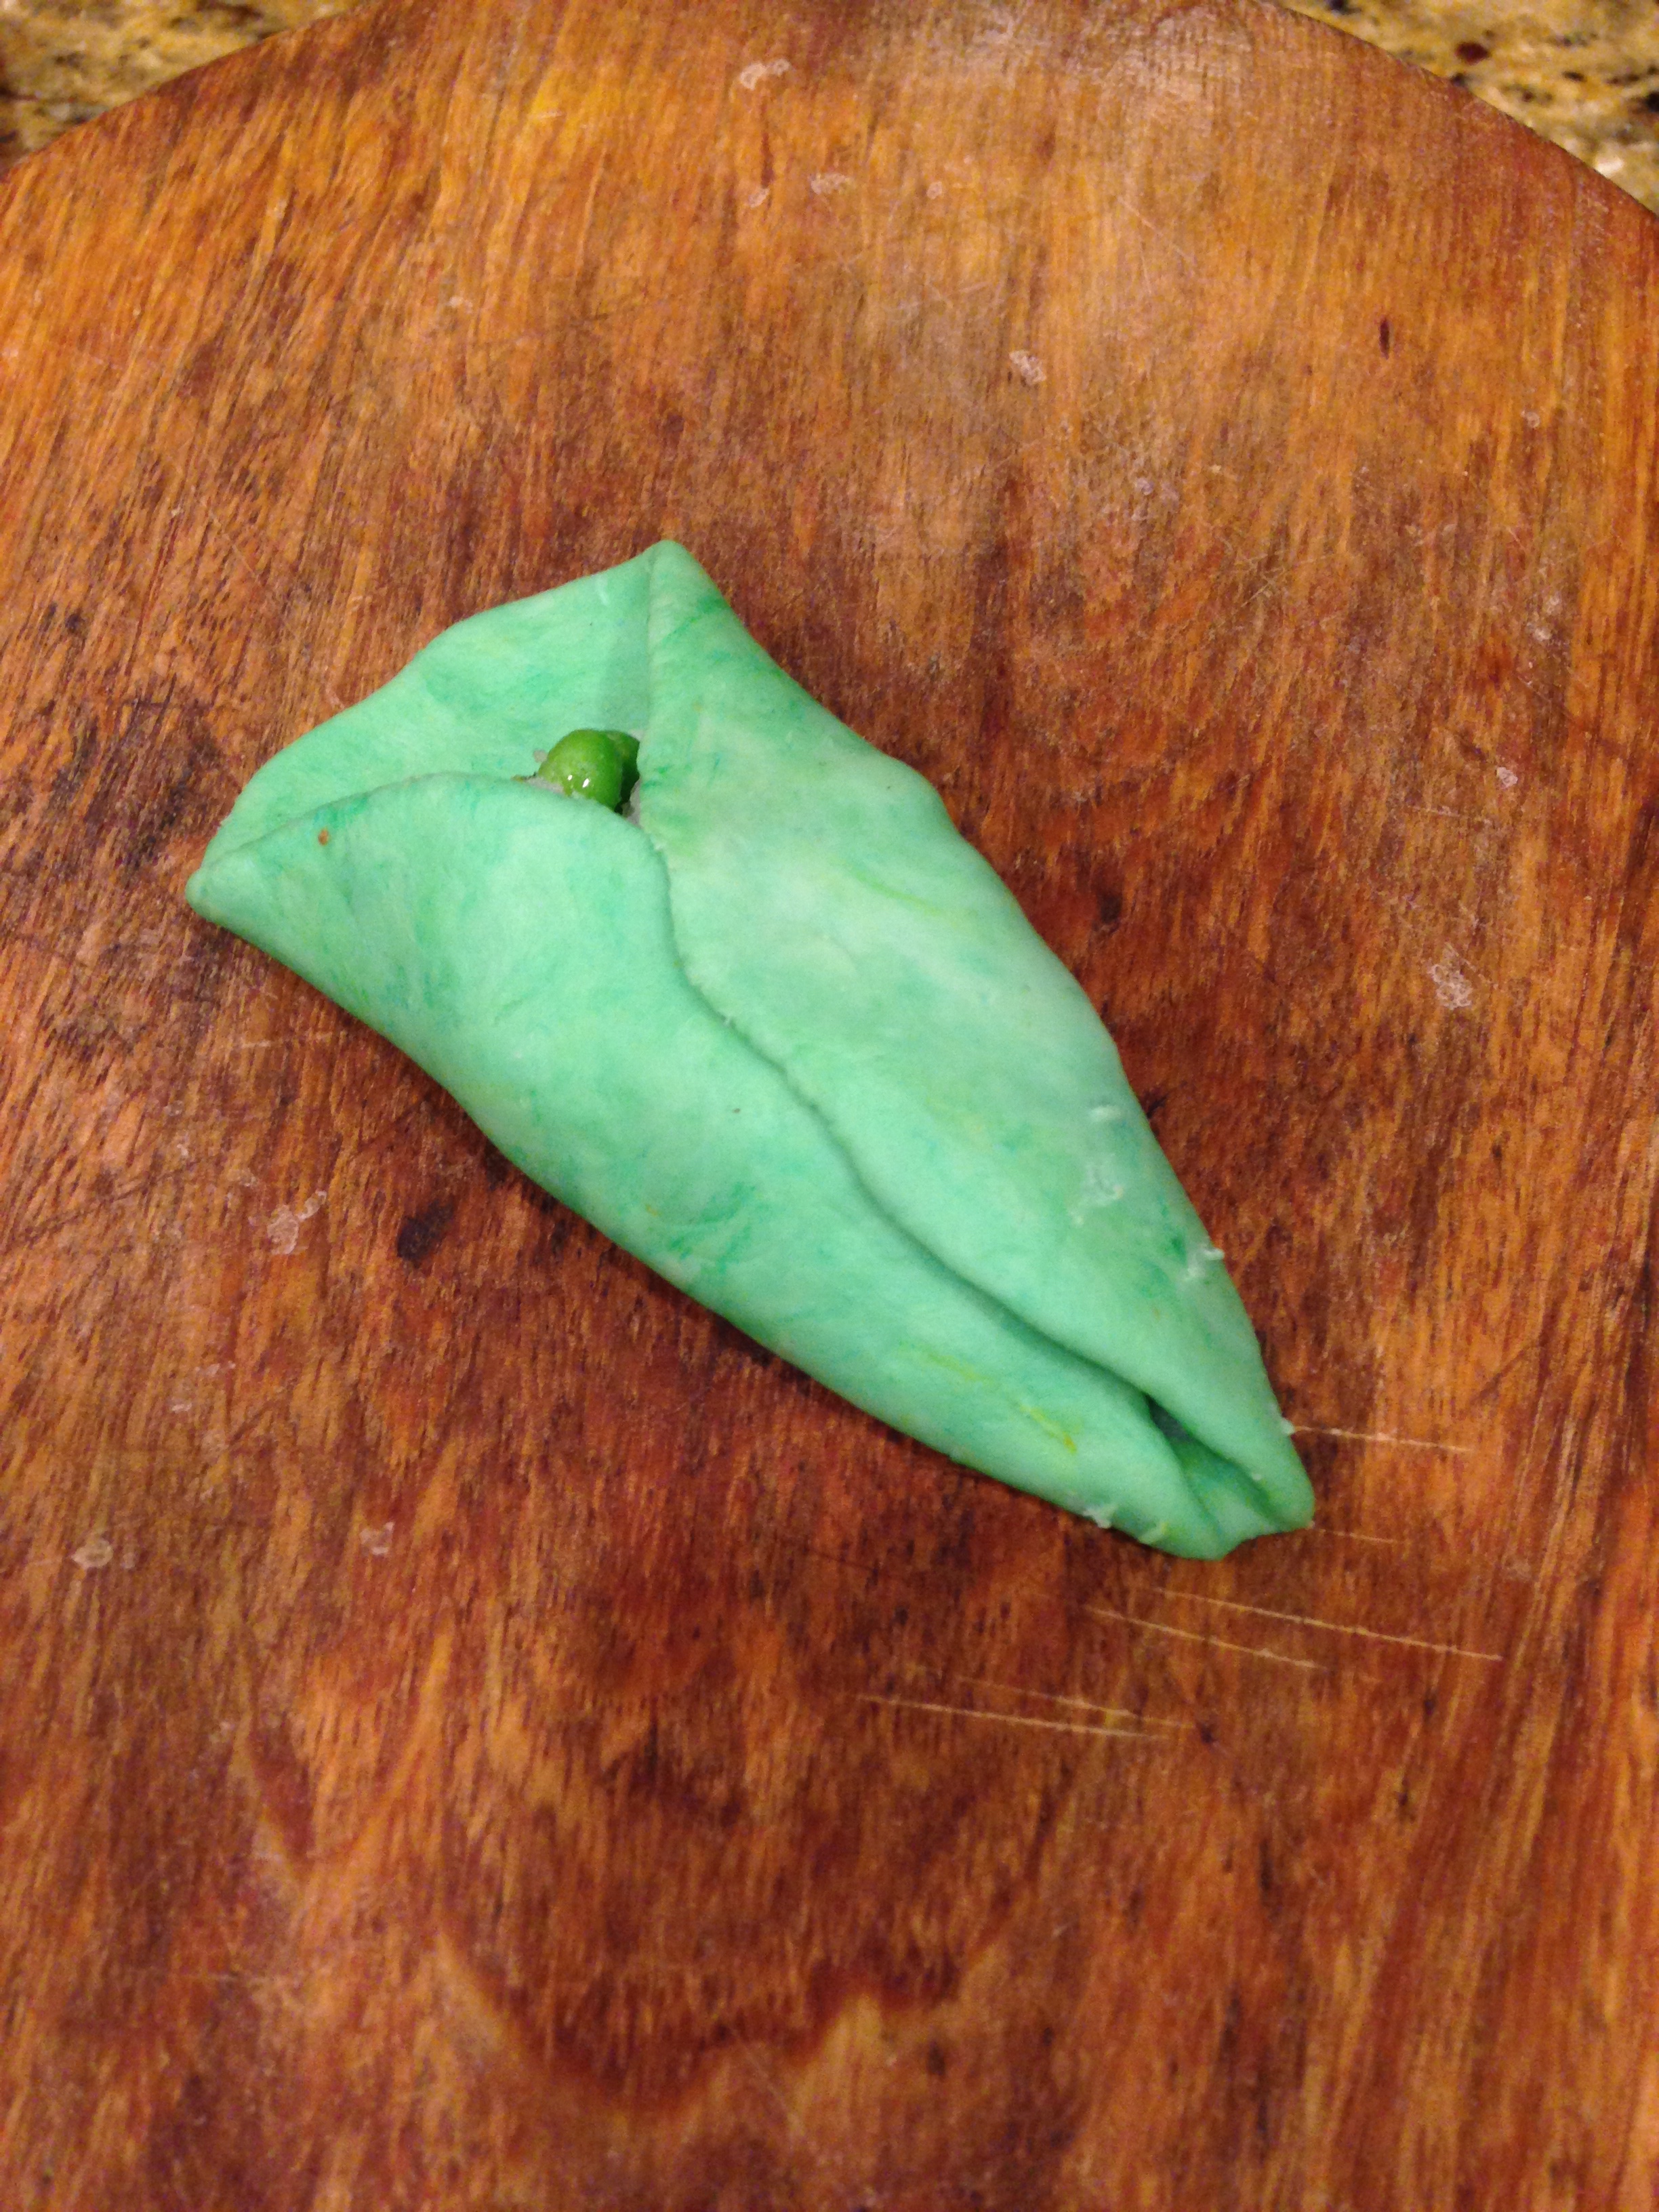
  • Pinch the edges where the flaps meet all the way to the open part of the circle.
  • Gather all the edges of the open part of the circle, by pinching in the centre, creating a stem like.

IMG_2240

  • Push the stem downwards to create a bit of indent and make sure all edges are sealed well on the top and the sides.

IMG_2241

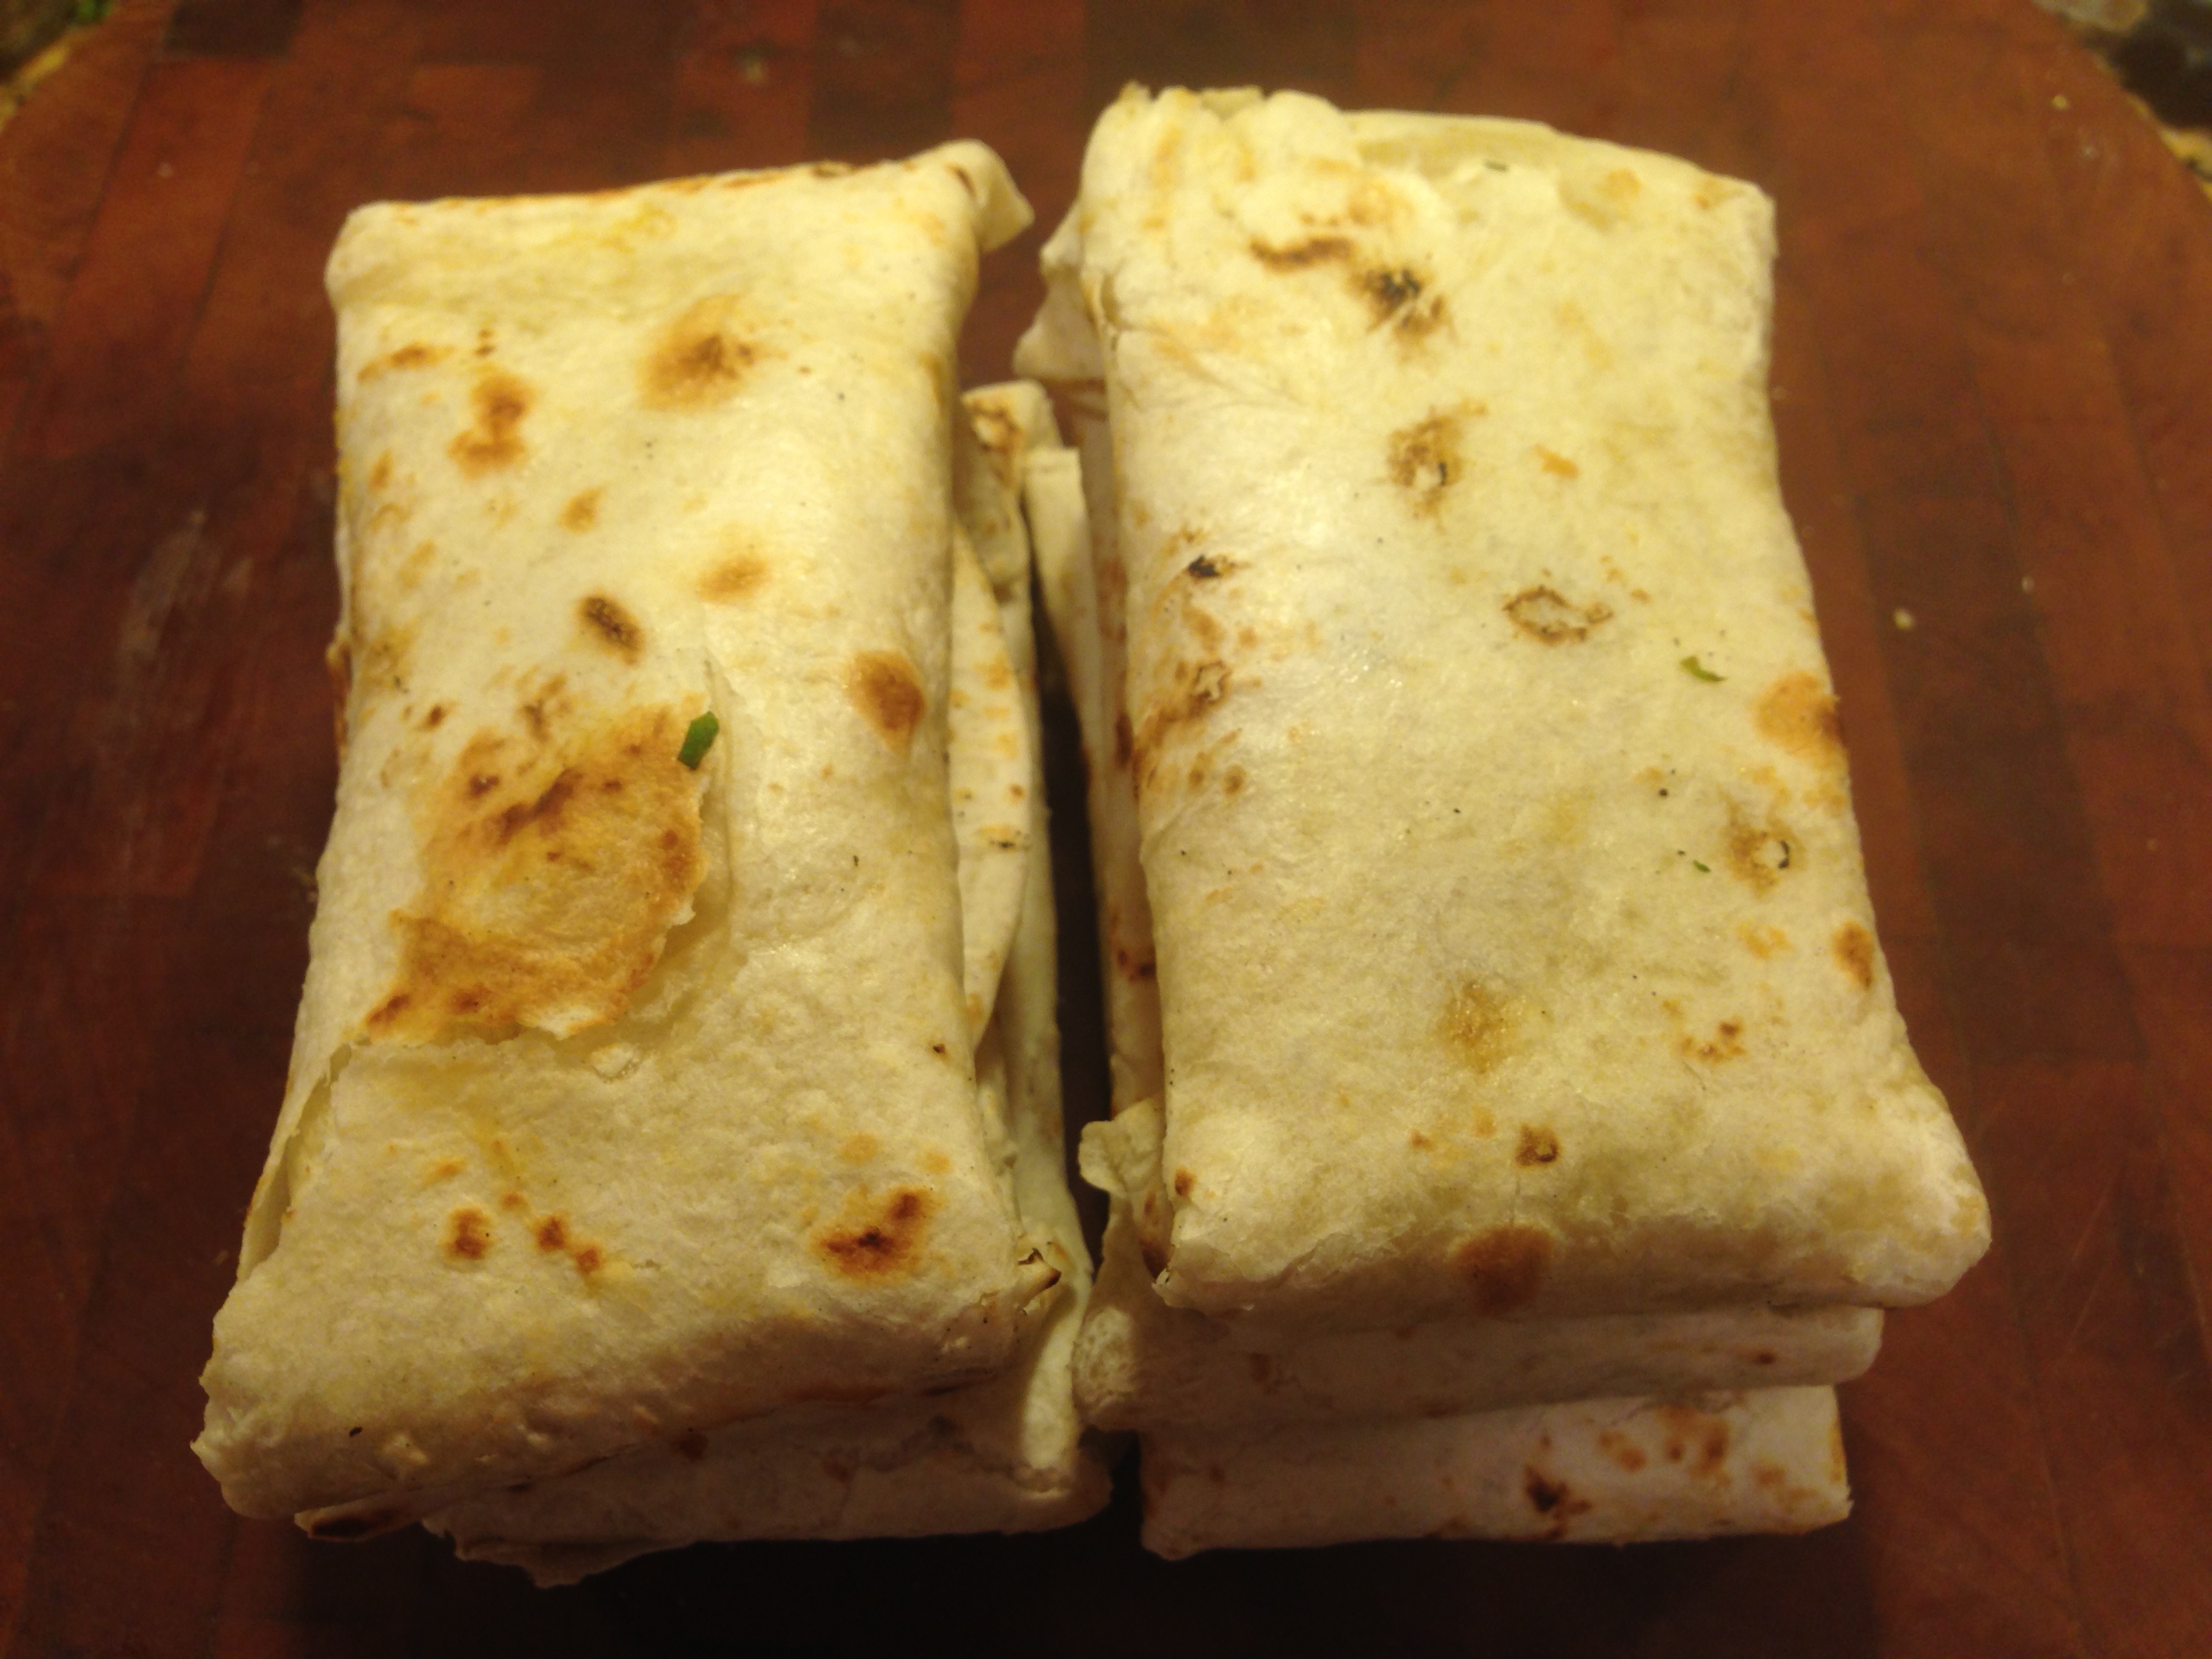
  • Use up all the dough to make the stuffed mirchi pepper.

IMG_2243

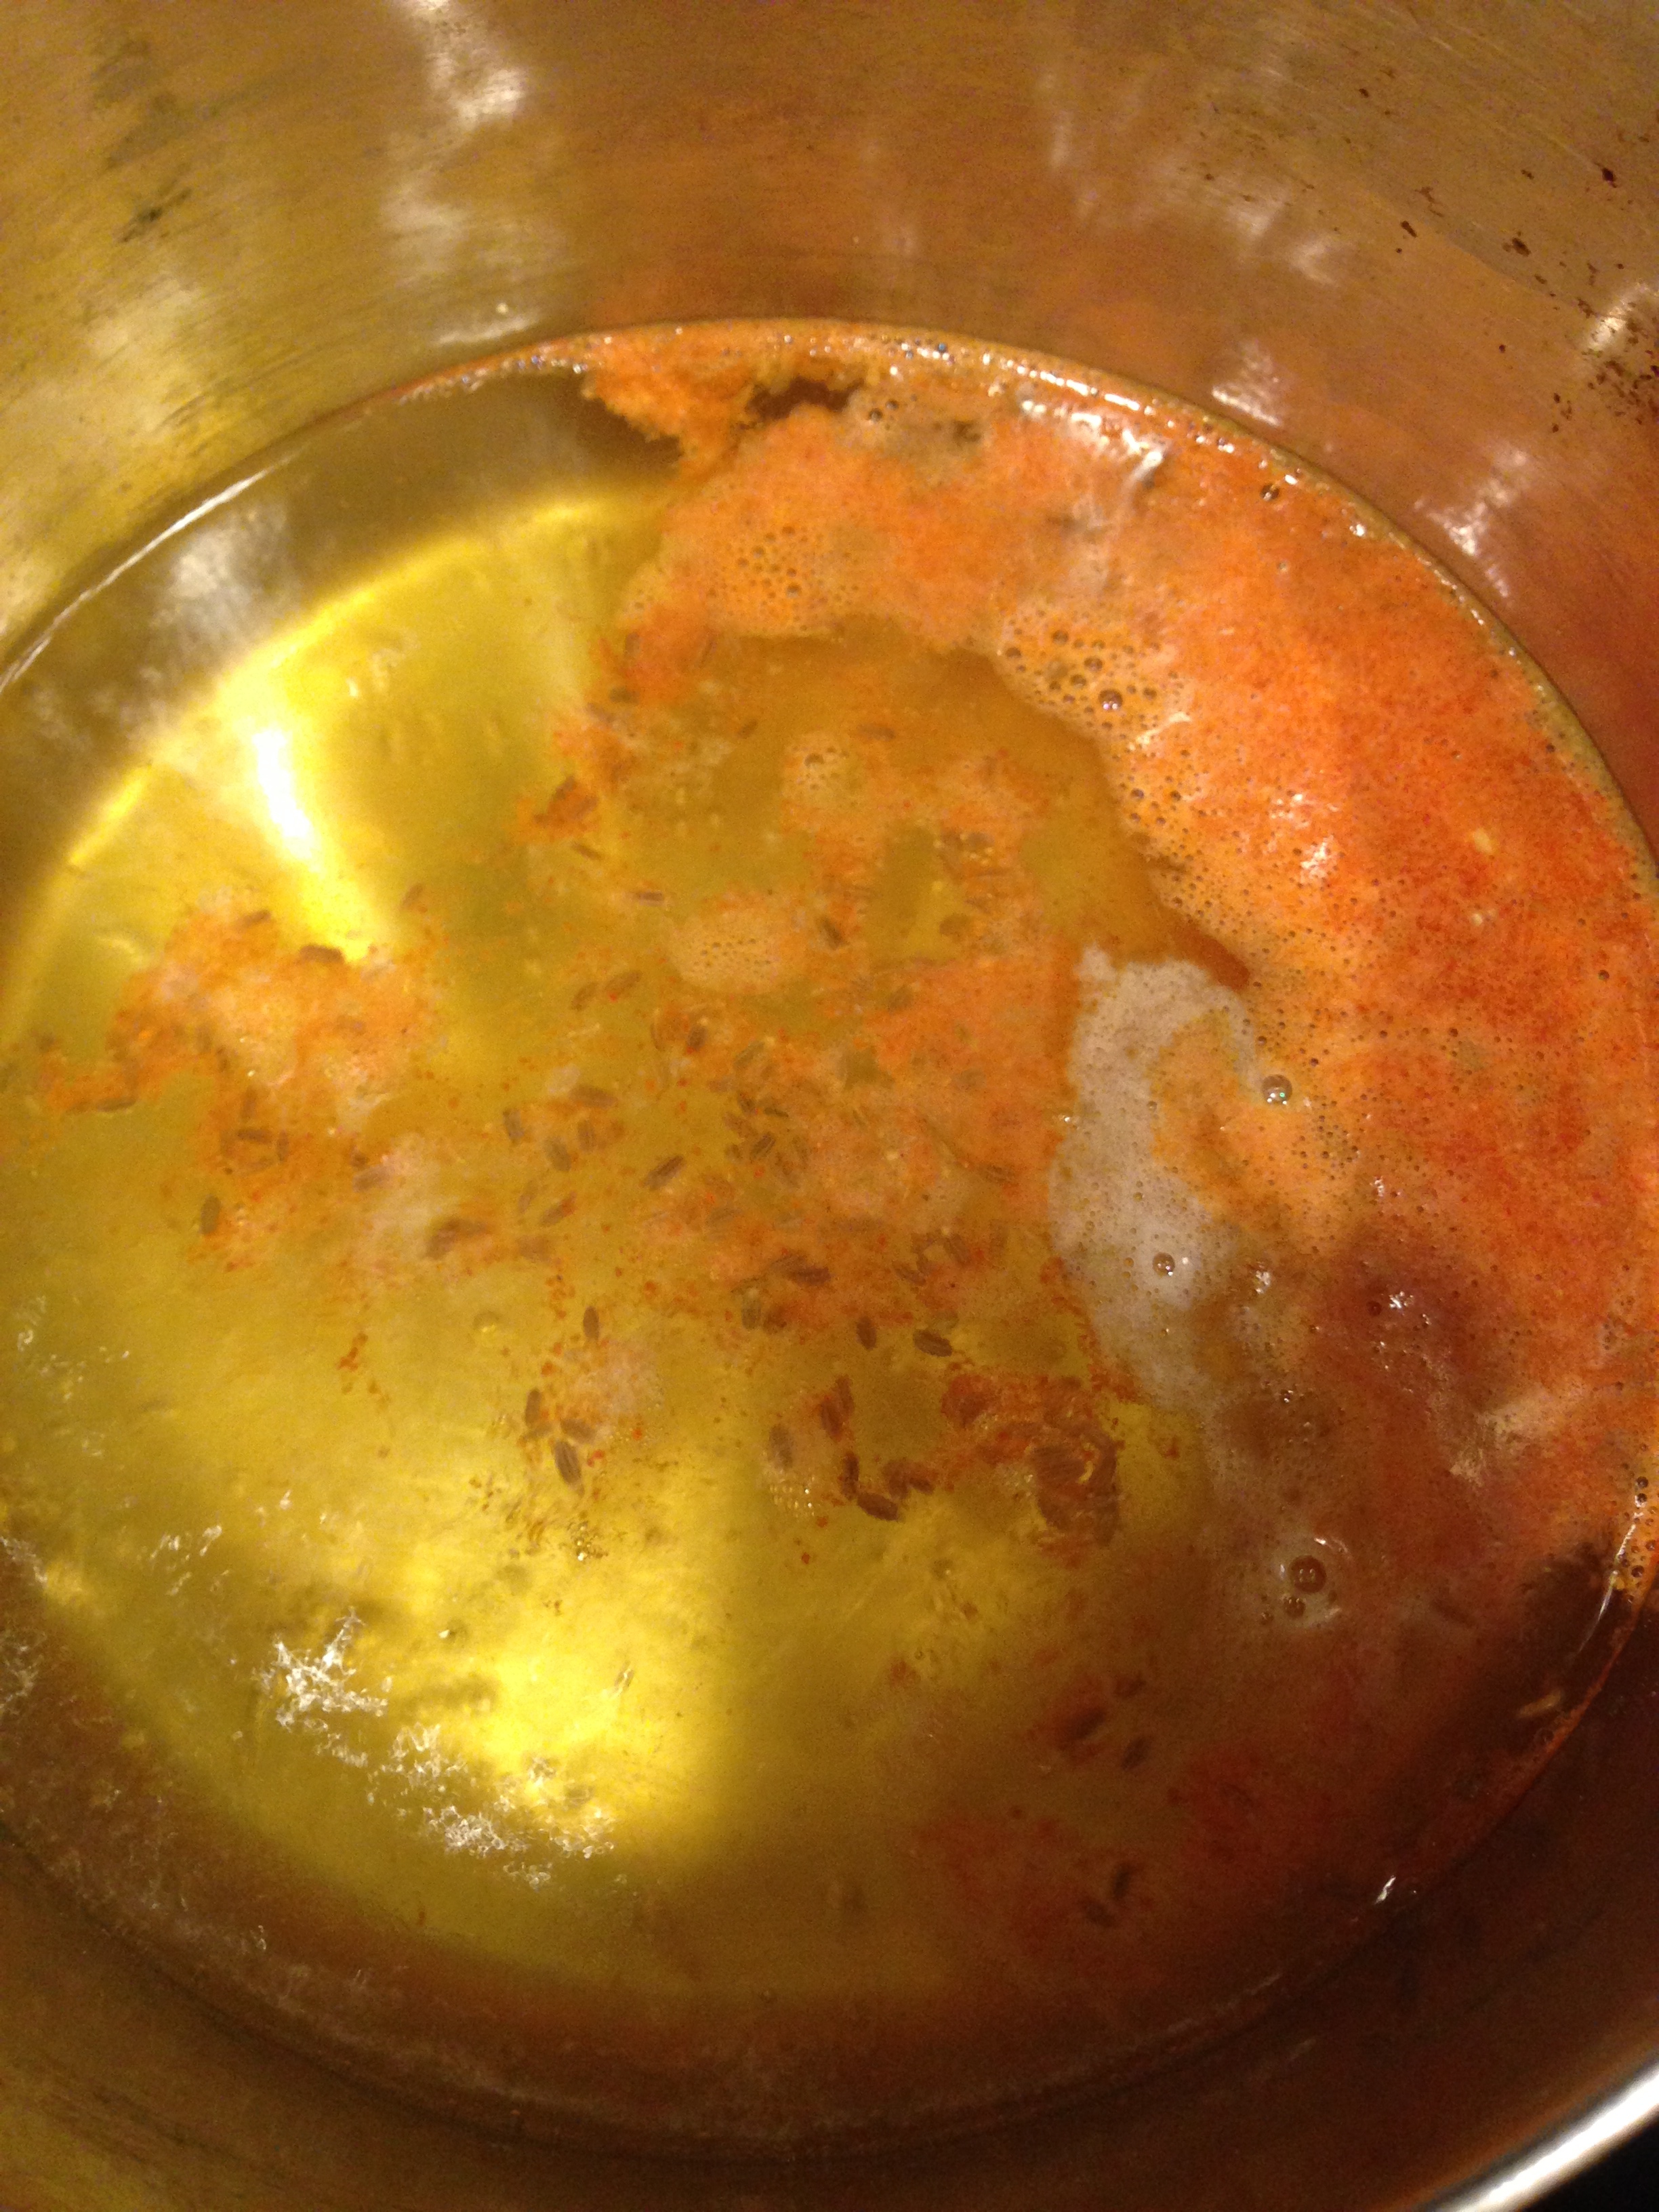
  • Heat oil for deep frying on a high flame.
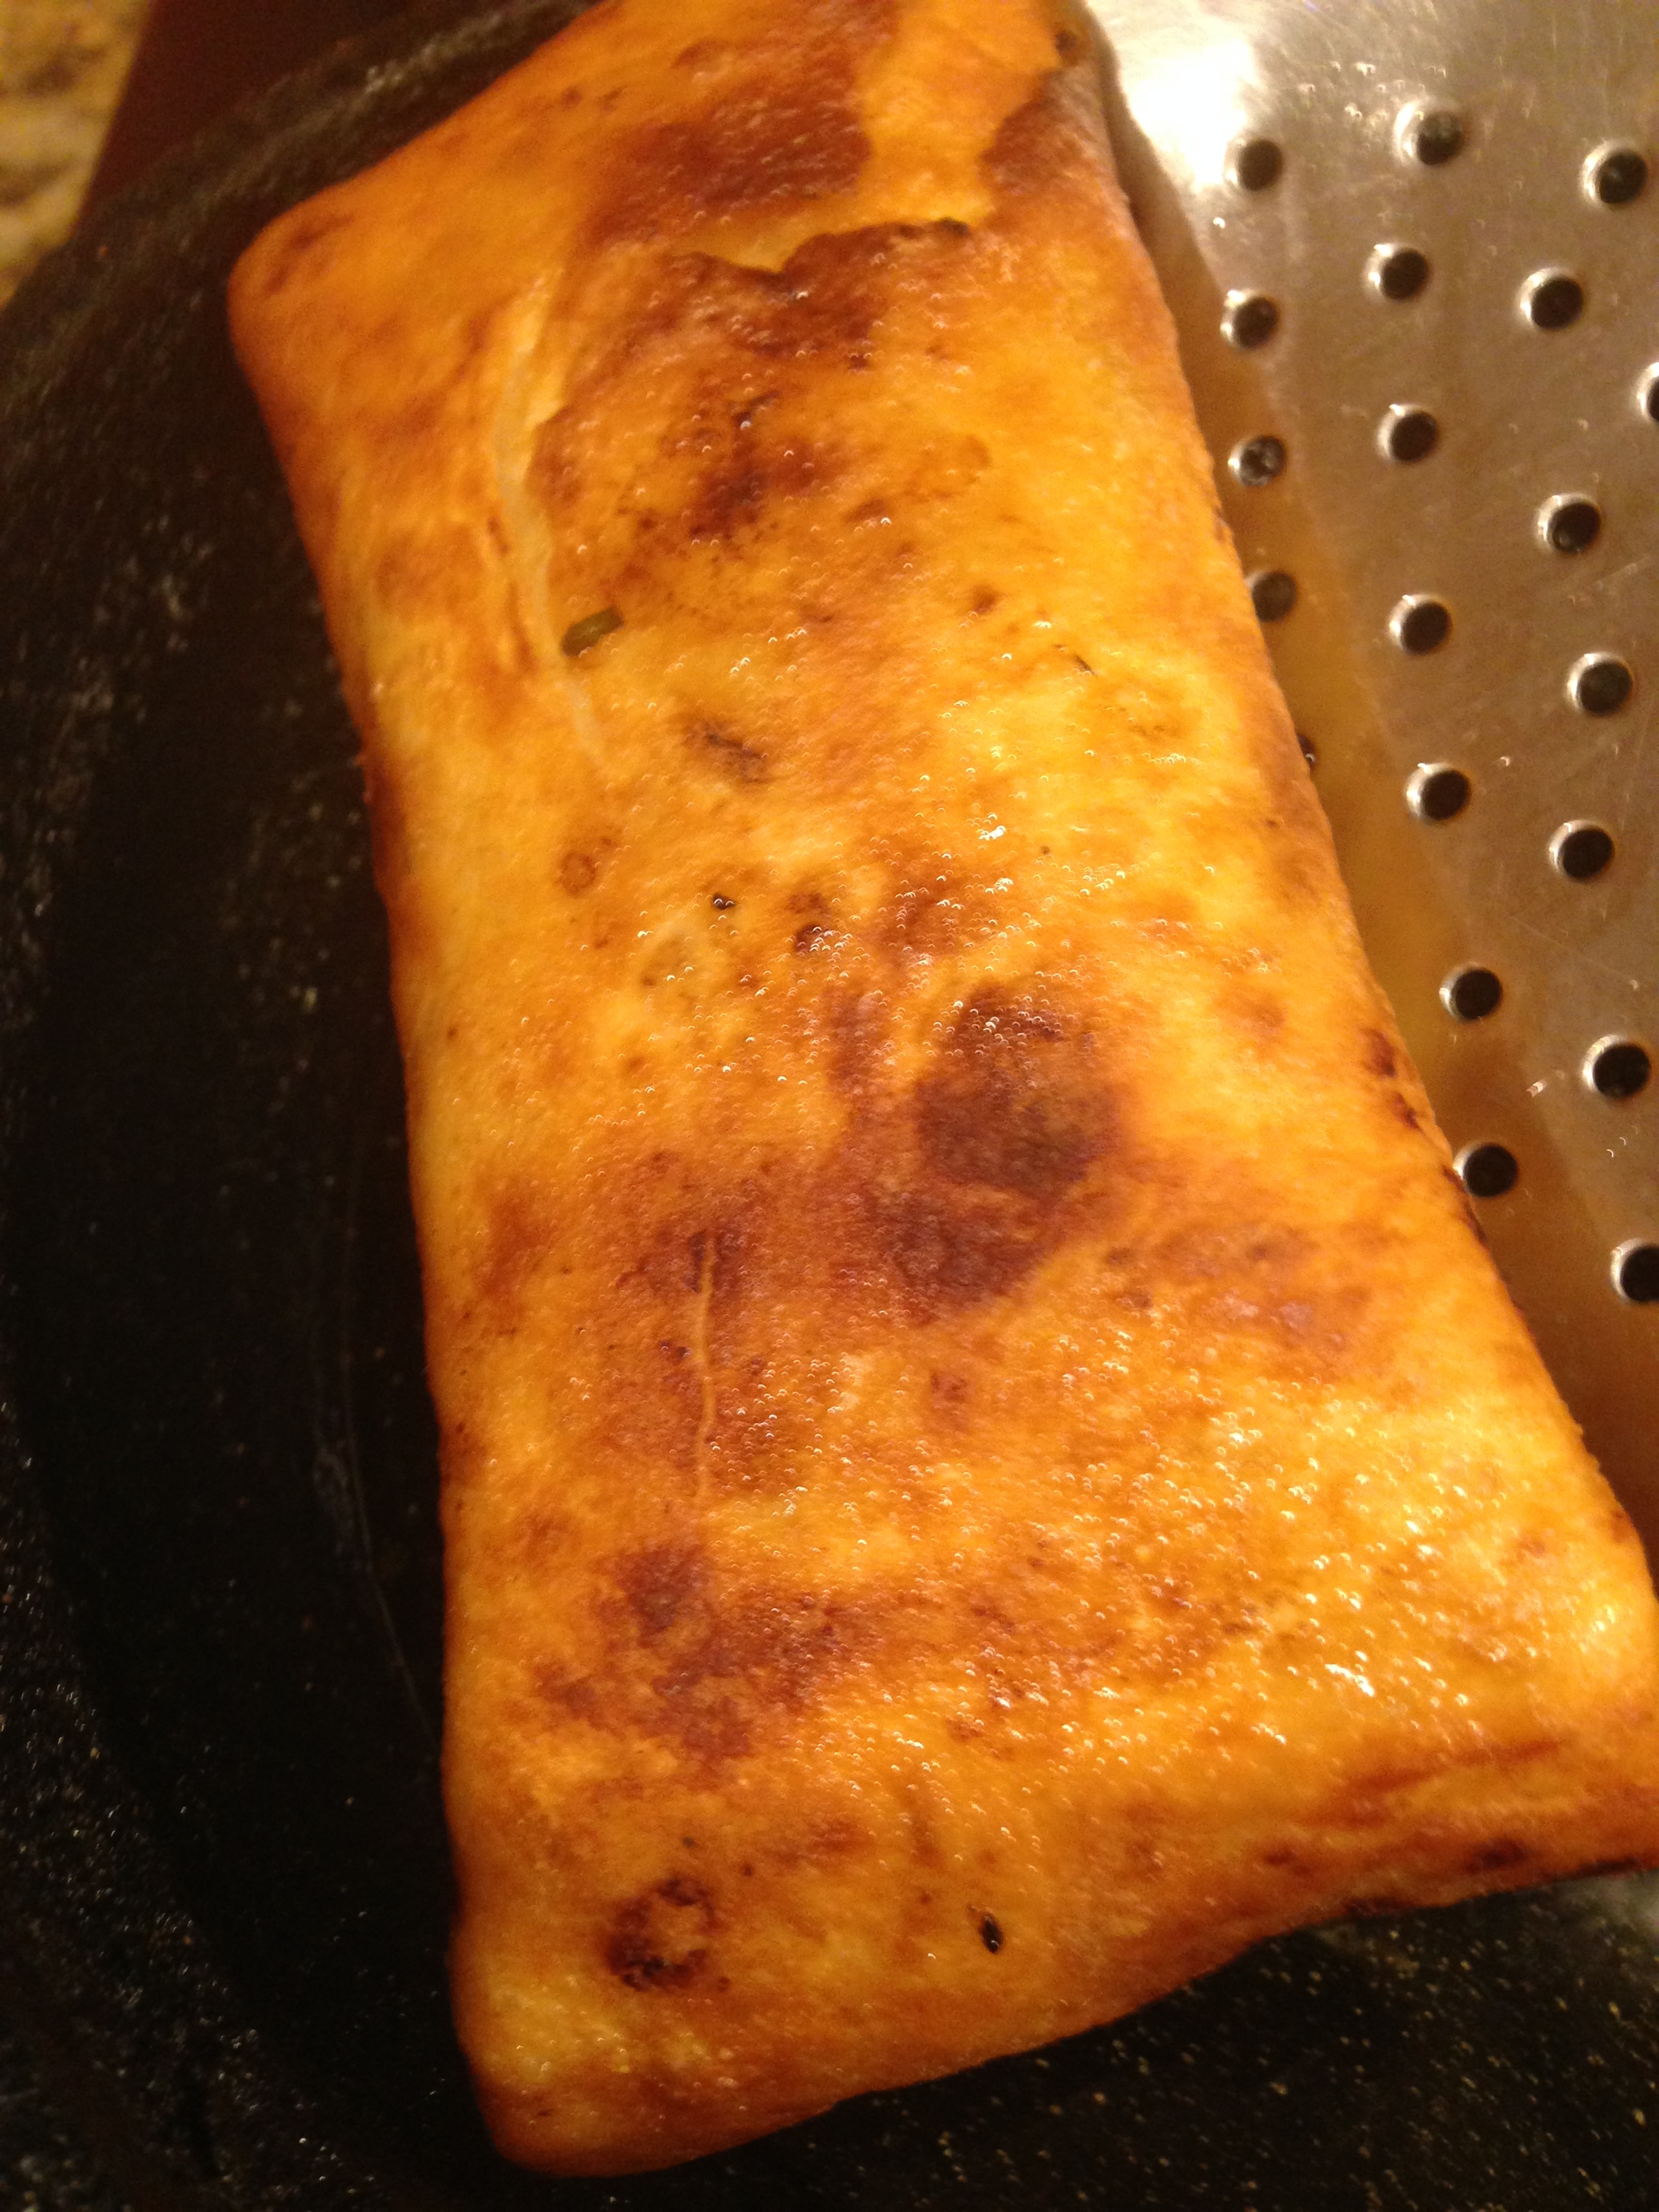
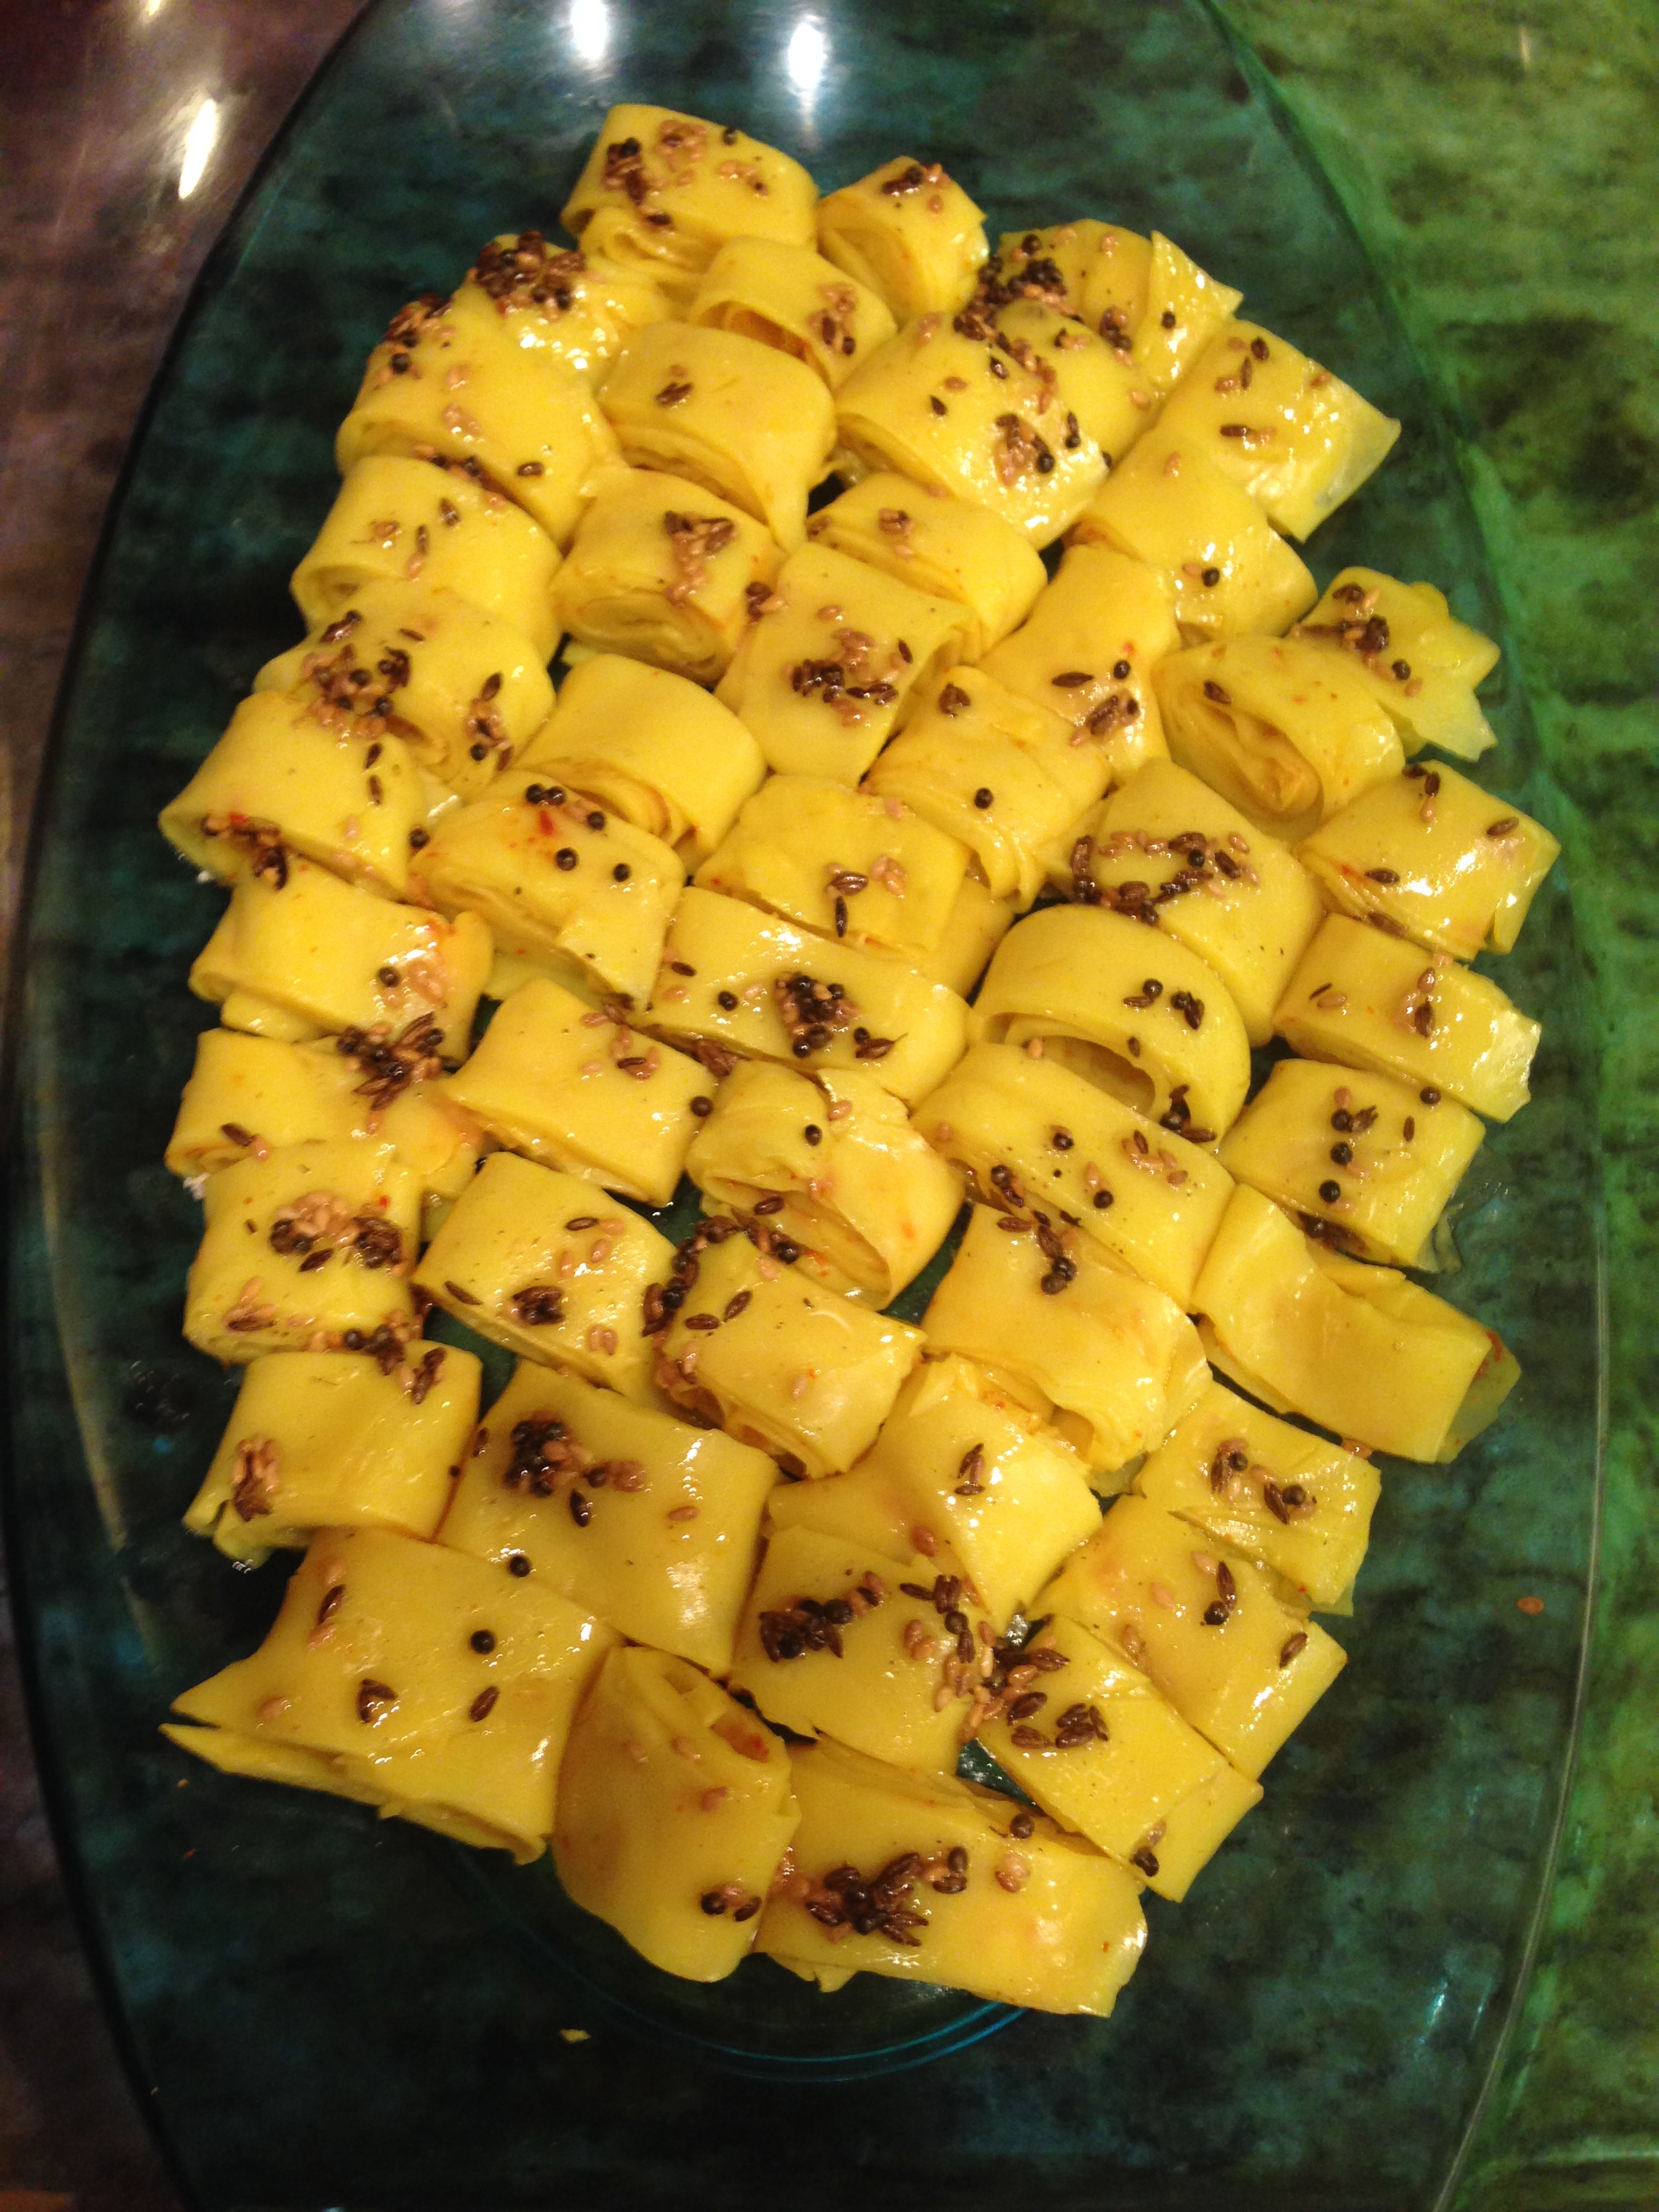
  • When hot, reduce the flame to slow and deep fry the peppers till crisp on all sides.

IMG_2250

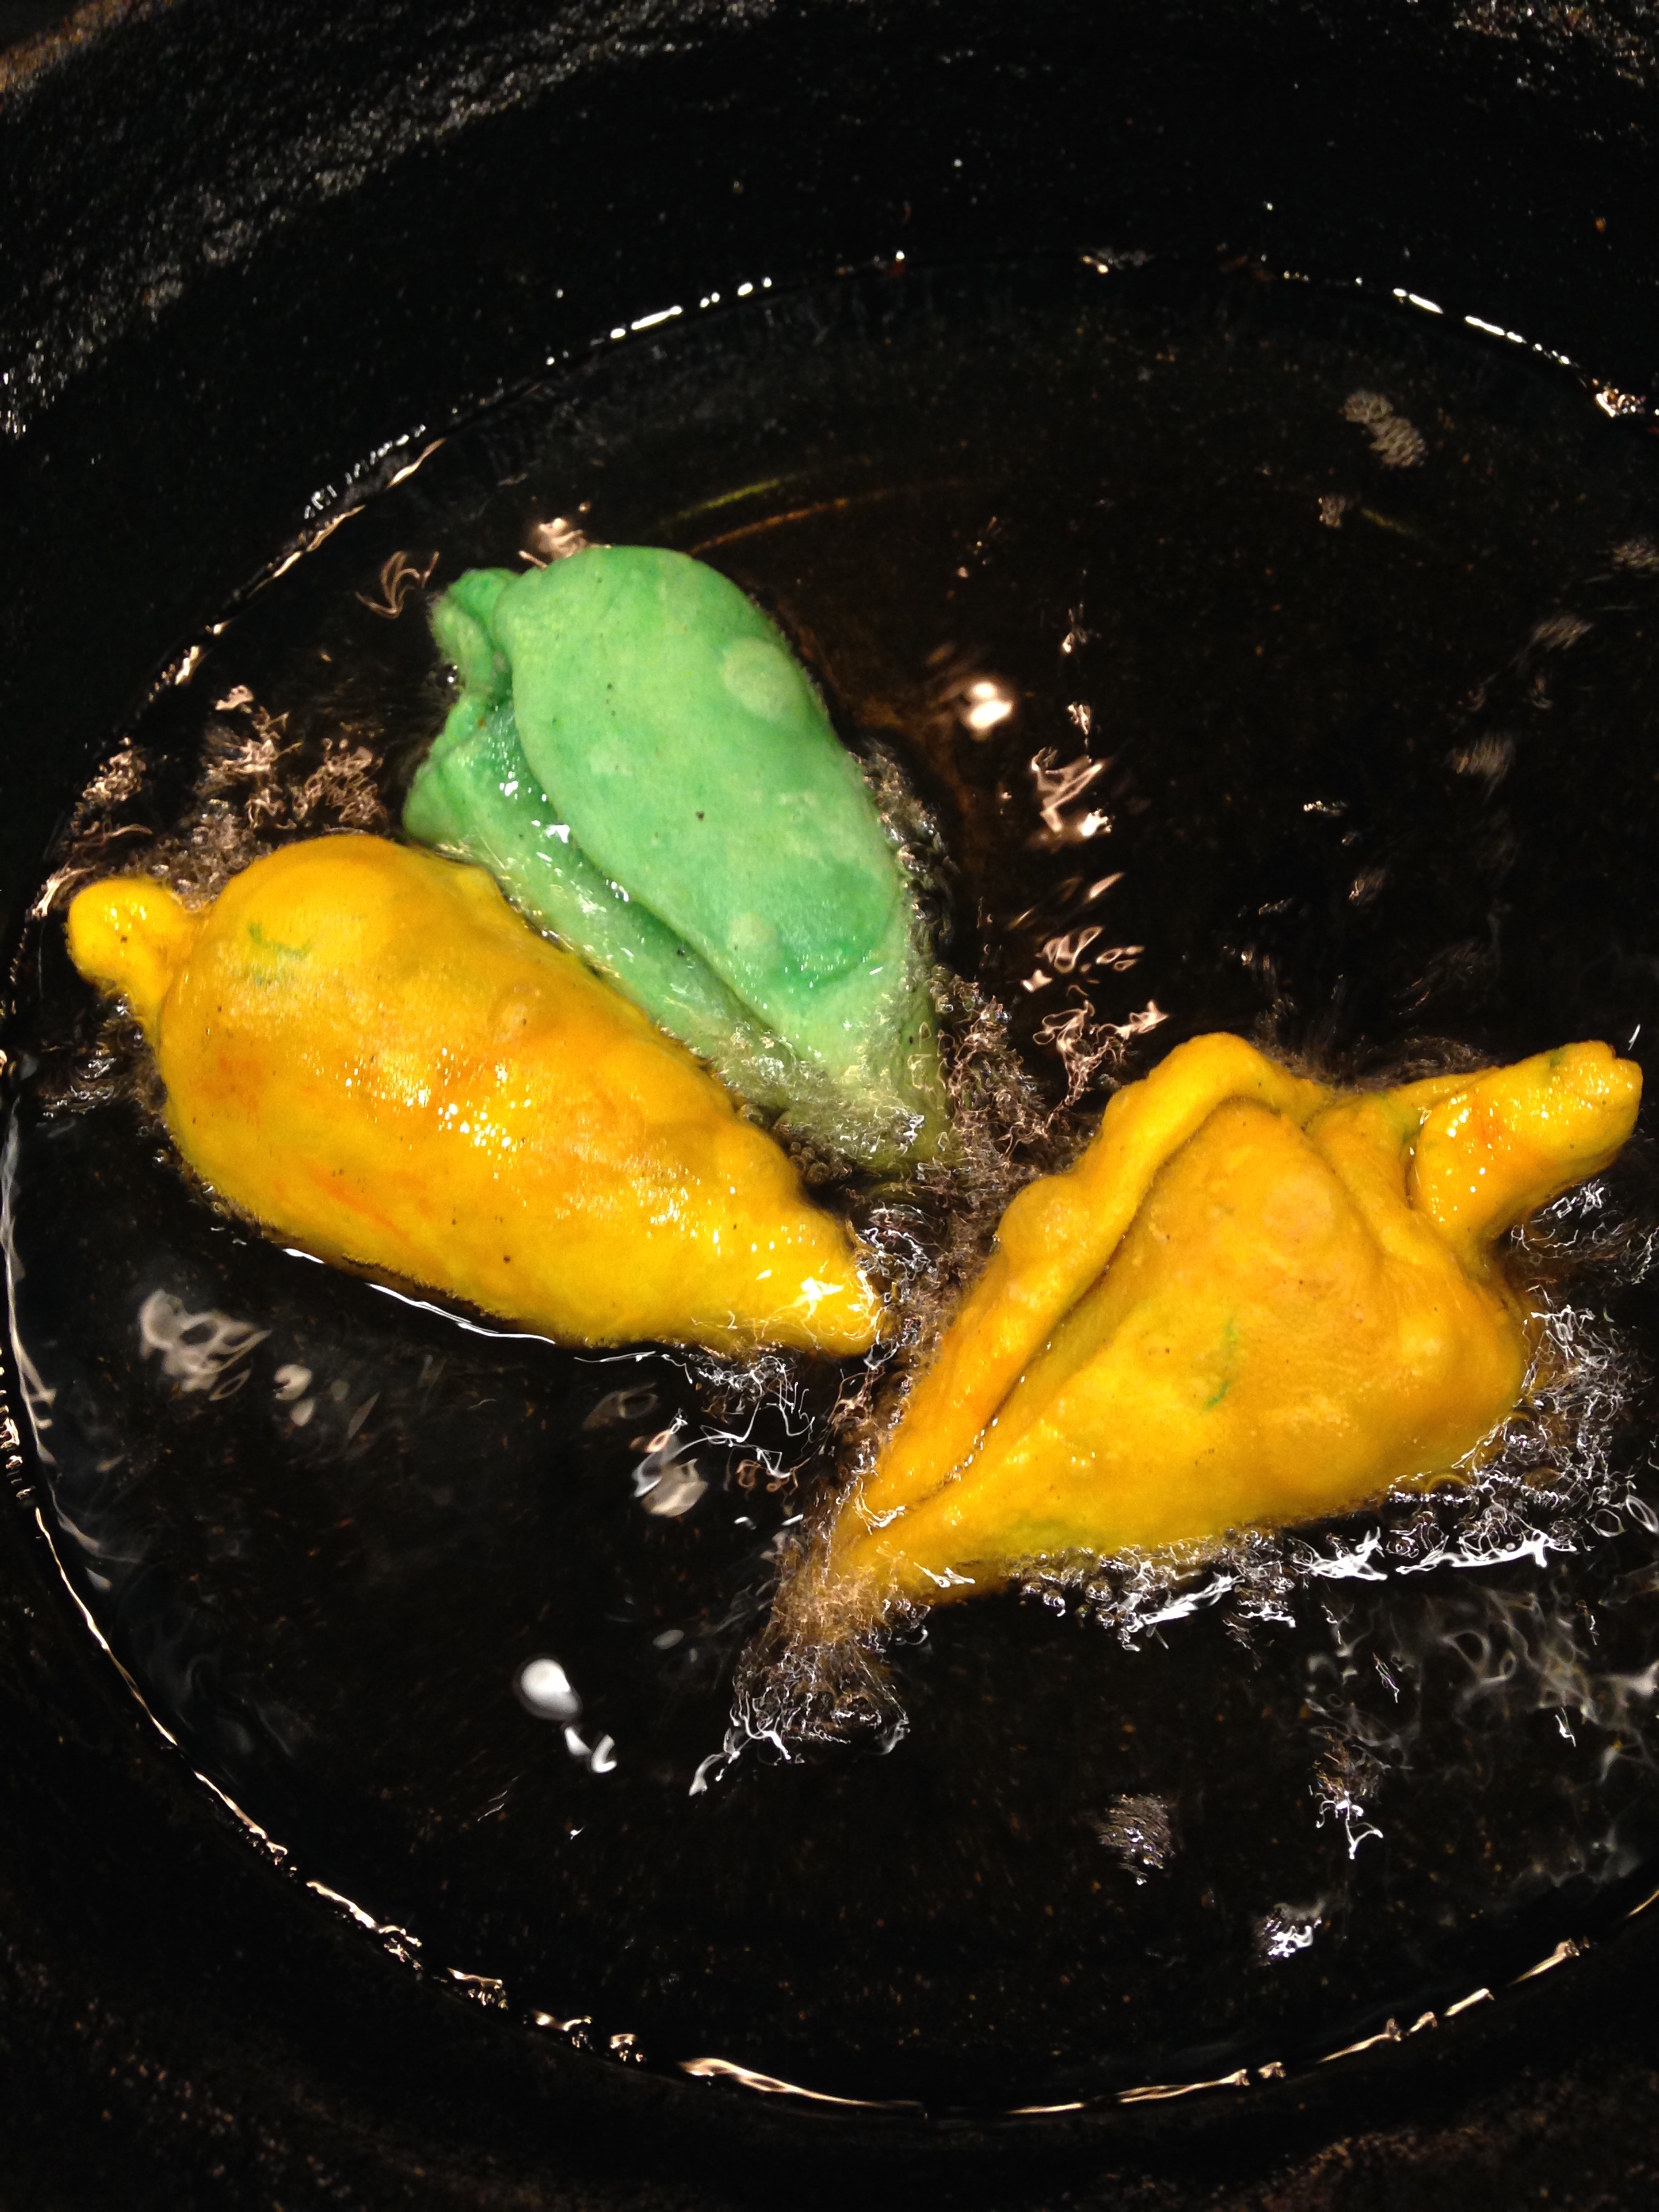
  • Remove and drain excess oil.
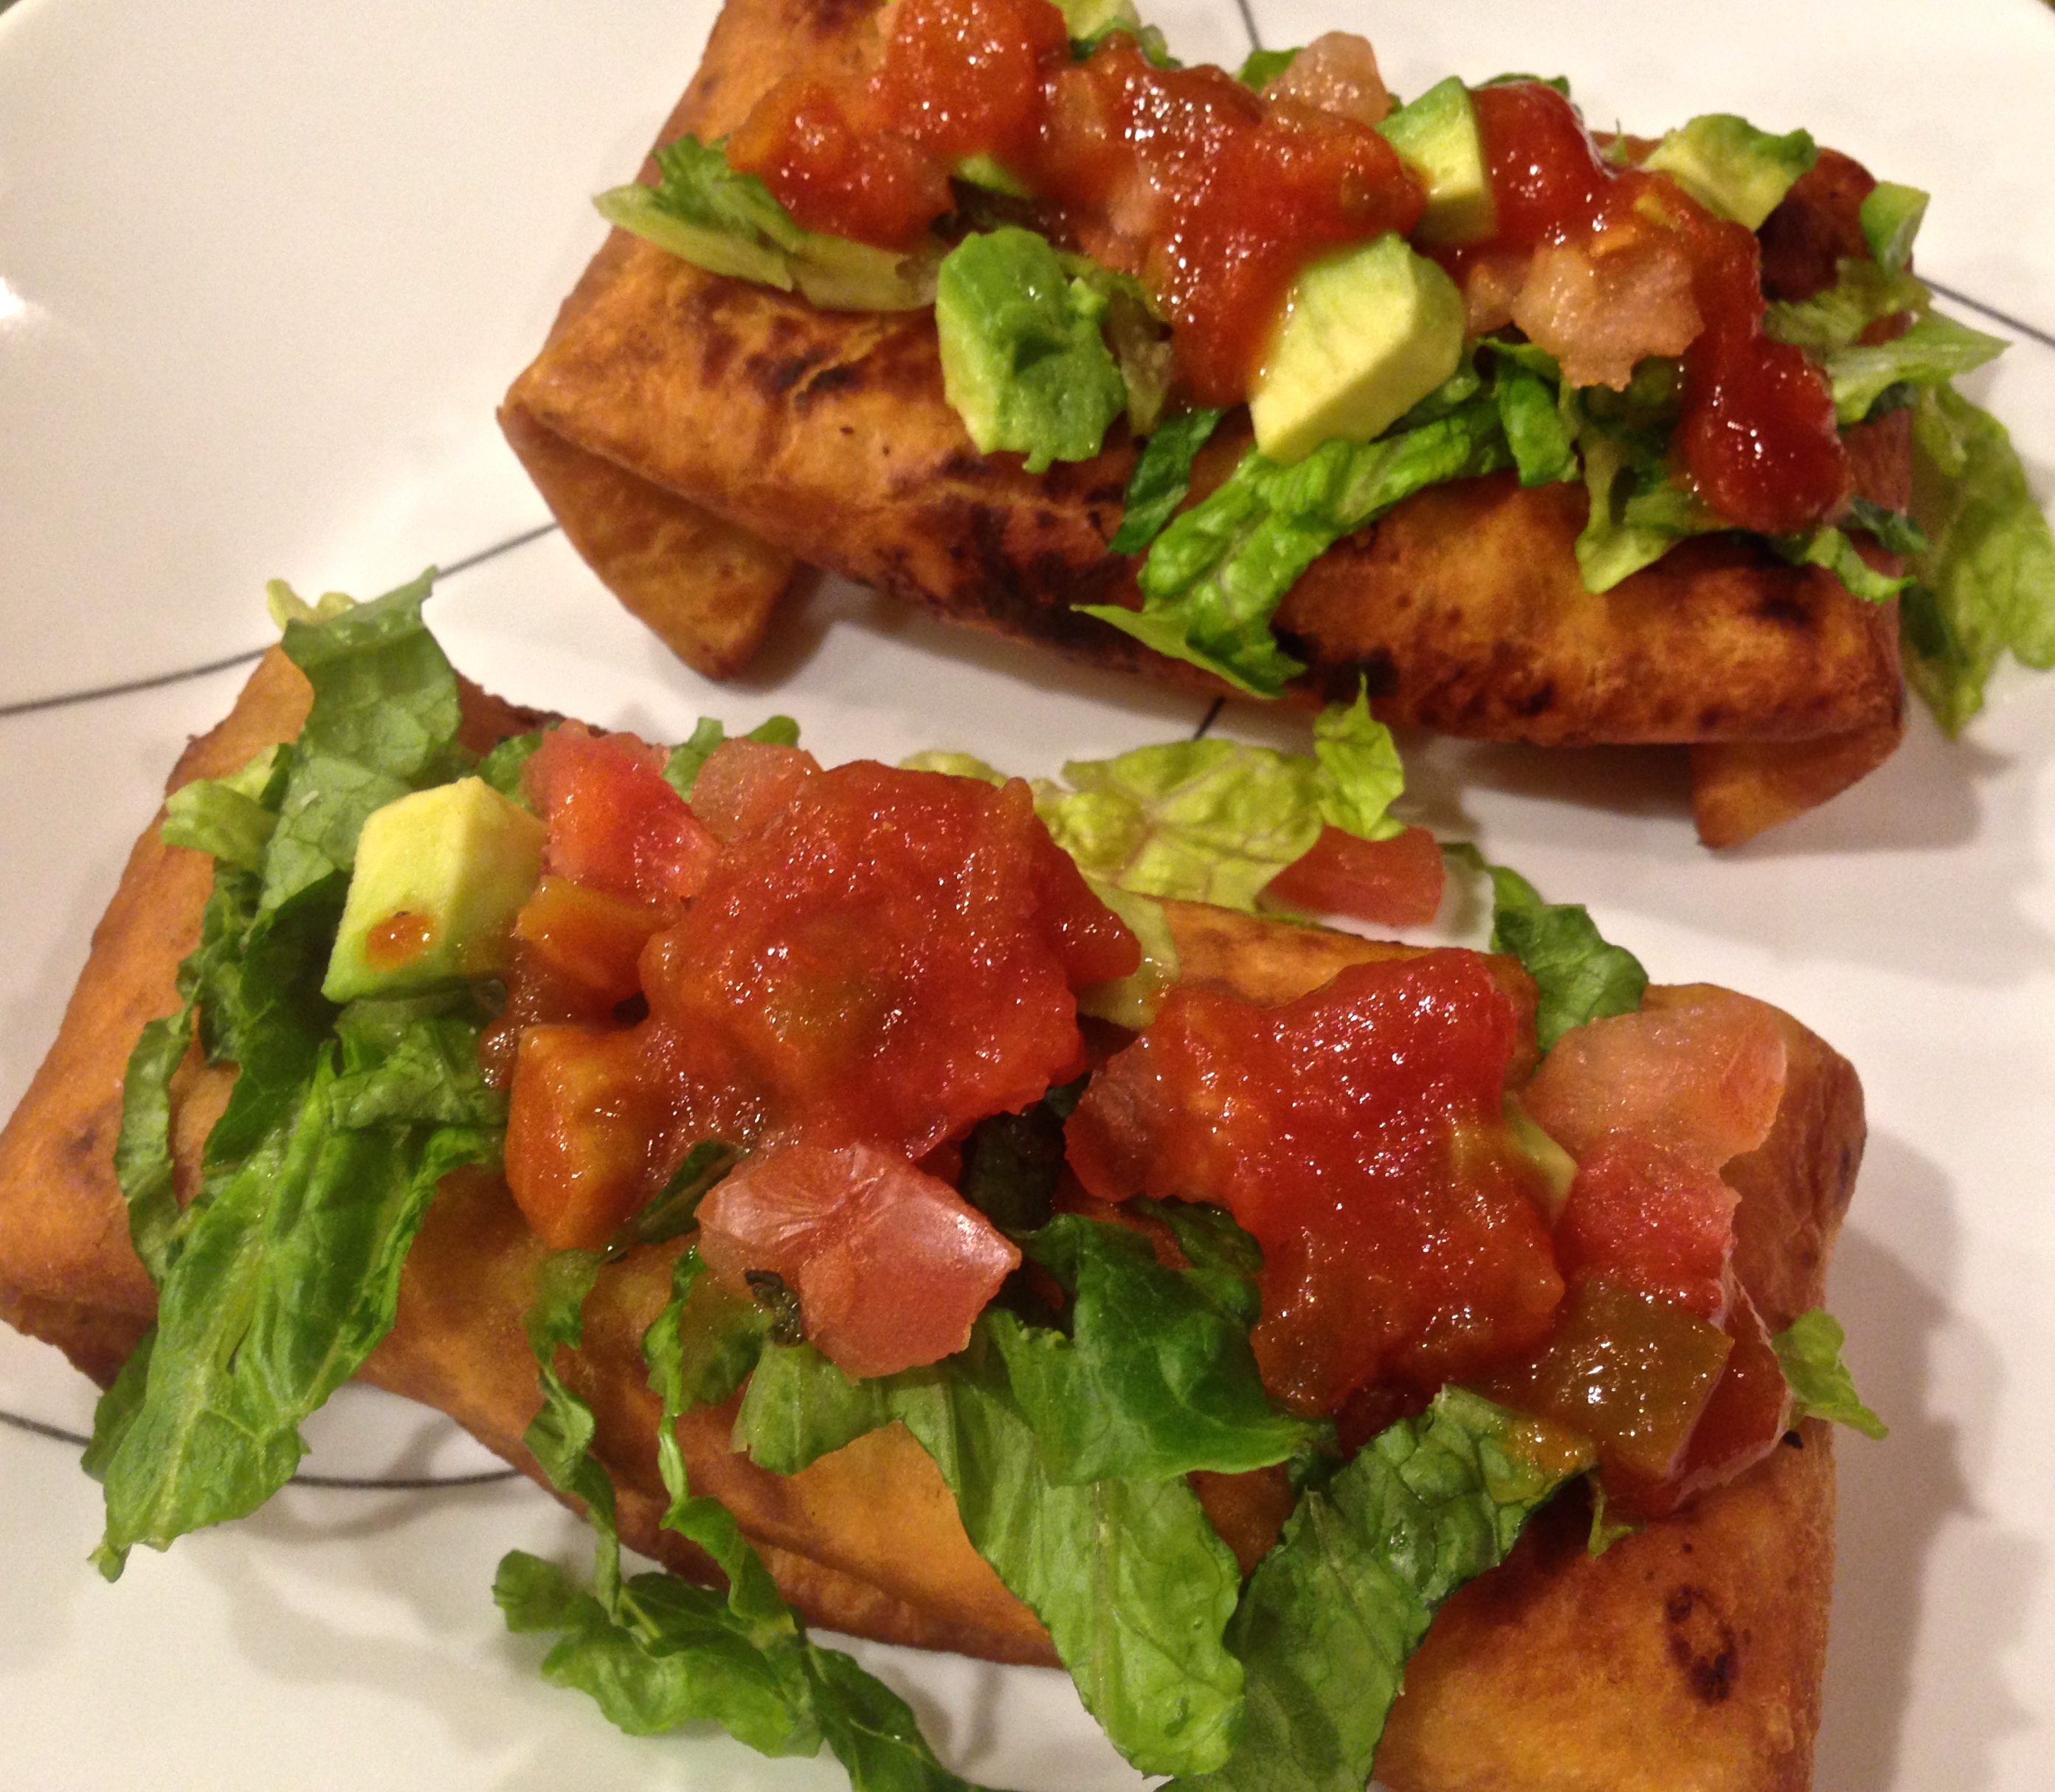
  • Sprinkle the  stuffed mirchi peppers with chat masala and serve plain or with ketchup/chutney.

IMG_5420


Tips

If making this for non-indian guest, I would reduce the green chillies to one tsp.

If you do not fry on slow flame, you will get bubbles on frying.

If the dough has dried, or if you feel your peppers may open up, seal the edges with a paste( from all purpose flour/maida and water)

While kneading doughs of different color, I would advise wearing gloves, as one color bleeds into another.

Instinct Factor

Be innovative on your garnish and stuffing!! Such as cheese and jalapeno on the inside, or a jalapeno green chutney are some of the things that come to my mind.

Create new shapes as more short and round habanero chillies and invite your guests to be gutsy.

Taste the mixture before stuffing, to ensure it has enough of spicy, sweet, sour and salty taste. Everything should taste on the excess, which will get diluted with the pepper cover.

Feel Factor 

Colorful, hot, spicy, sizzling stuffed mirchi peppers are sure to catch everyone’s attention and taste buds for sure!! What an interesting way to fool your guests and  you may just end up having a spice contest at a party with this lovely appetizer that has a unique stuffing, colorful look, and a highly innovative appetizer that your guests will keep talking about for a long time. It tastes crunchy, with the sweetness of coconut and spice of the green chillies, is fun to hold and bite, is attractive and a totally new way of having rice flakes and peas.


Posted on

Pumpkin Soup

Welcoming Fall with everything orange!! Orange leaves in the backyard, orange pumpkins  lined up in the front for halloween and orange colored soup in the dinner menu!! Fall with its chilly climate is perfect to sip a warm colorful soup in the evening  along with some fresh baked bread and home made pesto sauce.

Making a pumpkin soup was like bringing the nature indoors for me, as we have had a few fall trips this year, and I was just amazed to see pumpkin patch or pumpkin farms, dotting in orange over a brown background of soil. This was one of the first exposure of mine to pumpkin farming.

This pumpkin soup  recipe is extremely quick and convenient as it uses all ready to go material and gives a gourmet feel at home. A bisque like soup with ginger, green onions, red chilli flakes, peanut butter (yum!) and sea salt,.. The ingredients list is so tempting and while the soup was simmering, I actually could smell the peanut fragrance in the soup!!

I am of the belief that nature takes care of us and provides us with nutrients as needed. So if we can incorporate them in our regular diet. we are well covered with our needs. All things orange, carrots, pumpkin are loaded with beta carotene, a much needed ingredient for sharp eyes and your DNA.  As a Jain follower would often look for substitutes for carrots, pumpkin is an ideal alternative to carrots. 1/2  can of 16 oz pumpkin puree serves 763% of your daily Vitamin A needs. So making this a part of your weekly diet even once, will fulfill the needs of Vitamin A, without having to resort to carrots. And that is very cool finding I made, thanks to the frequent posting to this blog!

I would like to recognize a very special friend at whose house I first tasted this pumpkin soup! Thats what friends are for as Dionne Warwick song goes..so hope you enjoy this colorful season of Fall, with this colorful pumpkin soup.

Recipe makes servings for 3 people

Time: 15 min

Prep time 5 min

Ingredients
  • 1 15oz  can  of pumpkin puree
  • 2 cups vegetable broth or water
  • 1 cup orange juice
  • 1/2 cup peanut butter
  • salt to taste, preferably sea salt
  • 2 tbsp green onions chopped (optional)
  • 1 tsp grated ginger
  • 1/2 tsp grated orange rind
  • 1 stalk of lemongrass
  • Fresh Cilantro/coriander leaves for garnish
Method
  • Mix pumpkin puree, vegetable broth/water and orange juice and put it to boil.
  • IMG_1533IMG_1535
  • Ater 3-4 min , add peanut butter, salt and the rest of ingredients.
  • IMG_1536IMG_1538
  • Simmer for 12  min on medium flame.
  • IMG_1540
  • Remove the lemongrass stalk, before serving.
  • Garnish with fresh cilantro leaves
  • Enjoy this with a slice of olive or tuscan bread or fresh baked baguette slice!

TIps

Freshly squeezed orange juice tastes better than the packaged juice, as there is a slight after bitter taste in a pre packed juice.

If you have peanut allergy, you can thicken the soup with cornstarch or potato starch. Mixt 2 tbsp of starch in a tbsp water and add to the sou

Instinct Factor

Just enjoy the fragrance and trust your friends choice in food!

Feel Factor

A warm colorful soup for the cold evening, with an unusual but delicious flavor of peanut butter, orange juice , lemon grass and ginger. This will definitely, spice up the chilly dark fall nite!

IMG_1548


[shopeat_button]

Posted on

Smoked Eggplant Baingan Bharta

Fresh Eggplants ripe this summer can be enjoyed the best when its a fresh from the farm and straight to the table. At my previous home, we used to pluck eggplants in the neighborhood  farm and the task of cooking them would be an under ten minutes job. I have yet to replicate the  sweetness of these  eggplants at any other restaurant!  Presently,  I do miss the proximity of such farms as available at my previous home. My experience says that the sweetness of these vegetables is even higher than what one gets when buying organic.

With summer almost in full swing, the outdoor grills are out in my neighborhood and neighbors and friends are enjoying grilling various vegetables. Eggplant baingan bharta is also made by grilling the eggplant. Many do this over a gas flame or microwave, but I wanted to approach this a little differently, keeping some of my Jain philosophy in place. Grilling a vegetable as a whole, is a no-no in Jainism , as there are chances of some worms inside the   vegetables, which might get accidently grilled or burnt in the process.  Hence we normally slice and steam it. And Jains will not also grill it for you may accidently kill some insects. But I still wanted to have the smoke flavour in my Eggplant Baingan Bharta.

So I decided to use a smoking box and insert this with lighted wood chips/coal amongst the vegetables and cover the vegetable to get the smoky flavor and the result was truly delicious and mouth watering. I was reminded of my home state in India where this is also known as Ringana No Oro- and is considered  a rural village delicacy , expertly cooked by farming community and served with other rural food accompaniments as Khicchadi Rice Lentil Entree and Bajri Rotla Millet Bread.

In the Northern India, this is often made without the skin, but I make it with the skin , as I like the eggplant for its rich purple color too,  and I am of the firm believer that the skins of the vegetables hold the maximum nutrients and besides it gives the cooked  vegetable a nice rich color of a night shade. The eggplant skin holds a lot free antioxidants that are also helpful in better skin and I also found on research that eggplants help in reducing triglycerides.

The smoked eggplant baingan bharta can be used a spicy dip and enjoyed with a pita bread or simple bread or you can relish this soft pulpy spicy textured entree with Roti, Paratha or Puri. Enjoy this also with any yogurt accompaniment in form of raita or lassi. If you have trouble finding a smoking box, you can experiment by putting the  chips/coal in an aluminum foil , light it and insert this in the vegetable and cover it with a lid.

If you are not an eggplant fan, I am pretty sure this smoked eggplant bharta will make you one!

Recipe Makes for 4 people

Cooking time 35 min

Prep time 10 min.

Smoking time : 60 min.

Ingredients:
  • 2 large eggplants
  • 4-5 vine tomatoes ( campari tomatoes preferred)
  • 2 1/2 cups medium diced yellow onions
  • 3 inches ginger with skin peeled off
  • 4 hot green chillies grounded into paste
  • 3/4 cup oil
  • salt to taste
  • 1 tbsp sugar(optional)
  • 1/8th tsp asofoetida
  •  coriander to garnish

For smoking the eggplant baingan bharta

  • 3-4 coals or wood chips ( hickory or sugar maple) I used sugar maple chips
  • Ghee Clarified butter for soaking coal/wood chips
  • Smoking box or aluminium foil
  • IMG_3956
  • Match sticks to light
Method
  • Slice the eggplants and  put to steam in a cooker adding 3 cups of water .
  • Remove from flame after 4 whistles.
  • On another flame put oil to heat in the  broadest thick bottom  pan you have
  • When the oil heats, add asofoetida  and chill ginger paste and saute for a couple of minutes.
  • Add diced onions and saute  on medium flame to nice golden brown color.
  • IMG_3950
  • Once the cooker cools, remove the eggplant and drain and save the cooked water.
  • Remove the skin from the eggplant and grind it in a mortar pestle.
  • IMG_3952
  • Add the grinded eggplant skin, tomatoes, salt, turmeric and drained cooked water to onions .
  • Simmer for 10 min.
  • Add the boiled eggplant plant, sugar and simmer for further 20 min.
  • IMG_3955
  • Soak the coal or wood chips in melted ghee for a couple of minutes,
  • Put the soaked coal/wood chips in the smoking box /aluminium foil and light it.
  • IMG_3968
  • Put the lighted coal /wood chips in the middle of the vegetables.
  • IMG_3969
  • Let the flame  burn for a two burn minutes.
  • Cover the vegetable with a lid and put weight on it if need be so that no smoke is released .
  • Remove the lid only at the time of serving, after keeping it covered for an hour or so.
  • Garnish with coriander , heat and serve with Roti Paratha, Pita  or Bread Slices.
  • IMG_3978

Tips

Microwave the ghee and then soak the wood chips in it, for an even coating and easy lighting.

Make sure the coal/chips are dry for it to catch flame.

Instinct Factor

In US, it is better to use wood chips than coal, as most coals are soaked in kerosene fuel and do not give a very appetizing fragrance.

Feel Factor

Rich in dark color, with a bit of tangy taste to the pulp of eggplant  and there is  depth in taste due to smoked  wood chips. Smoked eggplant baingan bharta is an entree that is simple yet rich  and  while devouring it and licking my fingers,  I  felt as if I was back in India, just enjoying this rural delicacy along with its traditional accompaniments.
[shopeat_button]

Posted on

Khaman Dhokla Gram Lentil Steamed Cake

People in India and  around the world  are filled with curiosity about Mr. Narendra Modi, India’s Prime Minister elect, on account of the sweeping victory claimed by him and his political party. So even I decided to join the club and do some more research about him, to know more about him as a person. Food being my passion, any information related to that sparked my interest. I came across this NDTV weblink on the top 5 favourite food of Mr. Narendra Modi at http://cooks.ndtv.com/article/show/narendra-modi-s-top-5-favourite-foods-525352. Needless to say they are all from Gujarati cuisine- Khili Khichadi, Khandvi, Dhiokla, Mango Chhundo( Chutney) and  Badam Pista Shrikand.

The state of Gujarat has something in its soil , for it is  the state from where stalwarts like  Mahatma Gandhi,  Sardar Vallabhbhai Patel, JInnah, and now Narendra Modi to have risen to  political ranks of the country. Besides these, Gujarat has also been the state from where business man  Dhirubhai Ambani and the Patriarch JRD Tata have originated. And the foodie in me, will want to also say , that, there must be also something in what you eat that makes you rise to top!!

Taking a cue from Mr.Modi’s five favorite foods, I am glad to share the recipe of instant khaman dhokla gram lentil  steamed cake using Instant Mix. I have found  this to be very easy, consistent and tastes delicious. This is often a breakfast item in our home , and is easily cooked in 15-20 min. There are many different brands of instant packs available, of which this is definitely very reliable and  we have been using this for almost past ten years or so.

The khaman dhokla gram lentil steamed cake is soft, spongy, with a nice spicy garnish in the top. This is known for its sponginess hence, the comparison to a cake! And the good part of this is, if it does not turn out well, just crumble it and make it a Khaman mix with garnishes! So it is very forgiving dish for a new person trying it out. This is so popular that Gits has come with two varieties Khaman and Nylon Khaman. I prefer the Khaman Dhokla Mix.

The garnish on the Khaman Dhokla Gram Lentil Steamed cake could be red chilli powder, black pepper or even powdered roasted cumin seeds.  Recipe of Khandvi , another delicacy enjoyed by Mr. Modi,  can be found on this  blog at http://cookingbyinstinct.com/khandvi-bengal-gram-rolls/

I am sure we will be seeing a lot of Khaman Dhokla Gram Lentil Steamed cake and Tea at Prime Ministerial State breakfast and that is something  international dignitaries will get a good share of!!  Seeing its well acceptance and appreciation   by m  international friends and my daughter’s classmates, Khaman Dhoklas are going to be very much in demand now!

Recipe makes 20 pieces

Cooking time 15 min

Prep time 5 min

Cooling time 10 min

Ingredients
  • 1 pack Instant Khaman Dhokla mix ( Gits Brand)
  • 2 tbsp oil
  • 1 cup plus 60 ml of water

For Garnish

  • 2 tbsp oil
  • 2 tbsp chopped coriander
  • 1/2 tsp mustard seeds
  • 1/2 tsp cumin seeds
  • 5-6 curry leaves
  • 2-3 tbsp grated fresh coconut ( optional)  I use the frozen grated coconut
  • Special equipment needed- Dhokla cooker with deep plates. Alternatively you can make your own dhokla cooker, with a broad deep pan and a deep dish, with a lid to cover.
Method
  • Put about a liter of water to boil in  the dhokla cooker.
  • Grease the dhokla plate with some oil.
  • In a prep bowl, empty the contents of the instant mix
  • IMG_3873
  • In a separate bowl, mix water and oil,
  • Mix in the water oil mix into the Instant mix, so that no lumps are left, and stirring constantly while mixing in the water/oil.
  • Once the water is emptied, hold the prep bowl with one hand, and vigorously stir the mix with your hand for about 20 sec.
  • IMG_3875
  • The mix will rise a bit. As soon as  it rises, empty the mix into the greased dhokla dish.
  • Sprinkle red chilli powder or black pepper or roasted cumin powder if you desire. You can also leave it plain.
  • Insert the dish into the dhokla cooker, cover the lid and steam on fast flame for 15 min.
  • Switch off the flame after 15 min and let it cool for further 10 min.
  • IMG_1923
  • While its cooling prepare the garnish.
  • Put 2 tbsp oil to heat.
  • Add mustard seeds to it.
  • Once mustard seeds crackle, add chopped chillies.
  • After 5 seconds, add cumin seeds
  • Add curry leaves.
  • Once cumin seeds become light brown, take off from flame.
  • Spread this garnish over the cooked Khaman Dhokla Lentil Steamed Cake.
  • Make diamond pieces by making dividing the dhoklas into four parts.
  • Then turn the dish a bit  and make further 4-5 lines.
  • IMG_3879
  • Garnish with fresh coconut and coriander.
  • Serve warm with Green chutney or ketchup or just enjoy plain.
  • IMG_1824

Tips

The trick to softness , lies in the vigorous stirring of the mix.

IMG_3884

If it does not turn out well, crumble the cooked dhokla and mix in the oil garnish as well corainder and coconut. Add an extra layer of sev ( thin gram noodles )  and serve.

Instinct Factor

Check if the dhokla is cooked by inserting a fort/knife to see that it is not  liquidy in the middle.

Feel Factor

Soft and yummy, spicy and colorful, healthy and nutritious , and soon to be a popular on an international level! A very healthy breakfast, appetizer that can be enjoyed with ketchup or green chutney.

[contact-form-7 404 "Not Found"]


[shopeat_button]

Posted on

Onion Upma ( Semolina with Onions and Peas)

My journey to cooking began with this Onion Upma, in March 1997 in Melbourne, Australia. I was born and raised in India, with ample affordability of servants and cooks. I did not have to handle any household work, but concentrate on studying and career. Then came the task of leaving these comforts and charting new territories.  My husband and I decided to explore overseas opportunities, and the first one that came along was an assignment in Melbourne, Australia. I fell in love with Melbourne, and it till today, even after travelling across the globe  a fair amount, still retains a special place in my heart. I still consider this as the best city in the world to live in, for the comfort, beauty, weather, arts, food and all things good it has to offer!   I have fond memories of South Yarra river meandering through the town,  tram railroad, the British Accent in people and their love for Indian Food. Indian cuisine was as popular, as Chinese and Pizza in USA.  I felt at home very easily over there because of this.

What has Onion Upma do with Melbourne? We were sharing an apartment at the company guest house which was mainly housed by bachelors. We experienced fellow Indian  hospitality. Our roommate Surya, made us this Upma for breakfast,  and I was totally amazed by his skills. Here was I, with no cooking skills, and in front of me, was this yummy Upma  made by a total stranger and that too a male! In our culture, cooking by men in the family is a RARE sight! So I decided that day, to start learning how to cook, and the first item I learned was  how to make this delicious upma from him. And that’s where my cooking journey began. I was so happy with my achievement, that the I brought over the measurement spoon from Surya, all the way to USA, as my Good Luck charm and may just be passed on as  a legacy to my daughter!

Upma being such a popular breakfast item in South India, has many versions.   This version of Upma, consists of onions, peas, spices and has the consistency of it being soft and crumbly  texture. which is different then the paste like texture at many places.  Onion Upma  bears some resemblance to Grits, but is spicier and has added nuts.  I only thought it befitting to share  a southern Indian recipe, and celebrate and wish Happy Ugadi to All for a prosperous beginning of a  new year, new season, new hobby and a new spring in the step!

Recipe makes for 3 people

Ingredients:
  • 1 1/2 cups Upma Rava (Semolina)
  • 1 medium yellow onion lengthwise sliced
  • 1/2 cup shelled sweet peas
  • 1 tsp mustard seeds
  • 2 tsp urad dal ( split black lentil without skin)
  • 1 tbsp cashew nuts
  • 6 green chillies
  • 8-10 curry leaves
  • 1 1/2 tbsp chopped coriander to garnish
  • 3 tsp oil
  • Salt to taste
  • 1 1/2 tsp ghee(clarified butter)


Method
  • In a broad pan, heat the oil on a medium flame
  • Add mustard seeds, wait for it to crackle.
  • Add green chillies, cashews,urad dal (black lentil split), curry leaves and saute until cashews are golden brown.
  • Mix onions and add cover and cook for 6 min until onions are golden brown, on a slow flame.
  • Add 2 1/2 cups of water, peas, cover  and let it simmer on medium flame for 8 min .
  • IMG_3283
  • While this is simmering, on a shallow flat thick bottom pan, roast the upma rava to mild pinkish tint for about 5 min, on a medium flame.
  • IMG_3281
  • Remove the lid, and stir in the roasted upma to the onion mix, making sure no lumps are left.
  • Add ghee, stir well, cover and cook for further 4 min on  slow flame.
  • IMG_3285
  • Garnish with coriander and serve.

Tips

Pre roasted Semolina or Upma Rava is also available in Indian Grocery Stores, which will be less time consuming.

Using Yellow Onions, will make it sweeter and less pungent than the Shallot onions

When you stir in the upma, all water should be used, which will enable it to have a crumbly texture.

Instinct Factor

Roast the upma, till you have the aroma of Roasted Semolina.

Feel Factor

Comfort, feel good breakfast that I can never tire of! Upma in any form is welcome breakfast any morning. The softness of  semolina, flavored with the sweetness of cashews, spice of green chillies and crunchy black lentils gives it a nice aromatic fragrance, that wakes up your senses for sure! For a western comparison this is similar to Grits but drier and spicier.

[contact-form-7 404 "Not Found"]
[shopeat_button]

Posted on

Mexican Chimichanga with an Indian Touch

Mexican Chimichanga- it is the name that caught my fancy and I wanted to try this! I instantly appreciated the similarity of a crunchy Indian Samosa with the Chimichanga crust. Of course the filling was different, but it looked so colorful and crunchy,  that was simply hard to resist. If you are red kidney bean fan and crunchy samosa fan, this will definitely become your one of the favorites soon.  The veggies on top add to texture and color and give a good contrast to the mashed kidney beans. You can either top it with guacamole or avocado. My avocado was not that ripe to make guacamole so diced it and tasted fine. I truly cherish this deep fried tortilla dish with my friends and family as somehow Chimichanga has happy ring to its name!

I am reminded of a friend who would take the refried beans and tortillas from USA to India and make Mexican Chimichanga  for her family  in India, as they use to enjoy this highly! This should prove the popularity of Mexican Chimichanga amongst Indians for sure!

Receipe makes 6 pieces of  Chimichanga

Cooking time: 15 min

Prep time : 15 min

Ingredients
  • 1 can plus 1/3 cup Vegeterain Refried  Beans
  • 3 tbsp oil
  • 6 hot green chillies finely choppped
  • 2 tbsp coriander finely chopped
  • 2 slices of cheese
  • 1/4 tsp turmeric powder
  • 1/8 tsp asofoetida
  • salt to taste
  • 1 pack corn tortilla (6 pieces)
  • oil to fry

For garnish

  • 2 cups lettuce thinly sliced
  • 1 cups tomato diced medium
  • 1/2 cup diced yellow red peppers
  • 1/2 cup diced avocado
  • Medium spiced tomato salsa
  • Guacomole
  • Sour Cream
Method
  • In a deep pan put the oil to heat.
  • Add asofoetida,  turmeric, chillies and stir for 20 seconds.
  • IMG_2873
  • Add red beans, salt and stir for 2-3 min
  • Add cheese slices and melt it  into the mix.
  • IMG_2875
  • Add coriander and remove from flame.
  • Heat a flat griddle
  • Put a corn tortilla to heat for 10-15 seconds on medium flame.
  • IMG_2878
  • Flip it over and heat the other side for 10-15 seconds and remove from flame.
  • Divide the red beans mix into 6 parts.
  • Layer 1/6th of the mix horizontally in the middle of the cooked tortilla
  • Fold over to the middle from the top and bottom.
  • IMG_2879
  • Fold over from both sides and flip it over.
  • Do this for all tortillas and red beans mix.
  • IMG_2881
  • Heat oil in a frying pan.
  • On a medium high flame, fry the refried bean stuffed tortilla( chimichanga) to golden brown
  • IMG_2886
  • Garnish  the chimichanga with some lettuce, tomatoes, peppers, avocado, guacamole,  sour cream, and salsa and serve hot.

IMG_2891


Tips

Just needs some technique in folding and frying,- fry with folded ends to the bottom of the frypan, as this will cook first and enclose the stuffing.

Instinct Factor

Heat the tortilla on a medium high flame, and do not have brown burnt spots as it will crack. when you fold and fry the tortilla

Feel Factor

I want it NOW, as my family members would say!! And you can have it too, as it is so quick to make!

[contact-form-7 404 "Not Found"]

 
[shopeat_button]

Posted on

Muli Paratha White Radish Bread

Muli Paratha, is bread stuffed with White Radish and spices. White Radish is also known as Daikon, meaning large root in Japan, the land it is suppose to originate from.  It is also a winter vegetable and on researching I found it contains up to 27% of daily vitamin C. Some people can take the pungent taste of raw white radish, but I prefer the taste of white radish or Muli mixed with Bengal Gram flour. A lot of recipes details raw white radish with spices which I find difficult to roll, as  water in the white radish makes it difficult. Hence I prefer the recipe with gram flour, which absorbs the excess water as well as makes the white radish easy to warm up to.

The addition of bengal gram flour makes it fulfilling and when it is accompanied with yogurt or boondi raita or pickle, it gives you the pleasure  of consuming homely food! The leaves of white radish also taste well  when cooked with bengal gram flour and often people make this as a side vegetable dish too. More on this next time I able to get some nice fresh green leaves along with the white radish. In Rajasthan, this is also used to make dhokli.

The credit of showing me this recipe goes to my mother in law, who first made Muil Parathas for me, and I still admire her soft, tasty Muli Parathas White Radish bread, as they are very delicious.  Making Muli Paratha White Radish bread is easy, filling and can be a good variation to lunch meals or brunches or heavy breakfast on a weekend! Very little attention is needed while preparing the stuffing, so often this is  my go to recipe when I am tied at various ends.

Recipe makes 8 parathas

Cooking time 40 min

Prep 10 min

Ingredients
  • 3 cups grated white radish or white muli
  • 6 heaped tbsp of gram flour
  • 1/4 cup oil
  • 1/8 tsp asofoetida
  • 1/2 tsp mustard seeds
  • 1/2 tsp turmeric
  • 1 tsp red chilli powder
  • 5 pinches of  dry samosa kachori masala or garam masala
  • salt to taste
Method

For the stuffing

  • In  a broad pan heat oil on medium flame.
  • Add asofoetida first, then mustard seeds
  • When mustard seeds crackle, add grated white radish or muli
  • Add salt, turmeric, chilli powder and bengal gram and mix well.
  • Cover and cook on low simmer flame for about 20 min.
  • IMG_2941
  • Open and sprinkle the garam masala or dry samosa kachori masala and remove from flame
  • Uncover and let it cool down for 15-20 min until completely cool.

For the bread

  • In a broad pan, mix wheat flour, pinch of salt and one cup of water and knead into a soft dough.
  • Cover and Refrigerate the dough for 30 min.

For rolling the paratha bread

  •  Divide the white radish stuffing  into eight parts.
  • Take a small golf ball size wheat dough. Make a round ball
  • Using a roller pin, flatten the ball in to a round circle about 5 inches round.
  • Put one part of white radish muli stuffing onto the flatten round.
  • IMG_2943
  • Enclose the stuffing my covering from all sides towards the center.
  • IMG_2945
  • Twist the closed stuffing and remove excess dough that protrudes beyond the round ball.
  • Flatten a bit with the hand and using a roller pin and dusting flour(wheat flout), roll the stuffed ball into 7 inches flat circle.
  • IMG_2947
  • Grease a flat pan with oil and heat.
  • Cook the flattened circle on medium heat.
  • When brown spots appear, flip and  pour a few drops of oil on the center and the side.
  • IMG_2951
  • Cook the other side and also pour some drops of oil and flip.
  • Serve hot with boondi raita, plain yogurt or pickle.
  • IMG_2953


TIps

Rolling the paratha with light hand and making sure that the middle of the paratha bread is not thick, will help in making the cooked paratha soft.

Instinct Factor

Even if some stuffing sticks out, while you roll the paratha bread, that is fine, as it will all get cooked and will look similar with the paratha. If the dough gets too sticky you may find it difficult to roll, so trust your instinct in preparing the dough and rolling it.

Feel Factor

A quick , easy  dinner/lunch meal that is thoroughly enjoyed in the winter season as radish is a winter vegetable and when mixed with bengal gram and spices, gives you the quota of vitamin c and heat needed for facing cold winter days.


[shopeat_button]

Posted on

Khandvi Bengal Gram Rolls

Khandvi Bengal Gram Rolls is a delicacy from Gujarat. It is often a staple item in Jain Gujarati family for sure. This is often a part of the menu when a Jain household is observing its no vegetable day. On these days, items are often made from lentils.  This is very easy to make, but looks quite complicated, and that is the cool part of this recipe. I have listed the traditional Jain way of making this, which does not use buttermilk, as often mentioned in other recipes.  A  Jain follower observes not to mix Bengal Gram and Buttermilk together, unless the buttermilk is cooked first. I’ve also seen my mother make this with lemon, as we observed this rule very strongly when growing up.  I feel the lemon in it, and it gives it an ultra smooth and thin texture that looks more delicate and elegant, as compared to what is commercially available.

When I got married, this is one of the appetizers my in-laws were curious to know if I could make it! This delicacy is a signature hallmark of a Jain Gujarati family.

The texture of bengal gram rolls, is soft, smooth and the oil garnish on the top with mustard seeds crackling, gives it a slightly crunchy flavour over a smooth roll. Due justice can be done only by tasting this super yum delicacy. It is  truly enjoyed by most people as kids like the roll look and adults will enjoy this finger food appetizer anytime.

 Recipe makes 60 pieces about 1/2 inch in size.
Ingredients

For Khandvi Rolls

  • 1 cup besan bengal gram flour
  • 2 tbsp lemon  juice
  • 1/8 tsp asofoetida
  • 1/3 tsp turmeric powder
  • salt to taste
  • 1/4 tsp chilli powder
  • oil to grease

For Garnishing

  • 1 tsp mustard seeds
  • 1 tsp cumin seeds
  • pinch of asofoetida
  • 2 tbsp coriander chopped
  • 2 tbsp fresh/frozen coconut grated (or dry coconut can also be used)
  • 3 tbsp oil 
  • 5 green chillies chopped(optional)
  • 3-4 green curry leaves(optional)

4 flat dishes about 8-10 inches in diameter.


Method:
  • Grease the dishes with oil on the front and back of the dish with oil. Both the sides of the dishes can be used to spread the Bengal Gram Roll paste. If you do not feel comfortable using the back of the dish, you will need more dishes.
  • In a broad thick bottom pan, mix besan bengal gram flour, water, lemon juice, asofoetida, salt and turmeric powder till no lumps are left. This is the mix for making the khandvi bengal gram rolls.
  • Put it to heat on a medium flame, stirring constantly.IMG_2250
  • Keep stirring constantly until it thickens to a paste around 8-10 minutes later.
  • The paste will start leaving the edges of the vessel.

IMG_2253


  • Remove from flame, and quickly spread the mixture evenly, using as much as is needed to evenly cover the diameter of the plate. 
  • The paste cools quickly, so you need to spread this fast and quick.
  • IMG_2258
  • Do this till all the paste is used up.
  • Cool for 15-20 min.
  • Spread some oil on the paste.
  • Sprinkle some red chilli powder
  • Using a knife, cut the circle into half.
  • Slightly release the edges of the paste from the plate, using your fingers, by pushing the paste inwards.
  • Start rolling into rolls, using one half of the circle, rolling it tight.
  • So every flat dish will give you two rolled circles.
  • Gently lift the rolls and put it on a cutting board or flat surface.
  • IMG_2259
  • Cut the long rolls into 1/2 inch horizontal cuts.
  • Heat the oil in a pan on a medium flame.
  • Add asofoetida, mustard seeds.
  • When mustard seeds crackle, add cumin seeds.
  • When cumin seeds turn golden brown, remove from flame.
  • Using a spoon, spread this garnish over the cut khandvi bengal gram rolls.

IMG_2262

  • Garnish it further with fresh/frozen coconut and coriander.


Tips

Remove the seeds from lemon juice. I use a tea strainer to strain the lemon juice,

Mixing the bengal gram flour properly is needed, so that no lumps are left.

Keep stirring so that no lumps are formed while cooking.

To cut the long rolls, into small pieces, I prefer to line them one below other, and then slice it vertically in 1/2 inch gaps across all rolls.

You can add green chillies to the oil garnish on the top if you prefer. I often make this on days where we avoid green vegetables, hence often dont use green chillies and coriander too on this recipe. But these toppings no doubt add more flavour to the recipe. 

Instinct Factor

Spreading the bengal gram paste on the dish, comes with practice, but make sure you cover all the aspects of the plate.

If you see lumps on the top, that is fine, as this is going to be on the inside.

Feel Factor

A smooth, soft delicacy that just melts in your mouth. This is highly attractive, very quick to make appetizer that is simply YUM! The fresh coconut and coriander garnish atop the lemon flavored bengal gram rolls is a delicacy which will get a lot of WOW factor from your guests! And not to mention the feel good feeling you will  have once you make this complicated looking easy appetizer.

[contact-form-7 404 "Not Found"]


[shopeat_button]

Posted on

Cracked Wheat with Vegetables(Daliya Khichdi)

Cracked Wheat also known as Daliya or Lapsi in Hindi/Gujarati is a healthy form of eating daily nutritious food.Cracked wheat has many advantages for weight loss,  hypertension amongst other things as elaborated in this article http://healthyeating.sfgate.com/cracked-wheat-benefits-5717.html  Traditionally Indians are used to eating cracked wheat as a form of sweet item, but here it is presented with vegetables. This is a power breakfast with wheat, fibre and vegetables. The vegetables on the top have a nice tangy and refreshing taste due to lots of lemon and black pepper, which is the most delicious part for me.  This can also be an alternative to daily routine of eating oats to assist metabolism and weight loss. It is a quick meal under half an hour and it is a complete breakfast/lunch meal. You can variate the toppings of vegetables to your liking.

This is also a very comfortable baby food, and  the very first meal I gave to my daughter was this recipe without the vegetables. It is soft and nutritious and  with lots of fibre, easy to eat, after just garnishing with some black pepper and salt. An Indian way of eating  everyday oatmeal!

I like vegetables to have some crispiness when used as a topping on this, as it goes well with the softness of the pressure cooked cracked wheat, and adds a crunchy flavor through the crisp cabbage. It gives a fulfilling feeling when you have this complete meal and it is  warm,colorful and tangy! The first time I was exposed to this, I had it as a breakfast, so I continue to enjoy this as a breakfast item, and truly so,  as oats are normally considered as the best breakfast option by many. More commonly this recipe is also known as Daliya Khichdi.

Recipe makes for 3 people

Prep time : 10 min

Cooking time: 15 min

Ingredients
  • 1 cup cracked wheat
  • 1 1/2 tbsp ghee(clarified butter)
  • 4 cups of cauliflower cut into small florets
  • 3 cups of  shredded cabbage
  • 1/2 cup of peas
  • 1/3rd cup oil
  • 1/4 tsp cumin seeds
  • pinch of asofoetida
  • 1/2 lemon
  • freshly crushed black pepper
  • salt to taste
  •  2 tbsp coriander to garnish
  • 1/4  tsp turmeric powder
Method
  • In a pressure cook heat the ghee.
  • Add the cracked wheat and stir for 4-5 min on medium flame, until it changes color to pinkish brown.
  • IMG_2585
  • Add a pinch of salt and water.
  • Pressure cook that for 4 whistles on medium flame.
  • In a broad pan, put oil to heat.
  • When it heats, add asofoetida and cumin seeds(crushed in your palm)
  • Wait for it to become golden brown, and add turmeric.
  • Add the cauliflower and cook for 5 min. stirring in between.
  • Add cabbage and salt and cook for further 7 min . stirring in between.
  • Add peas and cook for 4 min.
  • IMG_2584
  • Remove from flame.
  • Remove the cooked cracked wheat from the cooker.
  • In a plate, put the warm cracked wheat at the bottom, top it with vegetables.
  • Garnish with nice dose of lemon, black pepper and coriander.
  • Serve hot.
  • IMG_2588


Tips

A lot of variation of vegetables is possible, such as carrots, spinach, but I prefer to have the above combination.

Cracked wheat can be alternated with bulgur wheat too, which will require less cooking time, as bulgur wheat is precooked. You may want to cook it to 2 whistles for bulgur wheat.

When you cook the cracked wheat and vegetables separately, you have the right texture for both of them, without overcooking either of them. And for this recipe, this is a crucial aspect.

Vegan Variation: Replace the ghee with oil and roast the cracked wheat.

Instinct Factor

Roasting of the cracked wheat to your desire, and enjoying the aroma of cracked wheat in ghee.

Feel Factor

When properly cooked, it has the perfect fluffy texture of cracked wheat, topped with the lemon yellow color of vegetables and green peas, with lots of lemon and black pepper. Inviting and fulfilling as well as extremely nutritious recipe for sure!

[contact-form-7 404 "Not Found"]
[shopeat_button]

Posted on

Khichu(Spicy Indian Doughnuts)

Khichu is a village food, in Gujarat, that is healthy, extremely quick and now is a widely appreciated rural delicacy in Gujarat. There are many variations in this, but traditionally it is made of rice flour or bajri millet flour. Some people also make it with grated corn or rice flakes. Though it is quick , it is a bit tricky and calls for getting the proportion right.  The rice flour khichu is the base from which rice papads are made. Rice  Papads or Pappadums as popularly known in restaurants, are made from this khichu dough. One rolls  the khichu dough into flat circles and dry them in the sun for a few hours.

During my childhood days, we use to make fresh rice papads every fortnight or so. As a child, I would look forward to eating khichu. This was my incentive for helping my mother roll out the rice papads from this.  The best way to enjoy this is to have it warm, and soaked in the accompanying oil. The texture of Khichu is smooth, flavored with spices, and extremely soft to eat. The garnish of oil and coriander gives it spicy and oily look and since it is steamed, it is healthy. The recipe here is made using the Khichi flour of Jalpar Brand. The traditional farming community of Gujarat often make the khichu with Bajri or Millet as it has a very high iron content and extremely nutritious.

My exposure to eating this in USA was only in  Edison, New Jersey, as it has a high concentration of families from Gujarat,India. I was excited to see this being commercially available in USA, that I made it a point to have a friend of mine try it, and now whenever I get a chance to eat this , I would not want to miss out.

The doughnut shape is what attracted me as a young kid, and it is definitely worth giving it a try for a spicy flavored healthy doughnut made of rice/grains/lentins.  Its attractive shape is ideal for a nice appetizers and  the advantage of this recipe is, it is quick, easy to make, can be made in advanced and then re steamed or re heated for large group of parties. And because of  its shape and texture it is highly appealing to children too!

I explored using the Khichi flour of Jalpar brand, thinking that this would be  the Khichu flour, but to my surprise, it came out to be a mix of Green Bean, Rice, Sago Seeds & Cumin and the taste turned out to be quite  delicious. The color difference from the original  rice flour based  khichu, is due to the use of different flour. I read the ingredients of Khichi flour only when I had to write this post!!

Recipe makes 12 pieces of khichu doughnuts about 3 inches in size

Preparation Time 5 min

Cooking time 15 min

Ingredients
  • 1 cup khicchi flour ( Jalpar Brand) or plain rice flour or plain bajri flour
  • 1/2 tsp cumin seeds
  • 1/2 tsp red chilli powder
  • 1/4 tsp asofoetida
  • 1/2 tsp chopped green chillies
  • 1/8 tsp bicarbonate soda
  • 1 tbsp chopped coriander for garnish
  • 2 1/3 cup water
  • salt to taste
  • For Flavoured oil accompaniment
  • 1/4 cup oil to serve and grease(preferably peanut oil)
  • Black salt powder
  • Red chilli powder
  • salt to taste
Method
  • In a deep pan, heat the water to boil on medium flame
  • When the water boils, add, cumin seeds, salt, red pepper powder and bicarbonate soda, green chillies.

IMG_2544

  • When the water reduces to about 2/3rd of its original volume, add slowly the khicchi flour, mixing it thoroughly so no lumps are left

IMG_2551

  • Stir for a couple of minutes, till water is absorbed, and flour forms a lump.
  • Cover and steam and slow flame for a couple of min.
  • Remove from flame and let it cool for 3-4 min.
  • In a broad pan, add, a litre of water to boil.
  • Grease a steaming dish with oil.
  • Grease your palms with a bit of oil.
  • Take about 1/4 cup size dough and roll it on to a ball shape.
  • Flatten the ball a bit, and pinch it in the middle with the thumb or index finger.

IMG_2553

  • Put it on the greased steaming dish.
  • When all dough is used up, put the greased dish on to the boiling water, cover and steam on high for 5 min.

IMG_2558

  • Remove from flame and open.
  • Using flat spatula, lift the cooked doughnut shape khicchu.
  • If the texture is not extremely smooth on the top, you can flip it and serve.
  • Make the flavoured oil by mixing red chilli powder, black salt and salt to your desire.( at least 1/4 tsp of each of chilli and black salt powder)
  • Garnish it with the flavored oil and coriander
  • Serve hot.


Tips

If the khichu doughnuts spread out to flat shape, that means you have overcooked it, or the soda bi-carbonate is too much.Excess of bicarbonate soda also will give it a bitter taste.

If the water is less, khichu doughnuts will turn out to be stiff and not soft.

Special bicarbonate soda knowns as Papad Kharo available in Indian Grocery store, is used. This is specially used when you are making Papad, as it gives it the appropriate crispiness needed. I have used normal sodium bicarbonate only.

If you do not want to make doughnut shapes, cook it further, and  after few minutes, you can mould it in a cup and serve it

Instinct Factor

Steaming the doughnuts,to the texture consistency of your choice as well as the shape of your choice.

Some people also add seasoning of sesame seeds , mustard seeds and green chillies, if that appeals to your taste!

Feel Factor

Comfort food, for me and  one just relishes this  soft, appetizing, warm and spicy doughnut that just melts in your mouth, when coated in the cayenne pepper and black salt flavored oil! And the new flour that I accidently used, seemed to appeal more to my daughter and I think that this mix was healthier too as it has green lentil and rice in this mix! This is any time quick meal, as an appetizer, snack or dinner!

[contact-form-7 404 "Not Found"]


[shopeat_button]