Spinach Asparagus Soup

Spinach Asparagus Soup

Spinach Asparagus Soup,a recipe I learnt at a cooking event in our community. I recently got elected to the HOA Board and we recently started a Social events committee in our neighborhood, Being a lover of food at heart, I volunteered the idea to start something like this where community would easily gravitate towards and find it easy to mingle with other neighbors. I firmly believe in the idea that your neighbors are the extended family of sorts. If you have good neighbors you are likely to enjoy life even more!

So our very first event of Chef’s Creations series, was held on an extremely cold day of the winter in January with temperatures at 24 F. Not sure if the residents will show up, fellow member and I decided to wait for people. The member took up the task of showing the recipe and she very graciously changed the ingredients to suit my vegetarian diet. We felt blessed that day as 20 residents showed up on Sunday afternoon, some to cheer us up, some out of plain curiosity, and some just followed the smell of delicious cooking! Spinach Asparagus Soup turned out to be a perfect accompaniment on an extremely cold day.

The kitchen could not have held more people, so it was just right size of group. The recipe used by her was from A Chef’s Kitchen, Williamsburg VA. According to couple of my other neighbors, it is known for its very classy cuisine and is extremely famous and booked more than 6 months in advance. So she really hit the bull’s-eye there!

I just admired her enthusiasm and willingness to do something she had never done before and as a great reward for her efforts, the participants really appreciated the event!  She did a great job in explaining the recipe and there was also ample time for neighbors to laugh and chat! A very generous neighbor decided to donate his collection of cookbooks as a surprise door prize to one of the participants. It was such a great camaraderie feeling, and it was heart warming to see teenager son and daughter with dads, and mothers and daughters bond over an afternoon of cooking demonstration.

The soup was great in color, and tasted delicious and even though there were too many cooks helping out, it did not spoil the taste! We sure made some mess, but felt a wave of positive energy and satisfaction.Unfortunately this would not serve a good recipe for strict Jain Diet as it uses roots. The recipe is nutritious and has the richness of Creme Fraiche, an ingredient I personally likes it reminds me homemade Indian butter from fermented milk cream.

So in the coming cold wintry days, enjoy this delicious recipe of Spinach Asparagus Soup from the highly rated A Chef’s Kitchen and as demonstrated by the chairperson of our Social Events committee! And a lesson I learnt that day was that the way to a stranger’s heart often lies via good food and that giving back to the community is a great feeling! My apologies for not having step by step images, as it was a class in progress, where I was a student!

Print Recipe
Spinach Asparagus Soup
Spinach Asparagus Soup How to make quick Spinach Asparagus Soup.
Spinach Asparagus Soup
Course Appetizers
Cuisine Italian
Servings
6 people
Ingredients
Garnishing the soup
Course Appetizers
Cuisine Italian
Servings
6 people
Ingredients
Garnishing the soup
Spinach Asparagus Soup
Instructions
Preparing the Soup
  1. Cut the tips of the asparagus from the stems and reserve as a soup garnish.Cut the asparagus stems in 1 inch pieces.
  2. Heat the olive oil over medium heat in a large saucepan. Add the leeks and onion and then cover. Cook for 10 minutes, stirring frequently, unless the onions are translucent in color.
  3. Add the potatoes, broth, thyme, pepper, salt to the saucepan. Reduce the heat, cover and cook until vegetables are tender and potatoes are soft.
  4. Once the potatoes are fully cooked, add the cut stem pieces of asparagus and cook for 3 minutes on hight flame, till they are soft.
  5. Add baby spinach leaves and cook for 1 minute.
  6. Remove from flame and puree soup in blender in batches.
  7. Pour the blended soup through a sieve or strainer in a pot. Thin with some more vegetable broth if desired,
Garnishing the soup
  1. Chop the saved asparagus stems into small pieces
  2. Heat a tbsp of olive oil in a skillet.Once the oil is hot and simmering, add the reserved asparagus tips. Saute until tender.
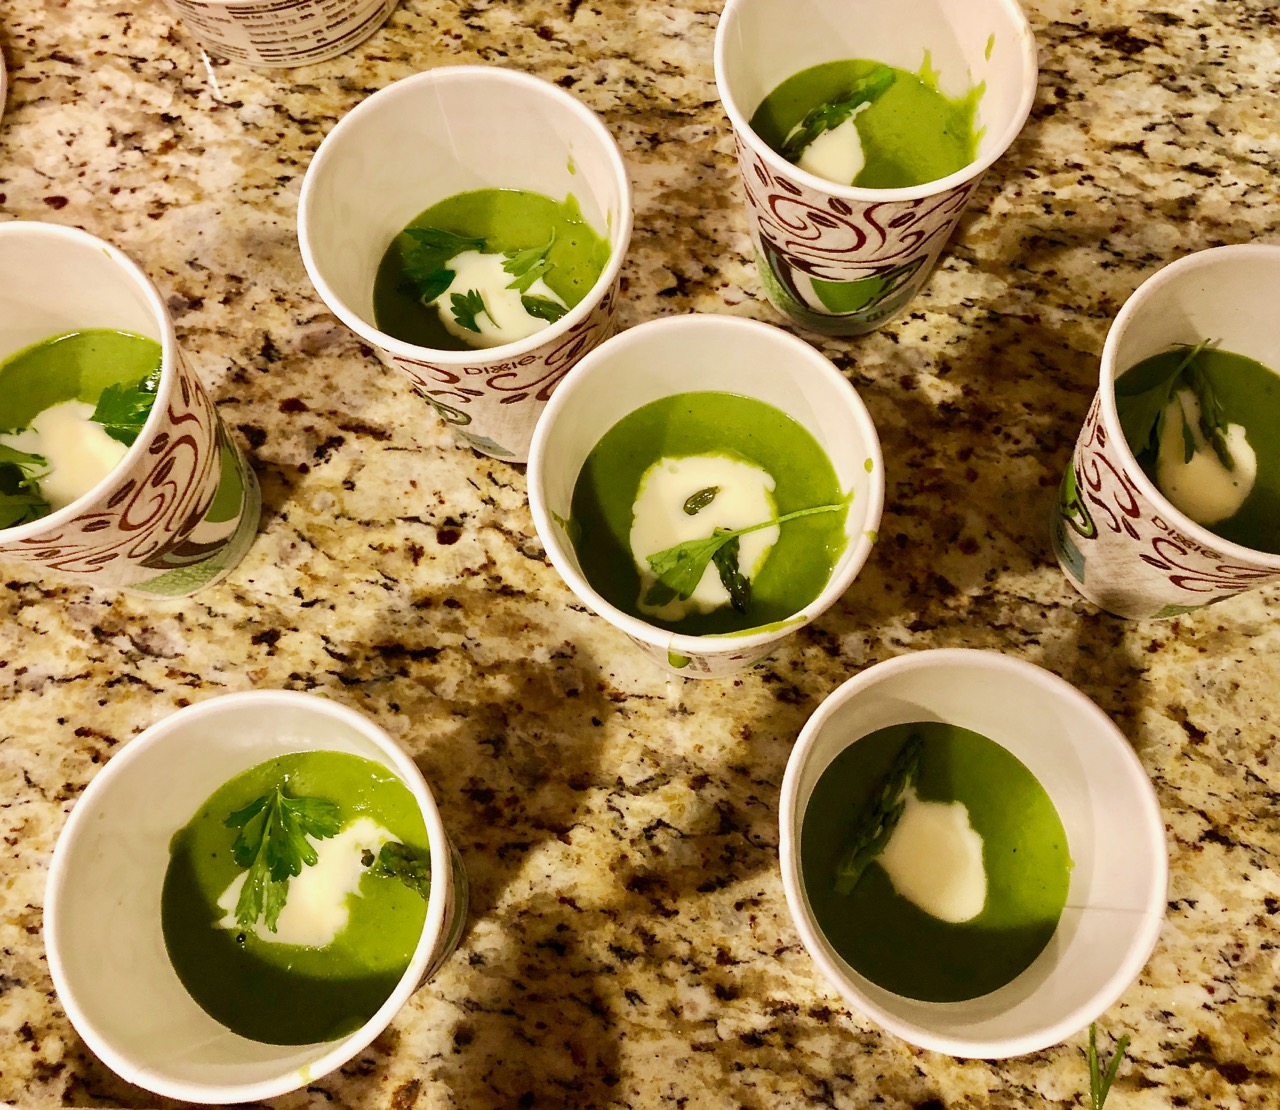
  3. Serve the soup in the cup and add asparagus to the soup. Garnish each bowl of the soup with Creme Fraiche or sour cream. and chopped parsley or chives.Add some drops of smoked paprika oil on the top and serve,
Recipe Notes

Tips

Be cautious when blending the soup, as it is just off the flame.

Prepping all the chopping previously quickens the cooking time.

Instinct Factor

If I were to rely on my instincts, I would remove the leeks as I did not taste them much and also am not too fond of it and I would be careful while adding creme fraiche, as little portion of it is sufficient, as it can get very rich and dense. Sour cream would probably adapt well here. 

Feel Factor

A really green inviting soup with the fragrance of onions, olive oil, and asparagus. As per the author this also serves as the base for Potato and Leek soup, if you are fond of leeks. The color of the garnishing of the asparagus was perfect and the Spinach Asparagus Soup was extremely welcome on a cold afternoon. A bit of thyme, a bit of parsley, a bit of asparagus and loads of baby spinach,  with the exquisite flavor of smoked paprika oil made this recipe and demonstration a truly unique and delicious experience. And am very happy to share such a wonderful community moment with the broader blog community here!


Masala Popcorn

Masala Popcorn

Masala Popcorn on a Friday night!  Friday night, often  a movie night in many families happened to be a movie night for me also today!  Masala Popcorn also became my dinner, as many a times when one is alone for a meal, the motivation to cook just vanishes. This interesting recipe  by Vikram Sunderam, the celebrity chef of Rasika tempted me to try it out. Rasika is known for its super quality contemporary Indian cuisine. I have over several occasions had celebration meals at the variety of restaurants under the Rasika group management, and never have we been disappointed!

Popcorn is something I have always enjoyed. Some years back I tasted jalapeño flavored popcorn at Potomac Mills. After tasting this salty and spicy flavor in popcorn, chance of this flavor being on the top flavors are quite likely. 

The recipe was created with the desire to bring the flavor of Chevda, the Indian quintessential snack. As an Indian, we always look for the comfort of the spices and  recreate the taste at the first chance we have. This recipe is truly a creative idea by Vikram, and no wonder this is a popular accompaniment at Rasika Bar. If I get a chance to meet him, I would probably get his autograph on the Recipe book that Rasika has just released it, and which I had the chance to get it on my anniversary. What more can a foodie ask for! 

I enjoyed this uniquely flavored Masala Popcorn while watching a Shah Rukh Khan and Anushka Sharma starrer When Harry Met Sejal! Movie review- A plus to Anushka for doing an amazing task of imitating a Gujjuben, and SRK is always at his best for his diehard fan! The masala in the movie was equivalent to  the masala in the popcorn, with  the use of cumin, coriander, curry leaves, chillies and spice level further raised by some red chili powder. 

Masala Popcorn has a nice kick in its flavor, while providing a comfort meal.  A two minute dinner that has all the spices, fiber and is low fat, is an interesting combination for sure. Enjoy your favorite movie, accompanied by Masala Popcorn!

Print Recipe
Masala Popcorn
Popcorn wit Indian Spices
Masala Popcorn
Course Appetizers
Cook Time 5 min
Servings
people
Ingredients
Course Appetizers
Cook Time 5 min
Servings
people
Ingredients
Masala Popcorn
Instructions
  1. Create the garnish for the popcorn first. Heat the oil in a small saucepan, Once the oil heats, add coriander seeds and asafetida. Lower the flame so that garnish does not over cook.
  2. Once coriander seeds crackle, add cumin seeds. As the cumin seeds brown, add fennel seeds. After few seconds, add the remaining ingredients and remove from flame.
  3. If cooking on gas I suggest creating the garnish first, and then mixing the garnish in the popcorn and then popping it over the stove.
  4. Otherwise, follow the microwave instructions for making the popcorn. Once the popcorn is cooked, add the masala garnish and toss it thoroughly so that the flavor is well integrated in the popcorn.
  5. Enjoy a nice family evening with Masala Popcorn and interesting movie at home!
Recipe Notes

Tips

Recently I came across this Masala flavored Popcorn by Swad having the spices of red chili powder, which might be a good alternative, though I have not tried it.

Instinct Factor

Taste of home is the main instinct factor for most of chefs!

Feel Factor

Masala Popcorn gives a great kick to the flavor of popcorn, For the really  high spice lovers, some finely chopped jalapeño will coat the popcorn well. Low fat tasty alternative to the buttery popcorn, and also possible to have more, as its not so high in calories! I had two servings and enjoyed the fennel, cumin , green chillies and curry flavor in the popcorn. Masala Popcorn while watching movie, made the movie  more enjoyable and memorable!


Aloo Gobi Singara Layered Bengali Samosa

Aloo Gobi Singara Layered Bengali Samosa is traditionally known as Aloo Phulkopir Singara in Bengali. When I saw this image on the web, I was fully mesmerized by the flowing layer look atop one of the most famous Indian Snack- Samosas! It just made the samosas climb a new height in my eyes. I had been craving for Samosas and it being Diwali time, in most homes, the best and the most creative dishes are being cooked so was looking for a recipe that satisfied my creativity as well as craving for samosas.

Cauliflower stuffing mixed with the traditional potatoes, gives it a whole new taste and the traditional recipe even mixes in raisins and cashews which I avoided, as did not want a sweet taste in the singara. My exposure to Bengali samosas came from Tewari Brothers near Opera House in Mumbai, whose samosas are just simply amazing and different as they had Chhole filling in their samosas and were fried in ghee. Now interesting point to google would be did Singara came first or the Persian Sambosag

So while searching for that recipe, I came across the Aloo Gobi Singara which was definitely different in taste with an interesting look, so thought why not start the Diwali festivities with a new take on an all time favorite Samosas!! Addition of whole spices of fennel seeds, coriander seeds and cumin seeds as well as a good amount of aamchur and roasted cumin gives it a good depth and blends the cauliflower and potatoes into a nice tangy, spicy mix, and when fried in ghee, everything just becomes fragrant, My house reminded me of the aroma at Tewari Bros! In West Bengal, singara and samosas are two different items, primarily different in shape as the samosa are more triangular/flatter  and can be filled with many other stuffings, but singara has to have potatoes and cauliflower in their stuffing and are more rounder with greater amount of stuffing inside it. 

Singaras are popular tea time snacks or journey snacks and they were introduced in 13th or 14 century by central Asian traders who brought them along with them to eat and they often originally had meat and other stuffings in it. The Persians called them as Sanbosag, and the Bengalis nicknamed them as singara as it had close resemblance to the Shingoras(Chestnuts). Well that makes the Aloo Gobi Singara Layered Bengali Samosa  an even more apt fall delicacy as it is named after Chestnuts! The taste was great and the shape, texture and crispiness even greater!! The recipe below is a mix of various recipes on Singara on the web, modified to suit my personal taste. It does take some time to take, but then no Diwali/Festivity recipe is without some effort! 

As a Jain I am happy to share this, as its a recipe that only uses half the amount of potatoes, and which easily can be substituted by Green Bananas. The time to cook is slightly more than normal samosas, and one can even try this using pastry dough too!

Happy to share Aloo Gobi Singara Layered Bengali Samosa with you all and wishing everyone a Prosperous Dhan Teras!!


Print Recipe
Aloo Gobi Singara Layered Bengali Samosa
Course Appetizers
Cuisine Indian
Prep Time 7 min
Cook Time 1 hour
Passive Time 30 min
Servings
pieces
Ingredients
For the Stuffing
Course Appetizers
Cuisine Indian
Prep Time 7 min
Cook Time 1 hour
Passive Time 30 min
Servings
pieces
Ingredients
For the Stuffing
Instructions
Preparing the Dough
  1. Mix in the flour, salt, carom seeds and oil thoroughly for about five minutes, till you see small lumps can form.
  2. After that add about half the water and combine thoroughly, then add the remaining water and knead the dough into a firm yet pliable consistency, slightly smoother than a pie dough.
  3. Cover with a wet cloth for at least 30 minutes.
  4. Check for the gluten formation, by pressing fingers into the dough. If the dough bounces back, the gluten has formed.
  5. Divide the dough into twelve parts and make round balls.
Preparing of the stuffing
  1. Heat the oil and add the coarsely grounded spices to it. Stir for a minute and then add the minced ginger and green chillies and stir further.
  2. Add cubed potatoes, mix and cover for 3 minutes to cook.
  3. Add cauliflower florets, turmeric powder and cover for 3 minutes and cook further
  4. Add salt , whisk the vegetables and cover and cook for another 5 minutes
  5. Add all the remaining spices and mix in two tbsp coriander, cook for 1 minute and remove from flame and let it cool.
Making Singara
  1. Roll one round ball into oval shape about 6 inches long.
  2. Lightly fold the rolled dough into half and open again.
  3. Cut the oval into half, at the indicated half line present due to light folding.
  4. Using a pizza cutter or sharp knife make horizontal cuts across one half of the oval, about 1/2 inch apart, and also leaving a 1/4 inch border. Moisten with water all over the surface of this half
  5. Place the non-serrated/ plain half over the moistened cut/serrated half and align all the edges well.
  6. Bring the flat edged side on the top, curved side on the bottom, and also the cut side should be below, and plain half on the top. This way the cut side will become outer covering and plain side will be the inner side, when you fold the singara.
  7. Moisten the top flat edge with water.
  8. Lift from both the sides to make a V shape and pull one side over the other to close it in a cone shape.
  9. Press firmly where the two sides meet to ensure that it will be a tight bottom cone.
  10. Take 1 tbsp of stuffing and fill the inside of the cone.
  11. Moisten the top open edge of the cone and bring it down horizontally to the lower side in order to close the cone. Make the rest of Singaras in the above manner.
  12. Heat about 3/4 cup ghee in a flat pan.
  13. Once its hot, reduce it to slow flame. Add 4-5 Singaras to fry at a time on a low flame. Because you are frying in ghee, it will take time.
  14. Turn over and fry till they are evenly cooked and have an almond color texture. Remove from flame on to a paper towel to remove excess ghee.
  15. Garnish it with some chat masala and serve hot with tamarind chutney/ green chutney or sauce.
Recipe Notes

Tips

Ensure that the water for the dough is cold, and oil is warmed up. This is crucial to the dough. The consistency of dough is key to having a crispy texture to singara.

If frying in oil, the color of singaras, will be more golden as compared to when frying in ghee. The taste is much better when fried in ghee for sure. Make sure that the strip layer as well as the inside layer are well fried. Frying in ghee will take a little longer then frying in ghee.

Add 1/2 cup of peas for more flavor.

The simpler non layered version will be a much faster version of this!

Instinct Factor

Frying in ghee was an instinct based response, as I remember clearly that Tiwari Bros had an aroma of ghee at their shop and they are known to make everything in pure ghee. Having ghee also reduces acidity!

Feel Factor

Welcoming Diwali with something new, tasty, and as interesting as Aloo Gobi Singara Layered Bengali Samosa is a great way to feel happy about the festive joyous occasion! The tangy taste of the Aloo Gobi and the crispy and crunchy texture with the buttery feel due to frying in ghee, makes it a great festival recipe! It makes it unique and definitely an item when you want to impress someone with your culinary skills, and can be done in the more or less the same amount as when making the traditional samosas! Layered look gives it gourmet look so definitely a recipe to go for when you need some surprise element in your menu and a recipe that delivers!


Khatta Sandwich Dhokla

Idli and White Dhokla both use similar ingredients, and what I learnt from my visit in India is how to combine the two and make quick Khatta Sandwich Dhokla! India has the luxury of expertise available at comparatively low costs with quite creative talent. The chefs in India who come to cook, probably cover 10-12 kitchens prep and cooking through the day. So they definitely know how to finesse their task and make things work faster for them. One such trick was shared by one such creative chef who comes to our house. Knowing my passion for food and cooking, she suggested I should definitely try her Khatta Sandwich Dhokla from Idli batter. I was so impressed by the outcome, I had to try out this quick, one more easy way of making Dhoklas.

My first challenge was getting the fresh Idli batter in USA, especially when one is living in an area without high concentration of Indians. So decided to try the next best thing, which was the ready Idli Batter available at the grocery stores, viz Shreeji’s Idli Batter. Various other brands are also available, but I did not have much luck with them. Maybe the stock was old, or not well fermented.

After persisting a bit more, was able to arrive at the right consistency and softness in the texture for the Khatta Sandwich Dhokla, What worked was diluting the mixture a bit, and adding a pinch of bicarbonate soda. In a Gujarati household, fresh green chutney is a staple and hence always have a stock of it at home. And adding a layer of this chutney in between, gives it a kick as well as the color. You can even not garnish it, and have them plain, if you are watching calories, and you will find them tasty as well.

Dhokla as people now know it, is actually known as Khaman (Yellow Dhokla) in Gujarat, on which I have blogged earlier Khaman Dhokla from Instant Mix  .The real Dhoklas are the Khatta or White Dhoklas. So enjoy one more version of Dhokla and keep this recipe in mind, if you have left over Idli Batter to fix some snack during the day or for a quick bite in the evening, or just have it for dinner, as a friend of mine did! She tried with fresh Idli batter! Any guess her state of residence? NJ 🙂

Hers came out soft and fluffy without any additions or alterations of the batter dough! Hope you enjoy this quick version of Khatta Sandwich Dhokla especially with the Diwali festivities on the way!

Print Recipe
Khatta Sandwich Dhokla
White Sandwich Dhokla using Idli Batter
Course Appetizers
Cuisine Indian
Prep Time 3 min
Cook Time 20 min
Passive Time 5 minutes
Servings
people
Ingredients
For Garnish
Course Appetizers
Cuisine Indian
Prep Time 3 min
Cook Time 20 min
Passive Time 5 minutes
Servings
people
Ingredients
For Garnish
Instructions
  1. Put the water to boil in Dhokla cooker and grease the Dhokla platter/thali with oil, a little more generously, covering the sides thoroughly too.
  2. Dilute the Idli Batter, by adding 1/2 cup of water and also add bicarbonate soda and mix thoroughly,
  3. Pour apport 1 cup of batter to the platter, cover and steam on high for 10 minutes.
  4. Open and check if the batter is cooked,
  5. Spread the green chutney more generously , bit more than what the picture shows, so as to cover all areas well.
  6. Then top the green chutney layer, with the remaining batter and cover and cook for another 10 minutes on high flame.
  7. Meanwhile, prepare the garnish, by heating the oil in a deep vessel. Add mustard seeds, and wait for it to crackle. Add cumin seeds and wait to to be light brown, then add white sesame seeds, chopped chillies and curry leaves and remove from gas after 10-15 seconds.
  8. Once the second layer of Khatta Sandwich Dhokla batter cooked, open and spread the garnish evenly all over and cover and let it cook further for 3-4 minutes.
  9. Make square or diamond cuts and serve with extra chutney, sauce or have it plain and you will enjoy the warm soft texture of Khatta Sandwich Dhokla!
Recipe Notes

Tips

Ensure that the consistency of the batter is dropping consistency.

You can also add ginger chillies paste in the mix to make it more spicier.

When the dhokla  leaves the edges of the thali/platter,  it indicates that it is nicely cooked. Other way of checking is to insert a knife/fork and check for the firmness/cooking of the batter.

If you want to try an instant mix variation, check out another post on  Khaman Dhokla Instant Mix Recipe

Instinct Factor

Persistence and instinct plays a great role in getting things right!

You can variate different types of chutneys for exploring different flavors. I might do with Guacamole filling to try something new with a twist!

Feel Factor

For a Gujarati household, another way of  making  Dhoklas  is always appealing and I have the chef back in India to thank for! The texture is soft and the layer of chutney makes it interesting and spicy. I cannot wait to explore this with the fresh homemade idli batter and am positive that will turn out even more fluffier and tastier! Morning breakfast got a new item on the menu! Plan to post the instant mix recipe of White Dhokla soon too, as this has been my way of making quick dependable tasty Dhoklas for all these years! Enjoy the upcoming festivities of Diwali with delicious foods of all kinds!


[contact-form-7 404 "Not Found"]

Dalvada Lentil Fritters

Dalvada Lentil Fritters

Dalvada Lentil Fritters, a specialty of Ahmedabad, Gujarat, is a highly nutritious, quick and easy snack that can be easily had in a place of a meal! You will find lots of people feasting on this as they are so delicious. I had been exposed to this delicacy during my childhood days,  eating the then famous dalwadas  at Natraj Cinema  during my college days at HL College. The snack is served with fried green chillies as accompaniment and is a popular street food of Gujarat, like the Vada Pav in Maharashtra.

This snack was made popular by the street vendors and made more famous by one vendor, Shri Ambika Dalvada. In one of the interviews with the owner, it turns out he is originally from Rajasthan, and  it is no wonder that a successful dish based on lentils would be coming from Rajasthani. As Rajasthan is known for Dal Bati, Moong Chilla etc. These Dalvada will also be appreciated by people who like Pesarattu, as it contains the same Split Green Gram Lentils as in the Moong Chilla or Pesarattu.

The addition of blackeyed peas (Chora Dal or Lobia Dal) gives it the extra crunch in the Dalwada. Split green lentil is already very high in protein and assists in lowering glycemic index. Black eyed peas or chora/lobia dal is  very high in phosphorous and magnesium along with high folate content. So together this is a great combination. The added spice of green chillies, ginger, garlic mix gives it a great flavoring.

What is interesting to know is that in southern food in USA, cowpeas(blackened peas) are known to bring good luck and so southerners insist on having them on the first day of the year, to bring them good luck. So why not have some luck coming your way on the upcoming Super Bowl weekend?!!

Hope your team wins as you munch on the Dalvada Lentil  Fritters, while watching the Super Bowl and also debating on which one was the most creative commercial of all! Have a great Super Bowl weekend!

Print Recipe
Dalvada Blackeyed Peas Fritters
Nutritious snack with split green mung lentils with skin and black eyed peas(chora/lobia)
Dalvada Lentil Fritters
Course Appetizers
Cuisine Indian
Prep Time 10 minutes
Cook Time 15 minutes
Passive Time 3 hours
Servings
pieces
Ingredients
Course Appetizers
Cuisine Indian
Prep Time 10 minutes
Cook Time 15 minutes
Passive Time 3 hours
Servings
pieces
Ingredients
Dalvada Lentil Fritters
Instructions
  1. Mix the lentils and wash them thrice. Soak them in 5 cups of water for at least 3 hours
  2. Make a paste of chillies, ginger, garlic by crushing them in a mortar pestle.
  3. Keep very little water in the lentils and grind the lentils coarsely. Add the ginger paste to it and grind further. Add fresh coriander to the blended lentils.
  4. Add salt for taste, and add some water if needed to arrive at a dropping consistency.
  5. Heat the oil to smoking point and lower the flame to medium low
  6. Drop the dalwada fritters using your fingers or an ice cream scoop. The finger method works better tor me.
  7. Fry on a medium low flame till golden in color on both sides, rotating as needed.
  8. Sprinkle some chat masala and black salt powder on top and serve hot with green chutney.
    Dalvada Lentil Fritters
Recipe Notes

Tips

Grinding consistency is important to crunchiness and so is the water level in the mix.  If the mix is too watery, it will not drop well.Starting with less water will always be easy as we can add more with required.

More commonly people now use, only yellow split moong dal, so you can try that recipe too. But the dal with the skin is more fibrous and nutritious than the yellow moong dal

Instinct Factor

It will have more flavor if green chillies are chopped and added to the mix along with coriander leaves. Since I was having kids as guests too, I decided to make a paste of it. Addition of Chat masala and Sanchal or black salt powder was purely instinct driven!

Feel Factor

Enjoying the delicacy from my distant past,!  Memories unfolded as I recalled all the carefree days of my college time.Truly a nutritious snack that I plan to make more, as the weather is still cold enough to enjoy warm snacks with a cup of tea and munching a handful while entertaining guests and having easy conversations. I would like to extend my gratitude to another friend at whose place I discovered the addition of blackeyed peas to dalwada, while enjoying Hindi Kavita and discussing literature with like minded folks! The best part of the Dalvada Lentil Fritters was the crunch in it, that promised to remain so even after they were cold.

[contact-form-7 404 "Not Found"]

Grape Focaccia

Grape Focaccia

Grape Focaccia is a bread from Northwest Italy, where there is a tradition of having dolce focaccia, meaning sweet focaccia, topped with raisins, honey and sugar. Focaccia bread has lots of olive oil, herbs and salt and could be thick or thin. When I  first heard about the word, Focaccia, I was quite intrigued by it. The traditional meaning is “hearth baked flat bread”. The first time I had focaccia bread, in New Zealand it was thick and soft version and had grapes inside it and we fell in love with it. The ingredients in terms of butter, olive, grains in New Zealand are in my opinion the world’s best, because of so little commercialization and population. It’s still very pristine, and our experience of having Focaccia was 18 years ago. Would love to go  there, and eat this bread again in Wellington, hoping that bakery/deli shop still exists! Kind of taking a parallel from a current movie Lion, which runs on  a similar theme, where a lost boy finds his way home in India, all the way from Australia. I would like to do the reverse to find this sandwich place  in Wellington:)

Till then, I will just have to try out my version of the same. And interestingly enough, came across  this recipe in Southern Living, and it immediately caught my attention. Though the size was flat, it had an interesting flavor and taste, with olive oil, salt, rosemary, thyme and lavender herbs and the sweetness of red grapes. Using organic and unbleached bread flour, will make the bread more light and flavorful  The color and size makes it an attractive appetizer, side dish. Having  this on a snowy evening, uplifts you with its sweet aroma and gives you a perfect accompaniment to celebrate the joy the nature provides you everyday!! Providing you this recipe in a new plugin which seems to provide all my needs as an author. Let me know if you like it, by commenting on the contact form!

Happy to be baking and celebrating the first snow of the season, with the warm,sweet,  savory flavor of Grape Focaccia!!

Print Recipe
Grape Focaccia
Grape Focaccia
Course Appetizers
Cuisine Italian
Prep Time 5 minutes
Cook Time 35 minutes
Passive Time 3 hours
Servings
pieces
Ingredients
Course Appetizers
Cuisine Italian
Prep Time 5 minutes
Cook Time 35 minutes
Passive Time 3 hours
Servings
pieces
Ingredients
Grape Focaccia
Instructions
  1. Warm the water for 20 seconds in the microwave. Add the water and yeast to the bread maker bowl and leave it for 5 minutes. Add bread flour, salt, 1/4 cup of olive oil and 1 tbsp of herbs to the yeast. Select the bread maker to dough and make the dough. The cycle should last about 1 1/2 hours, during which the dough should rise.
  2. Alternatively, if you don't have a bread maker, mix everything in a blender bowl, and mix using a dough blade , mix on medium high for five minutes. Grease some olive oil in a bowl and put the sticky dough in it, and wrap it with plastic wrap and let it rise to double in size in a warm place( under the oven light) for about an hour or more.
  3. Remove the dough after an hour, and transfer to the baking pan. Grease the baking pan lightly with oil, add another 1/4 cup of olive oil, and punch the dough with knuckles. Mix in about 1/3 quantity of grapes and cover again the dough and leave it to rise for another hour.
  4. After an hour, flatter the dough further to the thickness you would like to have, add the balance grapes on top. Garnish it with sea salt, pepper, balance herbs and remaining 1/4 cup oil.
  5. Pre heat convection oven to 425 degrees and bakes for 30 minutes till the top is golden brown.
  6. Remove from the oven and cool for couple of minutes. Slice into square shapes and serve.
  7. Enjoy your bite of Grape Focaccia!
    Grape Focaccia
Recipe Notes

Tips

Feel free to explore with fresh olives, or raisins or any topping of your choice. Fresh Basil also will give a great flavor in the bread.

Instinct Factor

Normally the focaccia is served in square pieces, but even triangles shapes would look good, and give a pizza feel!

Feel Factor

Warmth, love, happiness and joy from outdoors into the indoors! Love the red color of grapes on top, the orange glow of baking and crispiness of the bottom texture in the Grape Focaccia. The crunch mingled with softness of the inside and the fragrance of the herbs and olive and hint of sea salt! Wow baking bread is so so easy and satisfying and the house also warms up the bread aroma!! Bon Appetit!


[contact-form-7 404 "Not Found"]